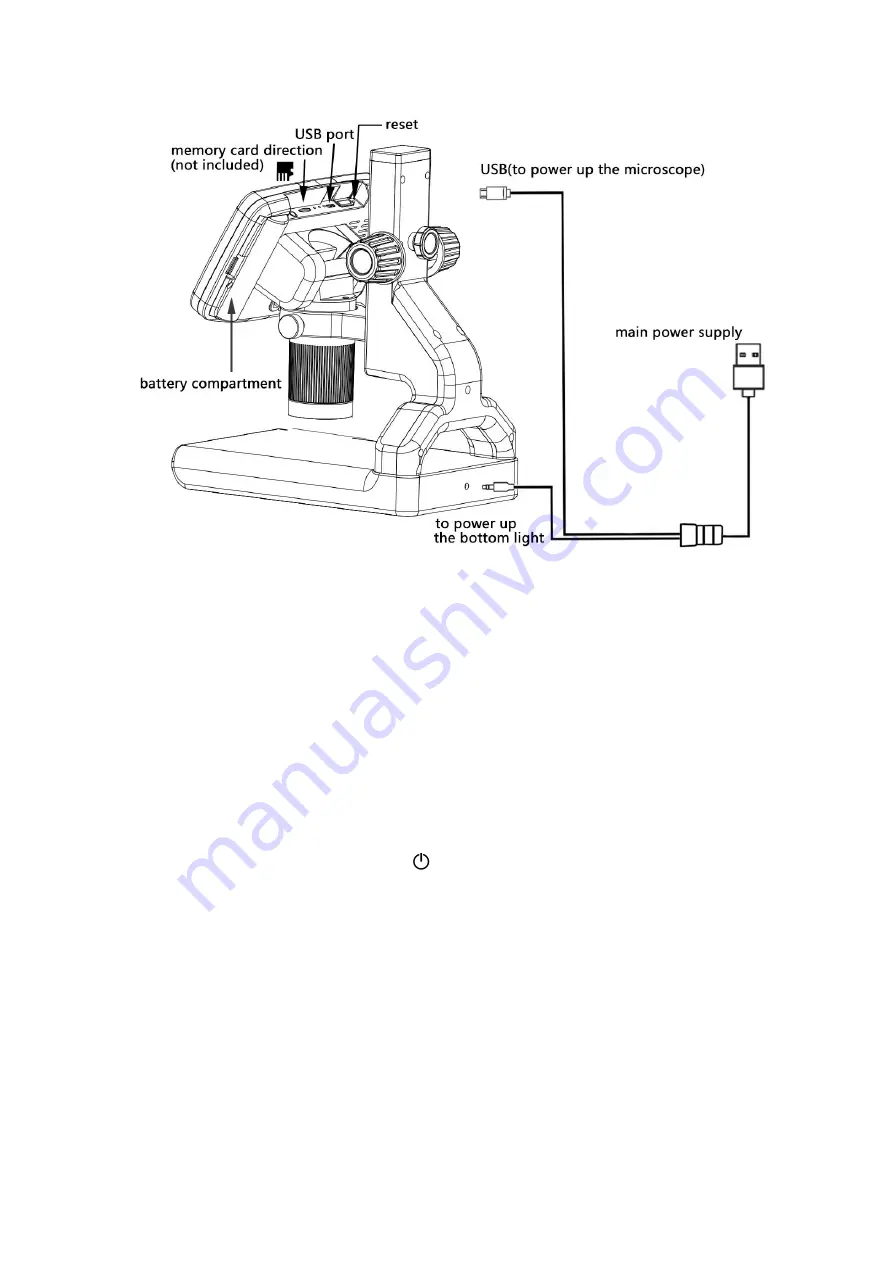
4
(P3 connect )
Quick start
Note
1. To give you good experience, please adjust the microscope and plastic bracket before using, then
remove the screen guard film on the screen.
2. If the light barrier is not over the bottom light, please adjust its position.
Connect
Firstly, connect the optical stack to the power supply via the switch cable. See the picture(P3) above.
This microscope supports battery(18650), it’s not included in the package, please purchase separately.
Switch on
Then press and hold the Power button (on/off
) underneath the display until the display turns on.
(It may turn on automatically while connecting cables at the first time, and it’s totally fine. )
*Troubleshooting
If the display freezes, locate the “reset ” hole on the back of the monitor. Use a narrow object such as
an unfolded paperclip to depress the button located inside.
This resets all settings to their factory
values and restarts the display. It does not erase saved images or video.
Adjusting the Magnification and Focus
①
Use the large knobs (Colored knob) on the bracket to raise or lower the optical stack to the desired
height. The lower the height, the greater the magnification is. But be careful not to let the bottom
of the stack contact the object being imaged. Turn the Focus controller to focus the image.
②
To increase the digital magnification, press and hold the Up button (
‘
Λ
Button
’
) until the desired


