32
EN
Manual calibration with flap
To perform the manual calibration, close the flap for
approx. 0.5s and then open it again. Once the ma-
nual calibration has been carried out, no automatic
calibration takes place any more. This will only start
again after the device has been switched on again.
Manual calibration results in better image quality
and longer battery life.
Shutter Flag:
If the device is in manual calibration
mode, the need for a new calibration is indicated
by a small empty square at the top right edge of the
screen. It means that the thermal image is improved
by re-calibration. It is not harmful for the device to
refrain from calibration. After manual calibration, the
shutter flag disappears again.
Manual calibration without flap
It is carried out if the flap is defective or is not usab-
le.
1. Point the device towards a surface with the follo-
wing qualities:
a. it shall be thermally uniform
b. it shall not glare
c. it should have nearly the surrounding tempe-
rature
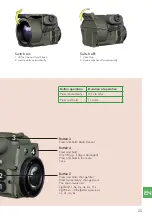
2. Press and hold button 1 until „Push B1 for FFC“
appears on the screen.
3. Within five seconds press again button 1 briefly.
Now the calibration (FFC) is completed.
Advice
Suitable surfaces on which you can calibrate are:
– Foamed plastic
(e.g. sponge)
– Sheet of paper
– Tree
or
forest soil
if the lens is close enough (few
inches) The surfaces should have nearly the sur-
rounding temperature.
The aids should be in harmony with the ambient
temperature.
Not suitable are:
– Metal parts
(see 1. b) except ones with matte
surfaces (sheet zinc sill is suitable).
– Palm of a hand
(see 1. c)
– Sky
(see 1. c. and a)
Use of rechargeable batteries (accu-
mulators)
The use of rechargeable batteries sized CR123 (type
16340) is not allowed.
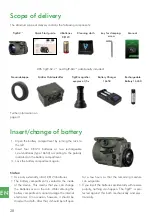
It is possible to use the TigIR ™ with 4 batteries type
CR123 or 2 accumulators type 16650.
Please read the security advice exactly and fol-
low the instructions carefully!
Improper contact with and wrong application of lithi-
um-ion batteries can lead to health defects, injuries or
damages to property by leakage of electrolyte, inflam-
mation or explosion. To guarantee the safety please
contact us to clarify questions or uncertainties regarding
charging and discharging specifications, construction
design, warnings, the general use of our product and
other important details. The best is if you use the battery
chargers recommended by us.
• NEVER charge accumulators with more than 4.20 V
• NEVER charge accumulators with incorrect polarity
• NEVER heat or burn batteries or accumulators
• NEVER puncture, crack or mechanically damage
batteries or accumulators
• NEVER charge accumulators under the influence of
high temperatures, such as e.g. near a fire
• NEVER short-circuit the batteries or accumulators
• NEVER allow the batteries or accumulators to get wet
or immersed in water
• NEVER use batteries oder accumulators with different
states of charge together.
• For long storage periods, the storage temperature
should be below 45°C/113°F
• For long storage periods, the state of charge should
be between 3,65V and 3,80V.
Brightness adjustment (display bright-
ness)
Display brightness can be changed alternatingly by
pressing button 1. Each time the button is pressed, the
brightness decreases until it reaches the darkest setting.
With every further press, the brightness increases again
until the brightest level is reached. Afterwards the proce-
dure starts again. The last setting used is saved and au-
tomatically recalled the next time the device is switched
on. Please note that the best results are obtained with
brightness levels 4-5 (indication see p.45).

