background image

51

Issue 4 21042018

Summary of Contents for RFF 13/175

Page 1: ...lease read and understand these instructions before commencing installation and leave this manual with the customer for future reference Andrews Builttoperform CLASSICflo Fan Fluedrange Models RFF 13 175 and RFF 18 270 Issue 4 21042018 ...

Page 2: ...ce on Andrews Water Heaters must be carried out by properly qualified personnel and therefore no liability can be accepted for any damage or malfunction caused as a result of intervention by unauthorised personnel Andrews Water Heaters policy is one of continuous product improvement and therefore the information in this manual whilst completely up to date at the time of publication may be subject ...

Page 3: ...ty Guide 22 5 Operation 23 5 1 Burner Assembly 23 5 2 Burner flame check 24 5 4 Temperature selection procedure 25 6 1 Introduction 30 6 2 Burner Assembly 32 6 3 Gas Control Valve 33 6 4 Magnesium Anode 34 6 5 Descaling Information 34 6 6 Accessing service mode on the water heater display Service personnel only 35 6 7 How to reset the control from Lockout conditions 44 6 8 Diagnostic error codes a...

Page 4: ...ign installation testing and maintenance of services supplying water for domestic use within buildings and their curtilages This standard supersedes the following British Standards and Codes of Practice CP99 CP310 CP324 202 CP342 Part 2 Centralised Hot Water Supply BS 5440 Installation of flues and ventilation for gas appliances of rated output not exceeding 60kW Part 1 Specification for installat...

Page 5: ...and the Chartered Institute of Building Services Engineers CIBSE TM13 All Codes of Practice draw attention to the design and operation of water systems with reference to avoidance of factors that favour colonisation by legionella bacteria These factors include stagnation lukewarm conditions 20 C to 45 C and the accumulation of debris scale and corrosion in the base of tanks and calorifiers Andrews...

Page 6: ...odel RFF 13 175 RFF 18 270 A mm 1440 1515 B mm 241 241 C mm 557 660 D mm 280 280 E mm 80 80 F mm 1400 1400 G mm 401 3 457 H mm 150 300 150 300 I mm 483 7000 533 4000 J mm 1867 1867 K mm 305 305 L mm 280 330 M mm 280 330 O mm 610 610 6 Issue 4 21042018 ...

Page 7: ...Kg 253 383 Shipping Weight Kg 88 123 Storage Losses kWh l day N A N A Inlet Outlet Connections Inch BSP 3 4 3 4 Return Connection Inch BSP 3 4 3 4 Gas Connection Inch BSP 1 2 1 2 Condensate Connection mm N A N A Twin Pipe Conventional mm N A N A Flue Diameter secondary mm 80 80 Flue Diameter concentric mm N A N A Ionisation Current min µA 0 8 0 8 Ionisation Current max µA 30 30 Electrical Requirem...

Page 8: ...8 Blank Page Issue 4 21042018 ...

Page 9: ...ate to enabled smart control settings CLASSICflo Fan Flued Natural Gas 13 175 18 270 Daily electricity consumption Qelec kWh 0 22 0 22 Declared load profile XL XL Sound power level indoors LWA dB 49 49 Daily fuel consumption Qfuel kWh 36 25 Emissions of nitrogen oxides NOx mg kWh 31 20 Weekly fuel consumption with smart controls Qfuel week smart kWh Weekly electricity consumption with smart contro...

Page 10: ...ater is installed must be flat level and of sufficient strength to withstand the weight of the heater when filled with water and should satisfy the requirements of the Local Authority Building Regulations Any combustible material adjacent to the heater must be so placed or shielded as to ensure that its temperature does not exceed 65 C 3 3 Flue System See Detailed recommendations for flueing are g...

Page 11: ... for vertical flue routes 3 Fit flue pipe into E2 to give required length of flue route Refer to manual for maximum horizontal and vertical flue routes 4 Determine correct position and fit outer wall plate using 4 screws and wall plugs provided Cut flue sleeve to suit wall thickness and fit flue pipe through wall to outer wall plate Fit inner wall plate and fix using 4 screws and wall plugs provid...

Page 12: ...s must communicate with the same room or internal space or must both be on the same wall to outside air Where compartment air vents are open to a room or internal space the room or internal space must itself have a permanent air vent s as previously specified For multiple installations where the total heat input exceeds 60 kW 204 720 Btu s hr reference must be made to BS 6644 The table on p7 shoul...

Page 13: ...f failure of either the inlet or extract fans NB The vapours given off by halogen based compounds can if drawn into the combustion air cause corrosion of the Storage Vessel and premature failure of the thermocouple If water heaters are to be installed in locations where halogens are likely to be present they should be isolated from such compounds and ventilated from and to outside uncontaminated a...

Page 14: ...an alternative to the standard magnesium anodes These anodes do not need maintenance or replacement The potentiostat which regulates the current to the CorrexTM anode features an indicator light which shows green to indicate correct function and red to indicate malfunction These anodes are available as an optional extra on all Andrews heaters In hard water areas scale formation can occur in hot wa...

Page 15: ...isterns used should be to the relevant British Standard and the distance from the normal water line to the top of the cistern should be as laid down by the water authorities The cold water inlet and hot water outlet are identified on top of the heater Connect the cold water feed and hot water outlet to these nipples with union adaptors for ease of servicing See See Servicing Section 6 Caution Do n...

Page 16: ...ponents The Wall Mounting Kit is available as an optional extra Items D4 D6 must be fitted into the Temperature Relief port see Fig 7 When assembling items D1 and D2 care must be taken to ensure that the flow arrows marked on the components are pointing in the direction of flow i e towards the water heater The cold water for services may be drawn from the 22mm compression port on item D1 a The wat...

Page 17: ...ef Part No Description Qty B171 Unvented Systems Kit Complete 1 D1 C780 Pressure Reducing Valve Strainer 1 D2 C781 Check Valve Expansion Valve 1 D3 C782 Expansion Vessel 1 D4 E462 Temperature Pressure Relief Valve 1 D5 C783 Tundish 1 D6 C772 Adaptor 1 D7 C788 Hose Assembly 1 17 Issue 4 21042018 ...

Page 18: ... local Gas Region It is recommended that a pressure test point is fitted on the input next to the gas supply valve 3 10 Electrical Supply The method of connection to the mains electricity supply should facilitate complete electrical isolation of the appliance preferably by use of an unswitched fused spur Alternatively a fused double pole switch or fused spur box serving only the heater may be used...

Page 19: ...3 11 Wiring Diagram 19 Issue 4 21042018 ...

Page 20: ...Fan Motor Wiring Diagram Notes Pressure Switch Setting 0 90 05 W C 421 Temperature Switch PC421 Normally Open 88o C Open on Rise 20 Issue 4 21042018 ...

Page 21: ...on position 6 If the burner does not light an error code will be displayed on control display 7 Set main burner pressure as described in section 5 1 8 Carry out combustion analysis from the flue sampling point located secondary flue Required combustion figures are detailed in the technical data table on page 7 4 1 2 To Shut off the Burner To shut off the burner isolate the electrical supply then s...

Page 22: ...unburnt gas to disperse Ventilate the area if possible Danger FOR YOUR SAFETY IF YOU SMELL GAS 1 Turn off gas supply and open windows 2 Do not operate electrical switches 3 Extinguish any naked flames 4 Contact gas supplier if the smell of gas persists FOR YOUR SAFETY Do not store or use petrol aerosol or other flammable vapours or liquids in the vicinity of this or any other atmospheric gas appli...

Page 23: ...come necessary to completely drain the heater close the cold water inlet valve open a hot water tap to allow air to enter the system Fit a suitable hose to the drain cock and open Whenever the Heater is filled with cold water condensation will form on the cold storage vessel surfaces when the burner is lit Condensation is normal and does not indicate a leak It will disappear when the storage vesse...

Page 24: ... operation 5 3 1 Start up sequence Upon powering up the control checks for the presence of the resistive plug If the resistance is in the expected range the control will begin normal operation after 5 to 8 seconds 5 3 2 Sequence of operation 1 A call for heat from thermostat 2 Fan ON 3 Pressure switch contacts closed no exhaust pipe blockage 4 Fan pre purge 5 Igniter warm up 6 Main burner ON 7 Fla...

Page 25: ...for the definition of the error code and call your plumbing professional or service agent to service the water heater Do not try to reset the water heater without having a qualified service person to diagnose and correct the problem If the display is blank or does not show an error code make sure there is power to the water heater Setting the water temperature to the maximum setpoint can result in...

Page 26: ...ease Setpoint temperature 1 Depress and hold Temperature Up button untildesired setpoint temperature appears in the display Fig 13 Setpoint flashes 2 Setpoint indicator begins flashing in the display after pressing Temperature Up button Fig 14 Fig 14 Fig 15 Setpoint flashes for 10 seconds Press SET button for setting to take effect immediately 3 Press SET button for new setting to take effectimmed...

Page 27: ...e display after pressing Temperature Down button Fig 17 Fig 17 Fig 18 Setpoint flashes for 10 seconds Press SET button for setting to take effect immediately 3 Press SET button for new setting to take effectimmediately Setpoint will stop flashing If the SET button is not pressed the new temperature setting will take effect in approximately 10 seconds Fig 18 Setpoint flashes 27 Issue 4 21042018 ...

Page 28: ...s displayed Fig 19 Fig 19 2 Press SET button to change temperature format Symbol F C will flash Fig 20 F C flashes Fig 20 Changes to C 3a Press Temperature Up button to change temperature format to C Fig 21 Fig 21 Changes to F 3b Press Temperature Down button to change temperature format to F Fig 22 Fig 22 28 Issue 4 21042018 ...

Page 29: ...n It is recommended that all service work be performed by Andrews Water Heaters Service Team If the water heater is to remain idle for 30 days or more or is subjected to freezing temperatures while shut off the water heater and piping should be fully drained See To Drain the Water Heater and the drain valve should be left fully open Warning Hydrogen gas can be produced in an operating water heater...

Page 30: ...erate this water heater if any part is found damaged or if any joint is found not sealed The following maintenance should be performed by a qualified service technician at the minimum periodic intervals suggested below In some installations the maintenance interval may be more frequent depending on the amount of use and the operating conditions of the water heater Regular inspection and maintenanc...

Page 31: ...s have been installed to extend tank life These anode rods should be inspected periodically every 2 years and replaced when necessary to prolong tank life Water conditions in your area will influence the time interval for inspection and replacement of an anode rod Contact the plumbing professional who installed the water heater or the manufacturer listed on the rating plate for anode replacement i...

Page 32: ...g the pilot assembly to the main burner supply tube 5 Remove the gland nut connecting the pilot tube to the pilot assembly Withdraw the pilot tube and remove the pilot restrictor from the end Clean the pilot restrictor and blow through the pilot burner with compressed air DO NOT ATTEMPT TO CLEAN ORIFICES OR MAIN BURNER SURFACE WITH SHARP METALLIC OBJECTS 6 Re assemble in the reverse order of steps...

Page 33: ...d remove the outer door and remove the inner door by sliding to the side 2 Disconnect burner gas tube pilot tube and blue ignition lead at gas control 3 Remove burner assembly complete with pipes and blue ignition lead 4 Disconnect electrical connection from the top of the heater Remove the screws that hold the flue fan in place and remove the flue fan 5 Withdraw the flue baffle 6 Clean the fluewa...

Page 34: ...nance is required 6 5 Descaling Information When descaling the storage water heater your attention is drawn to the following guidelines Caution Due to the corrosive nature of descaling fluid it is essential that suitable protective clothing is used and adequate ventilation available when descaling It is important to follow descaling manufactures instructions before and during use 1 Turn gas contro...

Page 35: ...d Temperature Up buttons togetherand hold for 3 seconds until Max Setpoint is shown in the display Fig 26 Note 30 Seconds after the last button press the display will automatically return to the User Mode Simultaneously pressing the Select and Temperature Up buttons will switch the display immediately to the User Mode Fig 26 2 Pressing Select button will change display to next mode Fig 27 Fig 27 F...

Page 36: ... Reset This is only shown if there is an operating error in the User Mode Fig 28 1 Max Setpoint Display Change Fig 29 Fig 29 2 Water Temperature Average Displays average if there are two sensors sensor temperature displayed if single sensor is used Fig 30 Fig 30 2b Water Temperature Upper Sensor Displays if there is an upper sensor some models Fig 31 Fig 31 idle idle idle 36 Issue 4 21042018 ...

Page 37: ...e two sensors Fig 32 Fig 32 3 Flame Current of Pilot Flame Sensor Displays only in the Heating Cycle Fig 33 Fig 33 4 Setpoint Display Change Fig 34 Fig 34 5 F C Display Change Fig 35 Fig 35 idle µA Flame Current setpoint idle F F C idle 37 Issue 4 21042018 ...

Page 38: ...ftware Version Display only Fig 37 Fig 37 No current error codes 8 Error Code History Displays if there are present error codes or up to 10 previous error codes Water Heater Display will show if there are no error codes Fig 38 Fig 38 F Differential idle Soft idle idle 38 Issue 4 21042018 ...

Page 39: ...ct Note The maximum setpoint is approximately 82C Fig 41 Fig 41 Max Setpoint stops flashing 4 Press Set button to confirm new Max Setpoint value and stop setting mode Fig 42 Warning Setting the water temperature to the maximum set point can result in scalding hot water delivered to the domestic hot water outlets It is highly recommended that the maximum setpoint be adjusted to the lowest temperatu...

Page 40: ...mperature sensors in the tank this will be the average reading between the two sensors For water heaters using a single sensor this is the reading for the sensor Fig 44 Fig 44 Fig 45 2 For water heaters using two temperature sensors pressing the Select button again displays the Upper Sensor temperature reading Upper Sensor will be displayed in the lower right side of the status window of the water...

Page 41: ... button until Setpoint is shown in the water heater display Fig 48 Fig 48 Setpoint flashes 2 Press the Set button to enter the setting mode Setpoint will flash in the water heater display Fig 49 Fig 49 Setpoint flashes 3 To raise the temperature setpoint press the Temperature Up button until the desired temperature is shown on the water heater display Fig 50 Note The maximum temperature that can b...

Page 42: ...n the water heater display press the Set button to confirm the newsetpoint Setpoint stops flashing in the water heater display Fig 52 Fig 52 6 6 6 To display and change temperature format F C 1 While in Service Mode press Select button until F C is shown in the upper right portion of the water heater display Fig 53 Fig 53 2 Press Set button to change temperature format F C symbol will flash in the...

Page 43: ...erature Down button to change temperature format to F Fig 56 Fig 56 4 Press Set button to confirm F or C format F C will stop flashing Fig 57 F C symbol stops flashing Fig 57 5 Pressing Select button will return display to setpoint in format selected F or C immediately Fig 58 Setpoint shown in F Fig 58 F C Flashes F 43 Issue 4 21042018 ...

Page 44: ...he control will also go through 3 attempts to relight the burners every hour in the soft lockout condition 6 7 2 Resetting error codes in hard lockout condition All other error codes will put the water heater into a Hard Lockout condition in which the water heater will not operate and cannot be reset in the User Mode To reset a hard lockout first enter the Service Mode described earlier by pressin...

Page 45: ...re is not a current error code The Water Heater Display will provide up to 10 previous error codes The oldest error code will be stored in code index 1 and the most recent in code index 10 if there are 10 error codes 6 7 5 To view previous error codes 1 In Service Mode press the Select button until the next display after the Software Version If there are no current error codes the display will sho...

Page 46: ... to view the error code number if any for that index number Continue on to index 1 the oldest error code index The water heater display will store up to 10 error codes with the oldest code starting in code index 1 with the most recent code in code index 10 Fig 67 7 10 seconds after the last button press the Water Heater Display will revert back to the current error code display To exit Service Mod...

Page 47: ...e present at the gas valve before or after ignition cycle Make sure wire positions on the wire harness are correct If gas valve is stuck open replace 23 Flame detected before ignition Check to make sure gas valve has closed No voltage should be present at the gas valve before the ignition cycle Make sure wire positions on the wire harness are correct If gas valve is stuck open replace 24 Flame det...

Page 48: ...ting label Is pilot electrode sparking Check gas valve wire harness for broken wires or shorts If 24 volts is present between PV and PV MV terminals at the gas valve replace gas valve Check for voltage output to the yellow and red gas valve wires on the control board pins If during the ignition trial period there is no voltage present at the control board pin terminal for the red and yellow wires ...

Page 49: ...ifnecessary Main gas valve not closing Clean or replace WATER TEMPERATURE TOO LOW a b c Reset thermostat to higher temperature Check gas pressures at burner and at gas inlet to heater Thermostat faulty Check and replace if necessary NOT ENOUGH HOT WATER a b Check gas pressures at burner and at gas inlet to heater Check amount of water being used against recovery rate given on data plate If usage t...

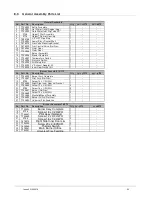
Page 50: ...8 Parts List 8 1 General Assembly 50 Issue 4 21042018 ...

Page 51: ...51 Issue 4 21042018 ...

Page 52: ...52 Issue 4 21042018 ...

Page 53: ...53 Issue 4 21042018 ...

Page 54: ...8 2 Control Box Assembly 54 Issue 4 21042018 ...

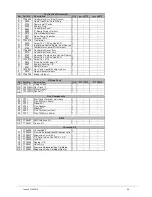
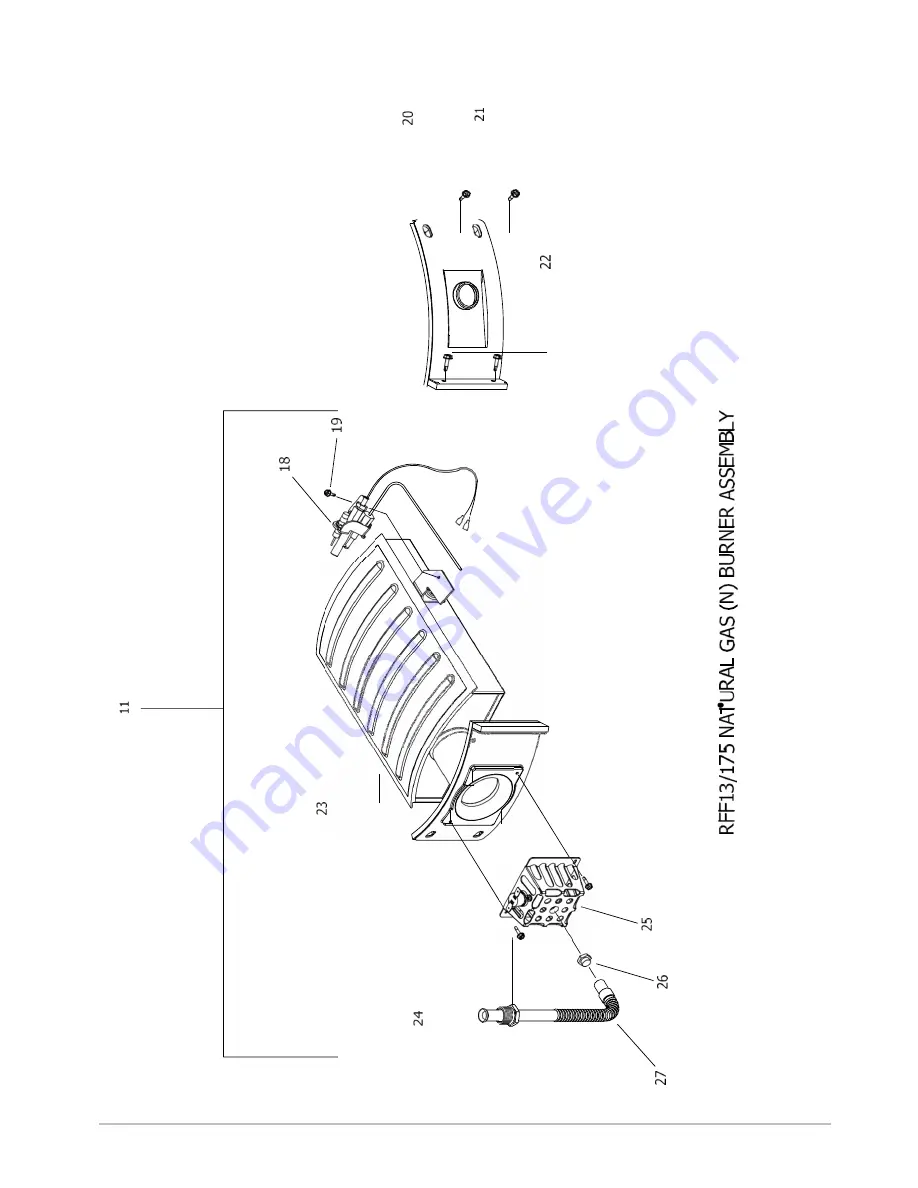
Page 55: ...t Kit 1 Burner Assembly 13 175 No Part No Description Qty R 13 175 R 18 270 11 7704022 Burner Assy Complete 1 18 7703881 Pilot Assy Nat Gas 1 19 Z194 Screw 18 x 1 2 HWH 1 20 7703884 Right Side Inner Door c w Gasket 1 21 7703882 Screw 12 x 3 4 HWH 5 22 Z194 Screw 18 x 1 2 HWH 2 23 7703887 Burner Nat Gas 1 24 7703889 Screw 15 x 3 4 HWH 2 25 7703888 Manifold Mount Assembly 1 26 7703892 Burner Orifice...

Page 56: ... Bushing 7 8 2 X Z251 Power Harness 1 Y 7678981 Gas Valve Control Wiring Harness 1 Z Z473 Upper Sensor Harness 1 AZ 7704026 Blower Harness 1 Fittings Pack No Part No Description Qty R 13 175 R 18 270 N S 7697191 Fittings Pack 1 N S C382AWH Gas Cock 1 N S C381AWH Water Cock 1 N S C103AWH Socket 1 Flue Components E1 C791 Wall Outlet Terminal c w sleeve 1 E2 E361 Flue 500mm x 80mm 1 E3 C792 Elbow 90 ...

Page 57: ...carded along with normal household waste and should be recycled where appropriate More than 90 of the materials that make up the appliance are recyclable Copyright All technical and technological information contained in these technical instructions as well as any drawings and technical descriptions supplied remain our property and shall not be multiplied without our prior consent in writing Subje...

Page 58: ...UAL April 2018 Customer support Monday Friday 8am 5pm Sales 0345 070 1055 Technical 03450701057 Website andrewswaterheaters co uk Twitter AndrewsWH ICOM Energy Association Andrews Built to perform www andrewswaterheaters co uk warranty Issue 4 21042018 ...

Reviews: