16
PicoBox and Chassis Assembly Instructions
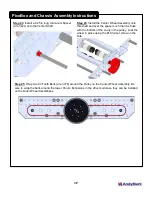
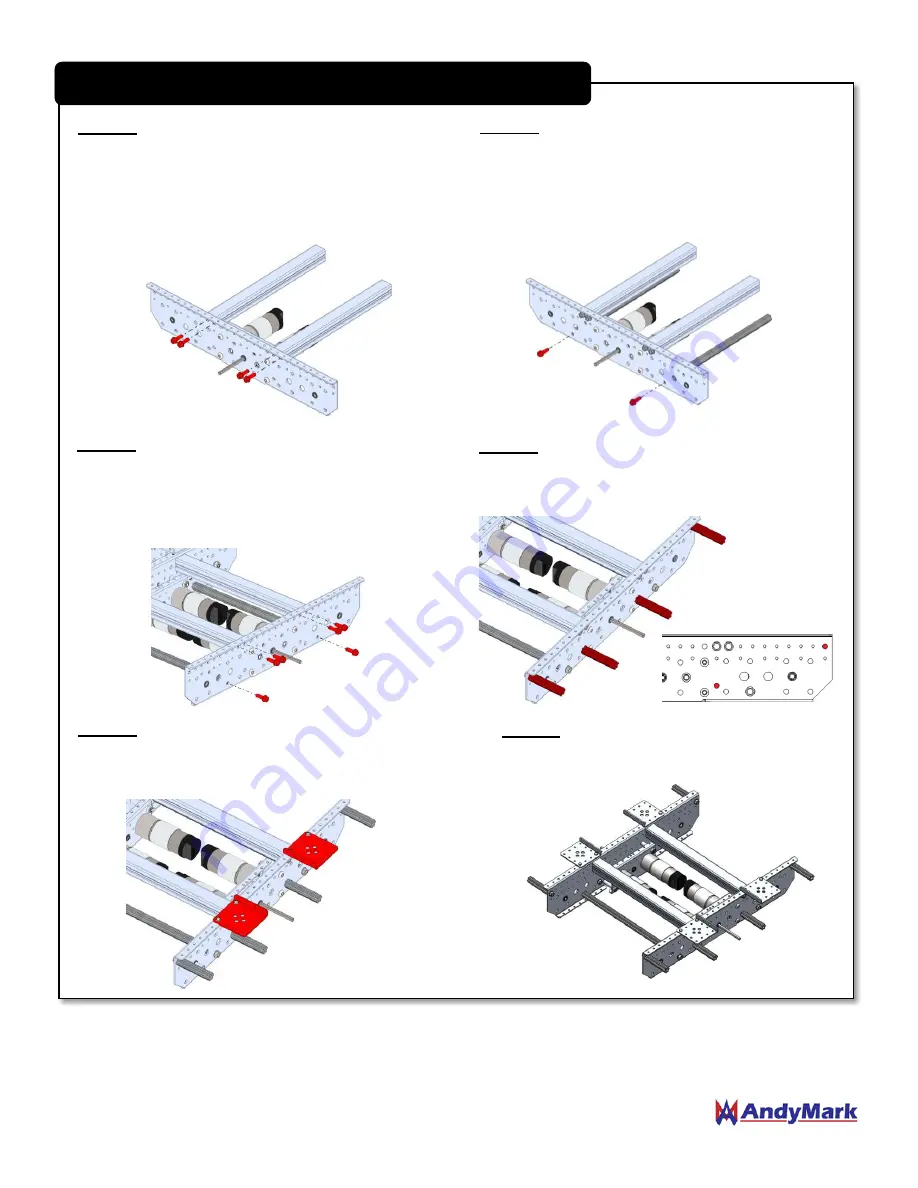
Step 17:
Attach two 11.25" Peanut Extrusions (am-
3395) to one PicoBox - TileRunner Inside Plate
Assembly (on the same side of the plate as the
PicoBox) at the indicated attachment points below
using four 1/4-20 x 0.75" Self-Tapping Screws (am-
1310).
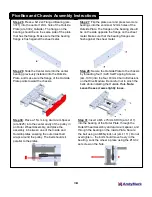
Step 20:
Attach four 63mm Churro Extrusions
(am-3399) to one of the Inside Plates using 1/4-
20 Self-Tapping Screws (am-1310) in the
positions indicated in the diagram.
Step 18
: Attach two 11.25" Churro Extrusions
(am-3398) to the PicoBox - TileRunner Inside
Plate Assembly (on the same side of the plate
as the PicoBox) at the indicated attachment
points below using four 1/4-20 x 0.75" Self-
Tapping Screws (am-1310).
Step 19:
Connect the two PicoBox - TileRunner
Inside Plate Assemblies together, ensuring the
gearboxes are both on the inside of the chassis, and
secure using six 1/4-20 x 0.750" Self-Tapping
Screws (am-1310)
.
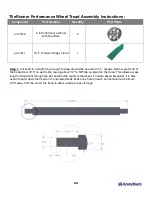
Step 21:
Attach two 4x4 Plates (am-3393) to the
Inside Plate using two 6-32 x 0.5" Hex Head
Screws (am-1436) and two 6-32 Nylock Nuts
(am-1419) on each 4x4 plate.
Step 22:
Repeat steps 20 and 21 to add
63mm Churros and 4x4 Plates to the other
side.
Right Half


