background image

6

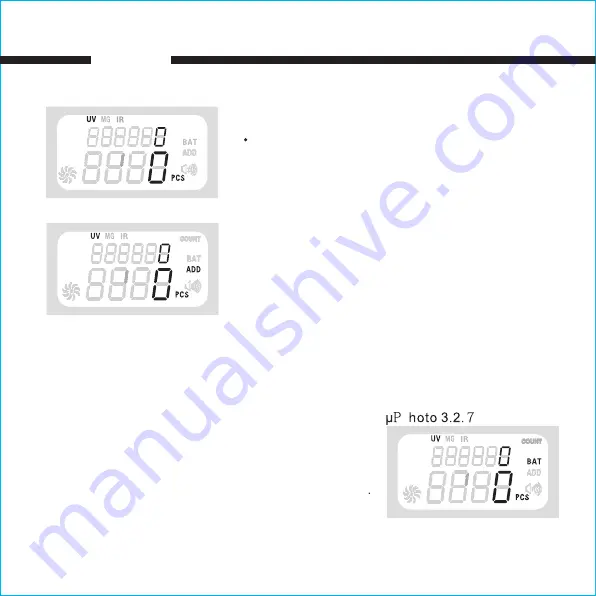
μP hoto 3.2.3

μP hoto 3.2.6

This mode counts manually when place bill on the

hopper.

Press the [M/A] button. When the AUTO LED light is not
on, this indicates that this mode is active. Place bills in
the hopper and counting will not automatically begin,
should press [RESET] to begin

3.2.3 MANUAL CountingMode

OPE RATION

This mode counts bills and adds it to the previous count number

In this mode, you can set a“batch number”(number of bills to count) using the [+1] and [+10] buttons.

Ex: if you set a Batch number?of 5, it will count and separate in batches of 5 bills.
1.Press the [BAT] button. When the BAT LED light is on, this

indicates that this mode is active.

2.Press [-1] or [+1] or [+10] to set your desired batch number

o[ -1]: deducts 1 to your desired batch number

o[+1]: adds 1 to your desired batch number

o[+10]: adds 10 to your desired batch number

3.Place bills in the hopper and counting will automatically begin.

4.When the batch number is reached, the counter will be

   automatically stopped every time.

5.When you remove a batch, it will automatically count the

   next batch.

1.Press the [ADD] button. When the ADD LED light is on, this
indicates that this mode is active.
2.Place bills in the hopper and counting will automatically begin.
3.As you insert more bills, it will be added to the previous count.

3.2.6 Add Up Counting Mode

3.2.7 Batch Counting Mode

580

Summary of Contents for NX-580

Page 1: ...Money Counter User Manual NX 580...

Page 2: ......

Page 3: ...tions 1 1 2 Speci cations 1 2 1 Parts 2 2 2 Display and Control Panel 3 3 1 Bill Placement 4 3 2 Working Modes 4 6 3 3 Error Codes 7 8 3 4 Hopper Adjustment 8 3 5 Troubleshooting 9 Cleaning and Mainte...

Page 4: ...10 MG detecting 11 IR detecting Dimensions 285mmx 245mm x 155mm Net Weight 8 4lbs 3 8kgs Counting speed 1000 bills minute Power consumption working 60W sleeping 3W Power source 100 240V 60 50Hz Noise...

Page 5: ...le 3 Lid 4 Front Control Panel 5 Front Display 6 Stacker Vane 7 Stacker 8 Adjusting Screw 9 Power Switch 10 External Display Outlet 11 Power Input 12 Fuse 13 External Display 2 1 Parts DESCRIPTION 1 2...

Page 6: ...o your desired batch number 6 1 Press to adds 1 to your desired batch number 7 10 Press to adds 10 to your desired batch number 8 FUNC Press for Counting UV UV MG IR Detection Mode 9 ADD Press to acti...

Page 7: ...scanning UV detects counterfeit bills through UV scanning 3 2 Working Modes This is the default mode which counts and simultaneously detects counterfeit bills through UV MG and IR scanning Press the F...

Page 8: ...on Mode OPE RATION This mode counts automatically when place bill on the hopper Press the M A button When the AUTO LED light is on this indicates that this mode is active Place bills in the hopper and...

Page 9: ...BAT button When the BAT LED light is on this indicates that this mode is active 2 Press 1 or 1 or 10 to set your desired batch number o 1 deducts 1 to your desired batch number o 1 adds 1 to your desi...

Page 10: ...sor is broken or dirty The code disc is dirty or loose The hopper sensor is broken or dirty The stacker sensor is broken or dirty Ambient light is too high UV sensitivity light is too high The plastic...

Page 11: ...ting and detecting Take out the rst bill fake bill or suspicious bill in the stacker then press reset to continue counting and detecting Take out the rst bill fake bill or suspicious bill in the stack...

Page 12: ...ded The counting sensor maybe dirty Clean it with a brush The rubber tongue may be worn out Change to the other side or replace it with a new one Counting sensor The MG may be dirty Clean it with a br...

Page 13: ...the glass surfaces with a soft cloth soaked in alcohol 2 Cleaning the inside of the counter It is recommended to periodically clean the inside of the counter Unplug the counter and lift the top cover...

Page 14: ...ot apply oil to machine parts as this may cause the counter to malfunction 4 E ective power scope 100 240V If outside this range it may cause the counter to malfunction 5 Fuse rating 2A 250V Do not in...

Reviews: