Anemoment LLC
29
Data Logger 422 User Manual
Table 14: Serial Setup Menu Command Descriptions
Menu Option
Description
Instrument Select
Presents a secondary menu to define which Serial Instrument is being configured.
In the example, INST1 is being Configured.
Enable
Toggles the Serial Port Enable setting. This turns on the data sampling for the port
Baud Rate
Presents a secondary menu to choose the Baud Rate
Parity
Presents a secondary menu to choose the Parity
Missing Data Type
Toggles the Missing Data Type Enable. When Missing Data Type is Enabled the DL422
fills in false data when the instrument data is missing. The values filled in are either
the value in the Missing Data String field below, or the last good data received from
the instrument.
Missing Data String
User entered text string that is substituted for instrument data when Missing Data
Type is enabled and Last Good Data as Missing Data is disabled.
Last Good Data as
Missing Data
Toggles the Last Good Data as Missing Data Enable. When this setting is enabled, it
overrides the Missing Data String value when the Missing Data Type function is
enabled.
Serial Pass Thru
Presents a submenu for the serial pass thru function. Serial pass thru makes a direct
connection with the instrument using the DL422 as a bridge between the computer
and the instrument. In the submenu is a command to allow the user to select a
character to exit the pass thru mode. When the user enters this character (Default =
Ctrl+D) the Serial Pass Thru mode is terminated and control return to the DL422.
Serial Tag Enabled
Toggles the enable for a Serial Tag that is placed in the data stream in front of the
instrument data. The value inserted is contained in the Serial Tag Value below.
Serial Tag Value
The text string that is inserted in the data stream in front of the instrument data
when the Serial Tag is Enabled.
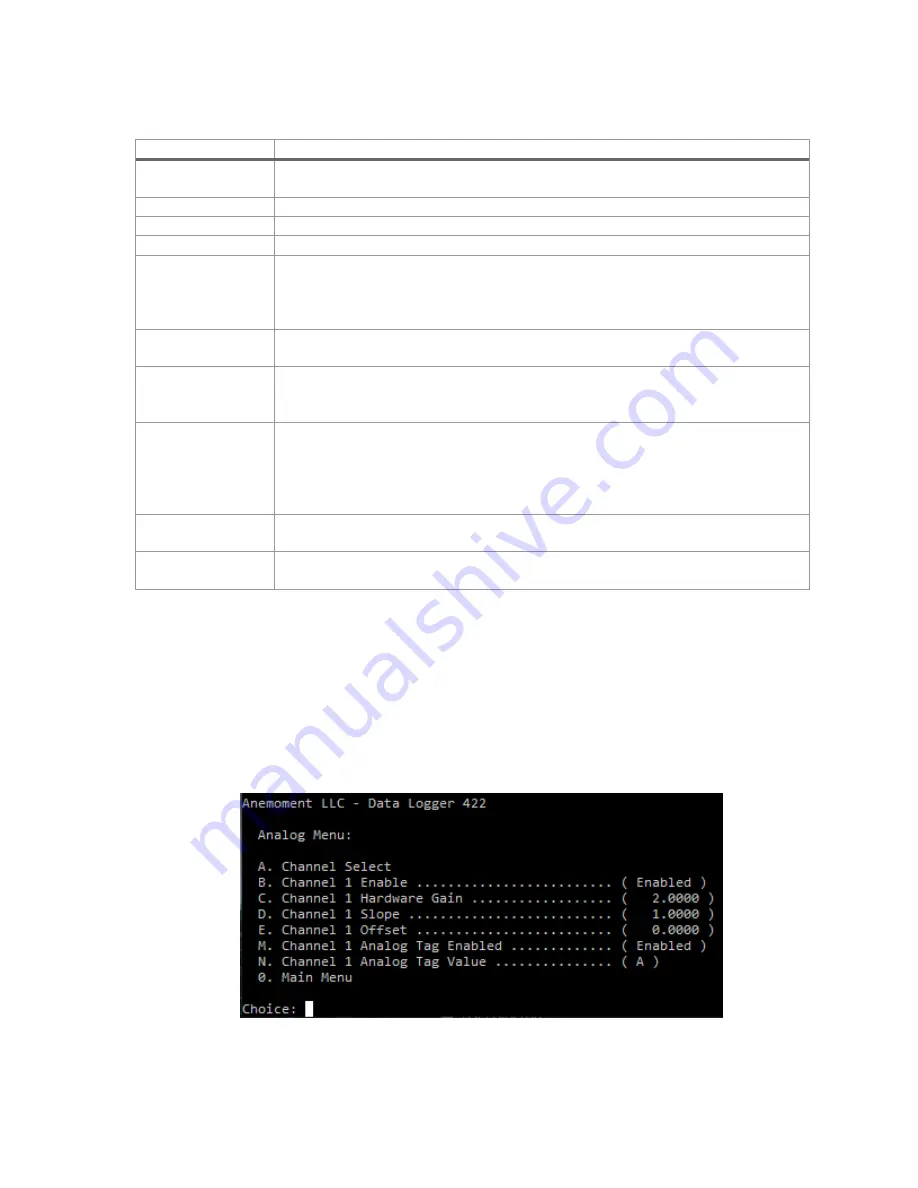
Analog Setup Menu
This menu sets parameter configurations and controls for analog instruments that may be attached
at the AD1 and AD2 headers of the circuit board, and the V IN voltage.
To make a change to an analog parameter, press the “A” key. A new sub-menu for Analog
Instrument Selection is shown. Press the letter key indicated to the left of the desired instrument.
The display then returns to the Analog Setup Menu listing parameter configuration options.
Figure 14: Analog Options menu


