E
N
STEP 9
ALARMS AND VIBRATION (VIBRATION NOT AVAILABLE IN SOME COUNTRIES)
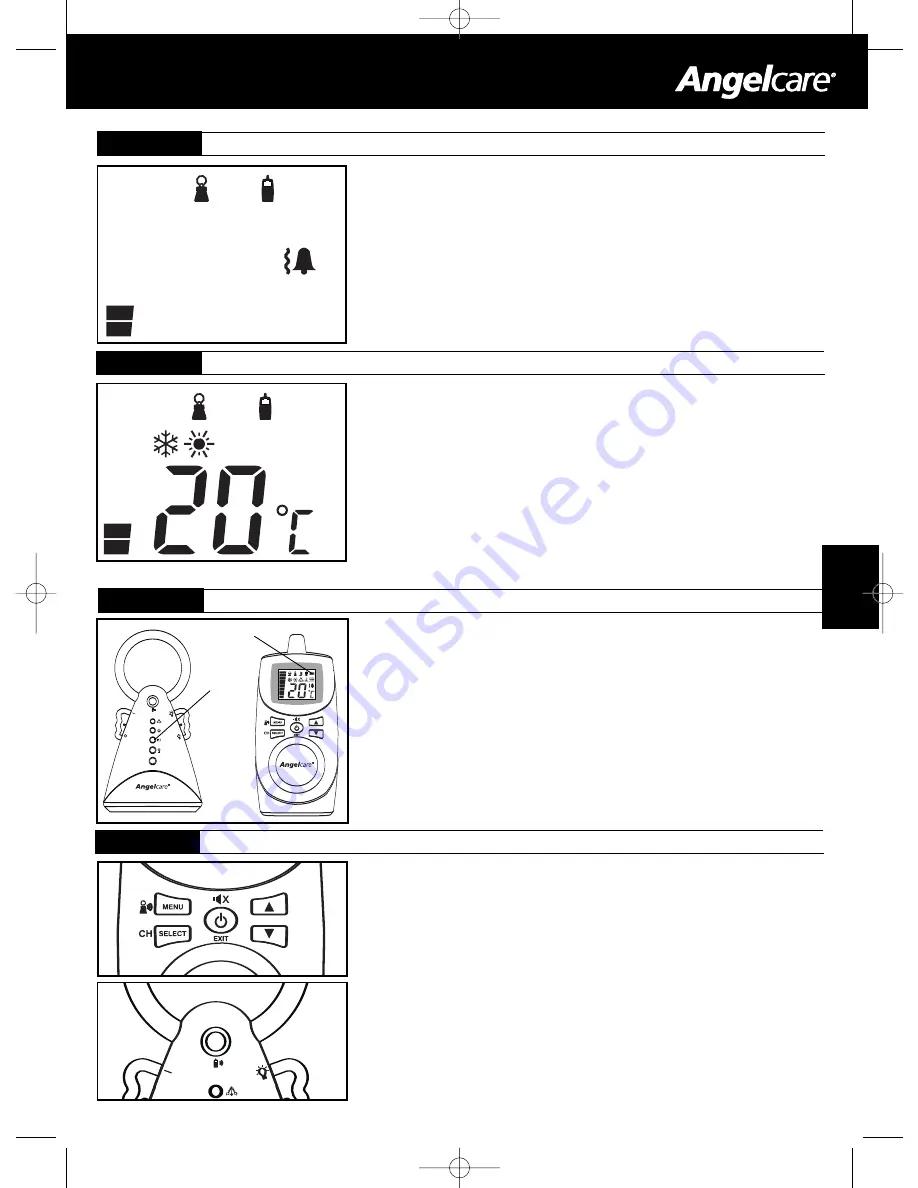
This menu will appear ONLY if the vibration option is available on your unit. It allows you to
chose between the following notification options :
- Alarm only
- Vibration only
- Alarm and vibration
NOTE :
The vibration mode will not work when the batteries are low or if the parents unit
is on the charger.
• Press MENU and chose the desired option. The wave icon is for the vibrationmode and the
bell icon is for the alarm mode.
• Select the desired option, using the arrows. Press SELECT.
• Press MENU to view the next option, or EXIT if you wish to stop programming now.
STEP 10
ROOM TEMPERATURE CONTROL
Your Angelcare© monitor can also monitor your baby’s room temperature and let you know
when the temperature is to high or too low. A tripple BEEP will be heard if the temperature
reaches levels out of the chosen range.
• Press MENU, the snow flake and sun icons and the word OFF will appear on the screen.
• Turn it ON or OFF using the arrows.
• Press SELECT.
• If you select to have the room temperature control ON, Press MENU.
The SNOW FLAKE icon will appear, with the temperature. Select the desired lowest
temperature with the arrows and press SELECT.
• Press MENU. The SUN icon will appear, with the temperature. Select the desired highest
temperature with the arrows and press SELECT.
• Press EXIT as this was the last available programmable function.
5
Low battery indicator
• The monitor will revert to battery mode during a power failure only if batteries are inserted
in
both units.
• It is also possible to use the Angelcare© monitor in places where electricity is not available.
• When the nursery unit’s low battery RED light is flashing, its batteries need to be replaced.
On the screen of the parents unit, the battery icon flashes and the nursery unit icon appears.
A short BEEP will also be heard every 15 seconds for about 30 minutes, until the unit shuts
itself off.
• Parents unit should be recharged when icon is clear (will not flash) and a beep sound is
heard. A short BEEP sound will be heard every 15 seconds until the unit shuts itself down.
Note:
Do not use Alkaline batteries in the parents unit.
IMPORTANT :
If the “Out of range” function is ON, when the nursery unit shuts itself off, the
“Out of range” signal will be heard and displayed on the parents unit.
Low battery
indicator
Red light
STEP 11
BATTERY MODE AND WARNINGS
STEP 12
ADDITIONAL FUNCTIONS
• CHANNEL SELECTION :
If the transmission is not clear, or if you hear parasite sounds,
you should change the channel. Press and hold the SELECT
button to change the channel (with the arrows). Then press the
SELECT button again to confirm.
• TEMPORARY MUTE :
If you want to mute the sound for 2 minutes, press the center
EXIT button. To reactivate the sound before the 2 minutes have
elapsed, press EXIT again. You can also turn the alarm off by
pressing the same button (this does not apply to the the low
battery alarm).
•CONNECTING THE PARENTS UNIT TO THE NURSERY UNIT:
If you lose the connection between the 2 units, press and hold
the MENU button on the parents unit, the "out of range"
indicator will flash. Press and hold the top button of the nursery
unit to re-connect to the nursery unit. The Tic light flashes.
• PAGING:
If you want to locate the parents unit, press the top button of
the nursery unit.
AC401 international.qxd 7/11/07 8:34 AM Page 5
Summary of Contents for AC401
Page 72: ...72 P L AC401 international qxd 7 11 07 8 34 AM Page 72 ...
Page 73: ...73 P L AC401 international qxd 7 11 07 8 34 AM Page 73 ...
Page 74: ...74 P L AC401 international qxd 7 11 07 8 34 AM Page 74 ...
Page 75: ...75 P L AC401 international qxd 7 11 07 8 34 AM Page 75 ...
Page 76: ...76 P L AC401 international qxd 7 11 07 8 34 AM Page 76 ...
Page 77: ...77 P L AC401 international qxd 7 11 07 8 34 AM Page 77 ...
Page 79: ...79 H U 79 80 83 83 83 84 85 87 AC401 international qxd 7 11 07 8 34 AM Page 79 ...
Page 80: ...80 H U AC401 international qxd 7 11 07 8 34 AM Page 80 ...
Page 81: ...81 H U AC401 international qxd 7 11 07 8 34 AM Page 81 ...
Page 82: ...82 H U AC401 international qxd 7 11 07 8 34 AM Page 82 ...
Page 83: ...83 H U AC401 international qxd 7 11 07 8 34 AM Page 83 ...
Page 84: ...84 H U AC401 international qxd 7 11 07 8 34 AM Page 84 ...
Page 85: ...85 H U AC401 international qxd 7 11 07 8 34 AM Page 85 ...
Page 86: ...86 H U AC401 international qxd 7 11 07 8 34 AM Page 86 ...


