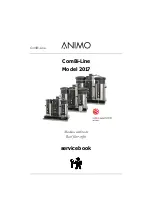
background image

ComBi-Line

ComBi-Line

Model 2017

Machine with taste

servicebook

Summary of Contents for ComBi CB10

Page 1: ...ComBi Line ComBi Line Model 2017 Machine with taste servicebook...

Page 2: ...RUCTURE 21 8 1 How to get access 22 8 2 The operator menu and the service menu 23 9 SOFTWARE 34 9 1 Upload private label logo 34 9 2 Upload dealer information 35 9 3 Software installation 36 10 MAINTE...

Page 3: ...3 2017 05 Rev 0 0 EN ComBi Line...

Page 4: ...rry out repairs on the machine Most of the settings including the product settings are secured by a PIN code This PIN code is intended to prevent the user from accessing the service menu It is recomme...

Page 5: ...IME INSTALLATION In this first step the most important menu items can be easily set LANGUAGE Set the language TIME Set the time DATE Set the date SOUND SIGNAL Select Yes or No DESCALE BREW SYSTEM Set...

Page 6: ...nergy safe mode In this mode the temperature lowers down to 60 C when the boiler is not used for 15 minutes can be changed in the service menu The OK button starts to blink After pressing the OK butto...

Page 7: ...system 10 Drain hot water system 3 Cold water reservoir lid 11 Boil dry protection hot water system 4 Level sensors hot water system 12 Inlet valve cold water only 5 Cold water reservoir brew H W syst...

Page 8: ...Min Max Min Swivel arm cold water reservoir brew system cold water reservoir hot water boiler Drain brew system Drain hot water boiler NTC sensor T1 H1 H2 Code Description Code Description WF Water f...

Page 9: ...3221 3x230 400 V 3000 W Heating element CB10 H1 03222 3x230 400 V 6000 W Heating element CB20 H1 03223 3x230 400 V 9000 W See chapters 5 and 7 for operation Boil dry protection coffee system 03089 Act...

Page 10: ...r inlet for the hot water boiler Both sides share one overflow outlet Reed contact 03063 Controls the position of the swivel arm and the coffee containers Boiler heating element Manufactured entirely...

Page 11: ...brew volume 1 4 the process is started by pressing the OK button 6 The inlet valve H opens and the cold water reservoir D is filled upto the maximum level sensor A The solenoid valve closes and two o...

Page 12: ...er power supply is plugged into the wall socket both the LED light M and the container heating N are activated The containers heating buttons 9 and or 10 light up Priority circuit When the ComBi Line...

Page 13: ...unicating vessels Because the hot water boiler is empty the filling process is continued until the minimum level sensor E is passed for 30 seconds From this moment onwards the heating elements 3x are...

Page 14: ...ng element G keeps on heating for an extra time period and then switches off Continued heating for CB5W 50 seconds Continued heating for CB10W and CB20W 80 seconds The continuous heating function star...

Page 15: ...uring menu operation 1 Brew volume selection Walk up increase value 2 Brew volume selection Walk down decrease value 3 Brew volume selection 4 Brew volume selection 5 Stop button Go back 6 OK button C...

Page 16: ...in combination with the highlighted buttons informs the user about the actions that are running or that must be started interactive The on off switch is located on the right side of the panel together...

Page 17: ...nu can also be manually activated in the service menu 2 10 START INSTALLATION MENU Special settings uploaded logos and dealer information on the previous interface board are lost and must be uploaded...

Page 18: ...The water from the boiled water output top 1 1 is always at the boiling point Major components Art no Technical data Material 1 Flow heater CB5 03221 3x230 V 400 V 3 kW st st Flow heater CB10 03222 3x...

Page 19: ...eater and the pocket with the dry boil bulb inside is surrounded with aproximately 60 C lukewarm water The set temperature for dry boiling is 90 C and it cannot be activated during a normal operation...

Page 20: ...l the warning Swivel arm not slope may appear The boiled water from the flow heater will have difficulties to flow smoothly through the swivel arm Place the buffet machine vertically wall mounted vert...

Page 21: ...m the swivel arm outlet Take a 2 litre measuring cup and hold it under the outlet for exactly 1 minute If the volume is much less than mentioned in the above table check if all three heating phases ar...

Page 22: ...OR VALUES 2 6 READ OUT LOG 2 7 DELETE LOG 2 8 LOADING FACTORY DEFAULTS 2 9 TEST MENU 2 10 START INSTALLATION MENU 2 11 HARDWARE AND SOFTWARE INFO OPERATOR MENU 1 0 COUNTERS 1 1 DESCALE 1 2 SYSTEM SETT...

Page 23: ...daily coffee counter TOTAL COUNTER BREW SYSTEM xxxxx Total counter of coffee made in litres RESET TOTAL COUNTER BREW SYST YES Reset the total coffee counter To deactivate this reset function Go to th...

Page 24: ...ogram will disappear and the counter starts all over again START DESCALING BREW SYSTEM Start the descaling program of the brewing system See chapter 10 1 Descaling the brew system COUNTER HOT WATER xx...

Page 25: ...MM Set the clock to the correct local time and date Use the selection buttons Date DD MM YYYY SOUND SIGNAL YES NO YES Enable disable the sound signal Reset day counter in operaror menu YES NO YES Add...

Page 26: ...nd in the SD card the display shows No logo files found ENERGY SAFE MODE ACTIVE YES NO NO Activate deactivate the energy safe mode The energy safe mode switches off the boiler if the hot water boiler...

Page 27: ...ODE This function can be used when the machine is in a showroom or at a trade fair In these cases the machine does not have to be connected to a water supply In the display DEMO is shown on the bottom...

Page 28: ...ON CUP VOLUME ML 100 500 ml 125 ml Set the volume of the cup that is used if the unit you selected is CUPS JUG VOLUME ML 200 2000 ml 250 ml Set the volume of the jug that is used if the unit you selec...

Page 29: ...321 536 250 Hard 12 18 22 32 7 18 2 2 3 2 214 321 500 Average 8 12 15 22 5 7 1 4 2 2 268 214 1000 Soft 4 8 7 15 2 5 0 7 1 4 72 268 1500 Very soft 0 4 0 7 0 2 0 0 7 0 72 2000 COFFEE DOSING G L 0 100 G...

Page 30: ...the moistened filter coffee wells so that the taste and aroma can macerate SWIVEL SENSORS YES NO YES Use this function to temporarily deactivate the swivel arm sensor and or the container sensor duri...

Page 31: ...must inform you to run the descaling process 0 OFF Water quality Hardness Scale indicator litres D F K mmol l mgCaCo3 l Very hard 18 30 32 55 11 18 3 2 5 3 321 536 250 Hard 12 18 22 32 7 18 2 2 3 2 2...

Page 32: ...SORS MAXIMUM LEVEL BREW SYSTEM The level sensor signal is a live signal Use this function to find out if the level signals are responding MINIMUM LEVEL BREW SYSTEM MAXIMUM LEVEL HOT WATER MINIMUM LEVE...

Page 33: ...k the control panel and all the sensors and to run a test cycle as described below HOT WATER BOILER Use this menu to check all sensors boiler fills heating displays actual ascending temperature and to...

Page 34: ...OGOS in capital letters and place your image in this folder SD LOGOS YOUR IMAGE JPG 2 Open the rubber cover located below the on off switch 3 Insert the SD card into the SD card slot ATTENTION Copper...

Page 35: ...oint towards you 6 Switch on the machine 7 The message UPDATE IN PROGRESS is displayed immediately The file is uploaded 8 The machine starts up 9 Remove pull out the SD card from the SD card slot 10 I...

Page 36: ...file and copy all files into an empty SD card 3 Switch off the machine 4 Open the rubber cover located below the on off switch 5 Insert the SD card into the SD card slot ATTENTION Copper contacts mus...

Page 37: ...ystem 2 measuring cups of approximately 2 litres each Preparation Carefully read the caution notice and the directions for use on the sachet of Animo descaler Dissolve 2 sachets of 50 gram Animo desca...

Page 38: ...rms you if this is close to a descaling signal The software will give you the opportunity to immediately start the boiler descaler program O I Service menu Operator menu 1 2 3 4 ENTER PIN CODE SERVICE...

Page 39: ...ENU 2 10 START INSTALLATION MENU 2 11 HARDWARE AND SOFTWARE INFO SERVICE MENU 2 1 0 COUNTER BREW SYSTEM 2 1 1 RESET COUNTER BREW SYSTEM 2 1 3 START DESCALING BREW SYSTEM 2 1 4 COUNTER HOT WATER 2 1 5...

Page 40: ...r blender coffee containers drip tray and clean them If the machine is equipped with a hot water system 4 Drain the tap B until no water comes out anymore 5 Pull out the drain tube C squeeze it and re...

Page 41: ...ible by removing the left side panel The following important parts can be found in the main control unit Fuse 6 3A T Art No 03391 To safeguard the power supply to the main PC bard Battery 3V Li CR2032...

Page 42: ...etection pin 4 8 boiler is present Connector J1 boiler relays Pin power relay Colour Notes 1 heater 1 Red 2 heater 2 Green 3 heater 3 Orange 4 Ground 1 Black 5 Ground 2 Black 6 Ground 3 Black Connecto...

Page 43: ...r J2 coffee relays Pin Valve Colour Notes 1 heater 1 Red 2 heater 2 Green 3 heater 3 Orange 4 Ground 1 Black 5 Ground 2 Black 6 Ground 3 Black Connector PWR1 power supply Pin Colour Notes 1 2 24 Vdc R...

Page 44: ...or and is connected to the main control by a cable Interface and display Conn Notes K1 Display connection CN1 Front key panel U4 Main control Batt Back up battery K3 SD card slot K1 CN1 U4 K3 interfac...

Page 45: ...back part of the machine During an overload the power supply is switched off automatically Reset the power supply by turning the main switch off and on again L N 100 240 Vac 24V GND 12 3 1 Connections...

Page 46: ...the probable cause of the problem If the solution column advises replacement of the part concerned it is possible that the defect is caused by another problem The operation of the device should there...

Page 47: ...rgy safe mode of the boiler is activated Select OK to activate the boiler again The boiler button blinks The boiler is heating Wait until the boiler has been refilled and heated Coffee system needs de...

Page 48: ...o restart the machine 201 B0 BOILER TEMPERATURE TOO LOW There is a fault in the boiler temperature sensor Replace the temperature sensor Press the X button to restart the machine 202 B2 BOILER HEAT UP...

Page 49: ...ine Check the mains water pressure and supply hose connection Open the tap completely During the first installation of the hot water boiler the minimum level sensor is not reached within 120 seconds I...

Page 50: ...0 6 kW 1 0 litres min CB20 9 kW 1 5 litres min One of the three heaters does not heat Check if all 3 phases are live Restore the power supply if necessary Check each flow heater with an ampere clamp o...

Page 51: ...s boilers sensors co se co re co re Power in 24Vdc interface board 1 LED LED LED LED LED 1 5 4 3 3 3 4 7 208 C4 FALSE WATER FLOW DETECTED There is a fault with the water inlet valve Replace the inlet...

Page 52: ...ontrol MAIN CN100 1 1 1 1 1 1 PWR1 Inlet valves flow meter boiler relays boilers sensors Power in 24Vdc interface board 1 LED LED LED LED LED 1 5 4 3 3 3 4 7 212 E0 TEMP SENSOR NOT DETECTED The temper...

Page 53: ...53 2017 05 Rev 0 0 EN ComBi Line...

Page 54: ...54 2017 05 Rev 0 0 ComBi Line...

Page 55: ...55 2017 05 Rev 0 0 EN ComBi Line...

Page 56: ...ComBi Line Animo B V Dr A F Philipsweg 47 9403 AD Assen The Netherlands Tel 31 0 592 376376 Fax 31 0 592 341751 E mail info animo nl www animo eu Rev 0 0 06 2017 Art nr 1006856...

Reviews: