01 EN
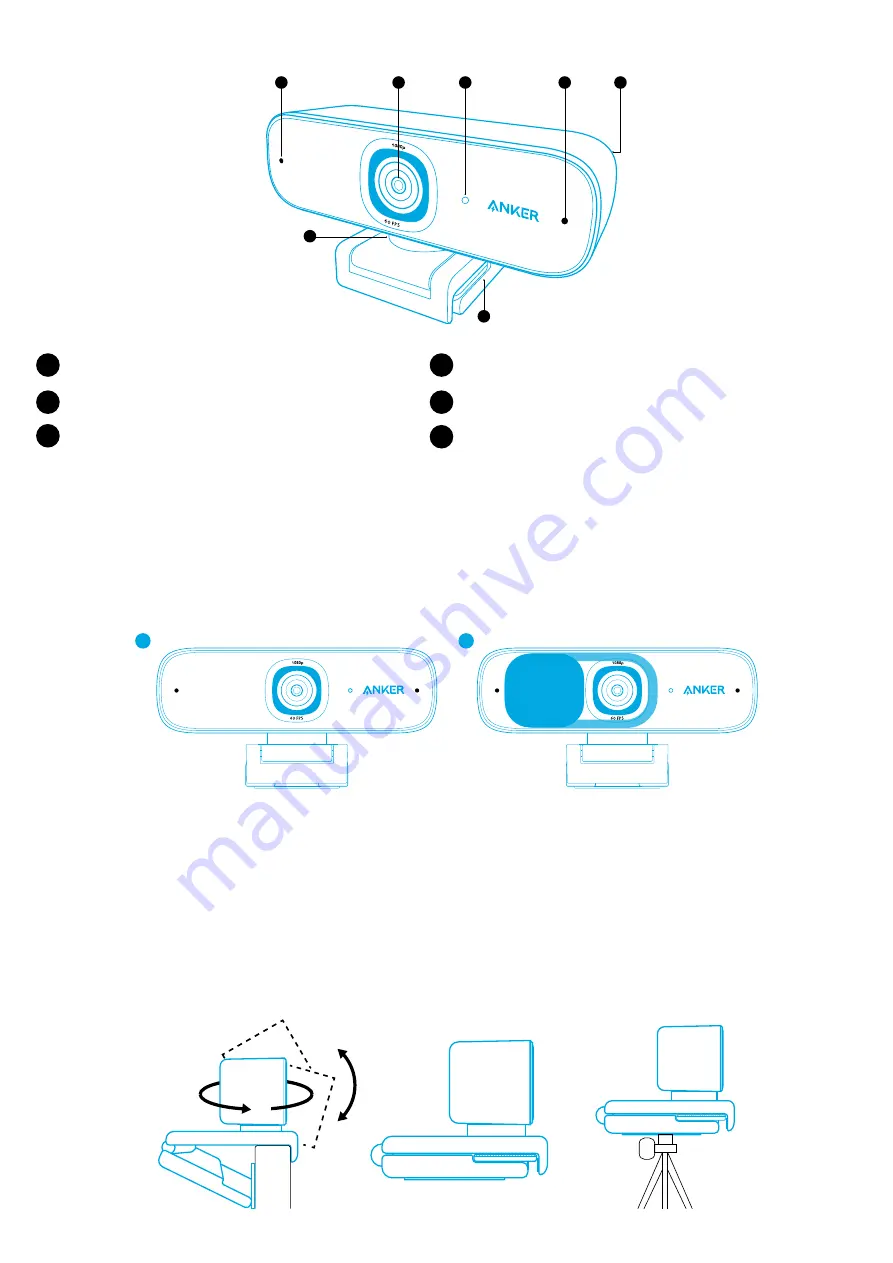
At a Glance
4
5
6
1
3
2
2
1
Autofocus full HD 1080P lens
2
Microphones
3
LED light
4
Adjustable clip/stand
5
USB-C port
6
Tripod thread (Tripod not provided)
Installing the Privacy Cover
Your webcam comes with two pieces of privacy cover. With the privacy cover installed, you can easily slide to cover the lens
when in need.
1. Remove the protection film from the back of the privacy cover.
2. Install the privacy cover on the front panel, making sure the cover is overlapped with the lens to avoid covering the
microphones and LED light.
1
2
Setting Up the Webcam
Option A: Mounting on a Monitor/Laptop
1. Unfold the clip so it fits over the top of your monitor or laptop screen. For a secure fit, adjust the clip by pressing it against
the back of your device.
2. Adjust up and down or rotate the webcam to the optimal position to frame.
Option B: Placing on Desktop
Fold in the clip so it forms a flat surface, and place it on a flat desk top.
Option C: Mounting on a Tripod
With the clip folded in, mount the webcam onto a tripod (not provided) with the ¼ inch thread.
Summary of Contents for PowerConf C300
Page 1: ...Anker PowerConf C300 USER MANUAL...
Page 39: ...37 RU Genel Bak 4 5 6 1 3 2 2 1 HD 1080P 2 3 4 5 USB C 6 1 2 1 2 1 2...
Page 48: ...46 JP 4 5 6 1 3 2 2 1 HD 1080p 2 3 LED 4 5 USB C 6 2 1 2 LED 1 2 A 1 2 B PC PC C...
Page 51: ...49 KO 4 5 6 1 3 2 2 1 HD 1080P 2 3 LED 4 5 USB C 6 1 2 LED 1 2 A 1 2 B C...
Page 54: ...52 SC 4 5 6 1 3 2 2 1 1080P 2 3 LED 4 5 USB C 6 1 2 LED 1 2 A 1 2 B C...
Page 57: ...55 TC 4 5 6 1 3 2 2 1 Autofocus HD 1080P 2 3 LED 4 5 USB C 6 1 2 LED 1 2 A 1 2 B C...
Page 60: ...58 AR 4 5 6 1 3 2 2 1 2 3 4 5 USB C 6 1 2 1 2 1 2...
Page 63: ...61 HE 4 5 6 1 3 2 2 1 HD 1080P 2 3 4 5 USB C 6 1 2 1 2 1 2...


