background image

8

Unpacking

•   Packaging  materials: 

This appliance has been packaged to protect it against transportation 

damage. Remove all packaging materials from around and inside the appliance and keep the original 

packaging carton and materials in a safe place. It will help prevent any damage if the product needs 

to be transported in the future, and you can use it to store the appliance when it is not in use. In the 

event the carton is to be disposed of, please recycle all packaging materials where possible. 

•  

Suffocation: 

Plastic wrapping can be a suffocation hazard for babies and young children, so ensure all 

packaging materials are out of their reach and disposed of safely. 

•   Power  cord:

 Unwind the power cord to its full length and inspect it for damage. Do not use the 

appliance if it or its cord have been damaged or are not working properly. In case of damage, contact 

our after sales support line for advice on examination, repair or return of the damaged product. 

•   Read the manual: 

Read this manual to familiarise yourself with the appliance. Pay particular attention 

to the safety instructions on the previous pages. 

•   Clean: 

To remove any dust from transit and storage, clean the interior and exterior surfaces of the 

appliance with lukewarm water and a soft cloth. Dry thoroughly. 

Important:

 do not use harsh or 

abrasive detergents or powders as these will damage the finish.

•   Two person installation: 

Use two or more people to move and install the appliance. Failure to do so 

can result in back or other injury. 

•   Freestanding  design: 

This appliance is designed to be freestanding only, and should not be recessed 

or built-in. 

•   Floor  surface: 

This appliance must be properly positioned on a dry, sturdy, level surface that is strong 

enough to support it when it is fully loaded. 

•   Ambient  temperature: 

The ambient temperatures must correspond to the climate class ( 

) indicated 

on the rating plate of the appliance: 16° C – 38° C

•   Clearances:

 Ensure that air can circulate freely around the back of the cabinet, which is necessary to 

cool the compressor and condenser. Allow at least 10cm clear space at the back, 10cm at the sides of 

the unit and 20cm between the top and any surface above (i.e. a bench top). If you are installing your 

refrigerator next to a fixed wall, leave sufficient space on the hinge side to allow for the door to swing 

open.

Do NOT

 install/use the appliance in the following locations/situations: 

•  In moist areas or areas of high humidity. 

•  In a recreational vehicle, or for use with an inverter. 

•   In direct sunlight, near heat sources, next to an open flame, cooking or heating appliance, or near any 

other source of high heat. 

•   Direct sunlight may affect the acrylic coating and heat sources may increase the unit’s power 

consumption. For best energy efficiency install the appliance in the coolest area of the room. 

•  In an area with extreme cold ambient temperatures. 

•   In an area with excessive moisture and high humidity. Make sure it is protected from elements such as 

wind, rain, water spray or drips. 

•   In an area where petrol or other explosive and/or flammable liquids or fumes are used or stored.  

The fumes can create a fire hazard or explosion.

Levelling the Fridge (see Fig. 1)

  a. Turn the feet clockwise to raise the refrigerator;

  b. Turn the feet counterclockwise to lower the refrigerator;

  c. Adjust both feet so the refrigerator is level.

Installation Instructions

Summary of Contents for ATM203S

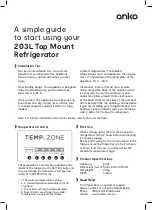
Page 1: ...203 Litre Top Mount Refrigerator Refrigerator Freezer Quick Start Guide Model no ATM203W ATM203S Rev 03...

Page 2: ...daily operation 5 Super Cool is used to get to a colder temperature in a quicker timeframe Two person installation Use two or more people to move and install the appliance Failure to do so can result...

Page 3: ...203 Litre Top Mount Refrigerator Refrigerator Freezer Instruction Manual Model no ATM203W ATM203S Rev 03...

Page 4: ...ase which can be found on your sales invoice The rating plate is located on the rear of the appliance Therefore please fit the duplicate data plates or label on the outside of the cupboard to sure tha...

Page 5: ...uctions 10 Using Your Fridge 11 Usage Tips 11 Energy Saving Tips 12 Maintenance and Cleaning 17 FAQ S and Troubleshooting 18 Product Specifications 19 Warranty To ensure proper operation of this devic...

Page 6: ...an appliance with a damaged refrigerant circuit If the refrigerant circuit becomes damaged avoid proximity to open fires and all types of heat and ignition sources Thoroughly ventilate the room in wh...

Page 7: ...e Electrical Safety Voltage Before connecting and turning on the appliance ensure the electrical voltage and circuit frequency correspond to that indicated on the appliance rating label Earthing This...

Page 8: ...r clean this appliance with flammable fluids Do not store or use volatile flammable or explosive propellants or liquids in or close to this or any other appliance The fumes can create a fire hazard or...

Page 9: ...procedures a Turn the feet clockwise to raise the refrigerator b Turn the feet counterclockwise to lower the refrigerator c Adjust the right and left feet based on the procedures above to a horizontal...

Page 10: ...nd should not be recessed or built in Floor surface This appliance must be properly positioned on a dry sturdy level surface that is strong enough to support it when it is fully loaded Ambient tempera...

Page 11: ...or remove the third earth prong from the power cord If the plug does not fit your outlet consult a licensed electrician for advice to have the outlet changed Plug the unit into a dedicated properly ea...

Page 12: ...in a low temperature Damper Adjusting Slider The initial position of the damper adjusting slider is on the far right side For better user experience it is recommended to push the slider to the right p...

Page 13: ...as bottles of fizzy drink in the chilling compartment as the container could explode under pressure and damage the chiller Do not refreeze food once it has been defrosted Frozen food which has thawed...

Page 14: ...Clean the outside of the unit with a damp well wrung out cloth keeping the area of the controls dry Keep the lid gasket seal clean Never use boiling water to accelerate defrosting as it may damage th...

Page 15: ...on 1300 11 43 57 or email support residentiagroup com au Power Failure Most power failures are corrected within a few hours and should not affect the temperature of your appliance if you minimise the...

Page 16: ...the two hole plugs 6 Remove the screw cap to remove the screw on the middle beam 7 Now remove the refrigerator door 8 Remove the adjusting feet lower hinge screw and lower hinge assembly 9 Now instal...

Page 17: ...rigerator door and freezer door 11 Install the limit blocks on the other side of both doors 12 Then install the sleeve pipe on the upper cover of the refrigerator door on the other side 13 Install the...

Page 18: ...16 Maintenance and Cleaning Reversing the Door Cont 14 Finally install the freezer door on the middle hinge and install the upper hinge hinge cover and hole cover to finish Maintenance and Cleaning...

Page 19: ...off The circuit breaker tripped or a blown fuse The light is damaged Plug in the appliance Turn on power point Reset circuit breaker replace fuse Please contact after sales support The door will not c...

Page 20: ...m H 1372mm Weight 43kg Net Capacity 203L Energy Rating 3 Stars MEPS Standards This product complies with AS NZS 60335 1 and AS NZS 60335 2 24 electrical safety and with EN 55014 1 2006 A1 2009 A2 2011...

Page 21: ...y will no longer apply where the defect is a result of alteration accident misuse abuse or neglect Please retain your receipt as proof of purchase and contact our Customer Service Centre on 1800 124 1...

Page 22: ...Model no ATM203W ATM203S...

Reviews: