English
9
(Original instructions)
EN
Warning - danger!
Check that the electricity supply voltage and frequency (V/Hz) correspond to those specified on the data plate See pag.1
Plug the battery pack charger (A9) to the power supply and insert the battery pack (A8) (fig. 3). During the charge, the charging indicator led (A19)
flashes. When the battery is fully charged, the led on the battery pack charger turns steady green; insert the battery pack (A8) into the slot (fig. 4). The
battery has been charged before delivery. However, it will discharge automatically during transportation and storage. It is recommended to recharge it
before the first use. There is a charge level indicator (A7) on the battery pack: pressing the charge level button the charge level is showed with three,
two or one green led depending on the charge level. To extract the battery pack (A8) from the battery charger (A9) or the appliance, press the release
button (A6). If the charging indicator (A19) is steady red, disconnect the battery and let it cool down, then repeat the charging procedure. If the charging
indicator (A19) keeps steady red replace the battery pack.
IMPORTANT! Recharge the battery after each use. In case of no-use, charge the battery every 3 months. If the performances decrease
significantly, recharge the battery. After a certain period of use, the battery must be replaced. The battery lifetime is influenced by several
factors: charge/discharge cycles, heavy-duty use, aging since manufacturing date, lack of charge and care, storage at high temperatures.
7
INFORMATION ON USE OF THE APPLIANCE (PAGE 4)
7.1
Preparation
Fill the tank body (A3). Test the sprayer with fresh water before adding chemicals. Prepare the solution in an external container. Pour the solution in
the tank through the inlet filter (A2, fig. 5). Do not fill the tank over the maximum quantity, that is 16 litres. Close the cap (A1) firmly. In case of a change
of liquid, clean the tank with fresh water. Do not disperse the rinsing solution. Keep the appliance at a comfortable height to put it on shoulders. Adjust
shoulder straps (A18) before use.
7.2 Start-up
Press the switch button (A5, fig. 6). Press the trigger (A13) to start the flow; push the lock catch (A12) to keep it on (fig. 7).
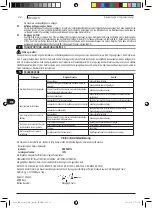
Warning - danger!
Hold the gun component firmly in both hands. Make sure the base is firm and safe. Operate the machine upright. Do not cover the machine
or use it in a poorly ventilated room.
IMPORTANT! Avoid operating the appliance without water, which may cause damage to the pump. Solutions must not have
temperature higher than 40°C.
7.3
Stopping operation (Pauses)
Release the trigger (A13) to put the device in stand-by.
7.4
Finishing work
Release the trigger (A13), turn off the appliance. Put the remaining solution in an external container and store it according to the instructions given by
the producers. Do not disperse the remaining solution after use. Rinse the appliance with fresh water and dry it after use and before storage to greatly
extend lifetime. Many spray liquids will dry out and harden if left in the tank, blocking the nozzle, the valve and the hose. Remove the battery pack when
the machine is unattended.
8
MAINTENANCE
Warning - danger!
All installation and assembly operations must be performed with the appliance disconnected from the battery.
Always switch off the appliance and disconnect the battery before any servicing or maintenance work. Repairs and work on electrical systems may only be carried
out by the Service Centre.
Do not change the original structure of the product or the connection of the power cord. The O ring and washer are wear parts. The replacement frequency depends
on the service time, the spray materials used, and whether the sprayer is cleaned regularly.
Warning - danger!
Never use abrasive detergents, glass detergents or universal detergents! Never immerse the sprayer in water. Clean the appliance and plastic
accessories with a standard synthetic material detergent. Rinse the tank and accessories with water if necessary and dry them before reuse.
8.1.
Maintenance of the battery pack
Please pay attention to the charge of the battery pack. Charge in time in case of low battery. In the case of long-term power loss, the battery
performances will be lowered. After a long period of storage, the battery needs to be charged and discharged many times for maximum performance.
8.2
Charging and storage of the battery
To extend the service life of the battery, avoid charging immediately after a full discharge and cool the battery pack for a few minutes. In order to ensure
95902_KK_Manual_AR_sprayer_INNER.indb 9
95902_KK_Manual_AR_sprayer_INNER.indb 9
2021/2/1 下午12:25
2021/2/1 下午12:25


