EN
46
– Must be emptied in a space with good visibility as emptying is an indication of a
problem
– Must be drawn independently with respect to the drainage of other equipment, hot
water heaters or other safety valves
– May not have any valves
– May not have any T-connectors
– May not have a threaded connection in the pipe end so as to avoid service
• The installation, planning and maintenance of venting should be carried about by a qualified
technician with knowledge about standards and local regulations as well as experience with this
type of equipment
• Only parts which have been delivered by the manufacturer or an authorised retailer may be used
for repairs
• Check once a year that the safety valve’s drain is not clogged Pull on the venting valve to make
sure that water runs out The valve is defective if no water comes out Shut off the hot water
heater and contact Jula’s customer service
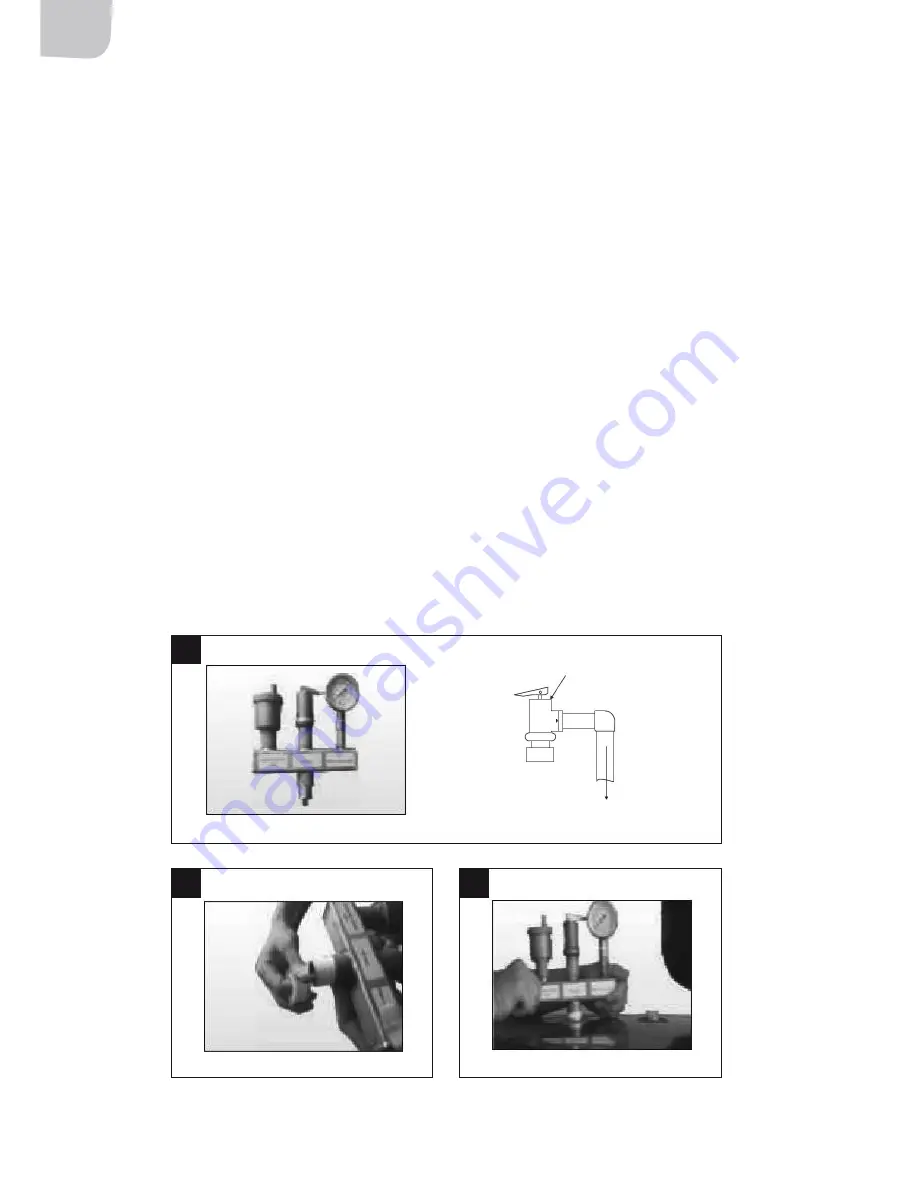
INSTALLING THE SAfETY VALVE KIT
1
Install the safety valve kit (figure 12) in the outlet marked ”Safety valve kit”
2
Wrap thread seal tape counter-clockwise around the threads at least four times (figure 13)
3
Turn the safety valve kit counter-clockwise until it sits correctly (figure 14)
12
13
14
Safety valve
Emptying


