background image

Antaira Technologies - Industrial Ethernet Switches 

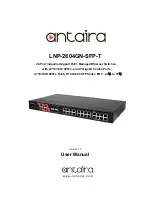
LNP-2804GN-SFP-T User Manual V1.0 


LNP-2804GN-SFP-T


28-Port Industrial Gigabit PoE+ Managed Ethernet Switches,   

with 24*10/100/1000Tx, and 4* Gigabit Combo Ports   

(4*10/100/1000Tx RJ45, 4*100/1000 SFP Slots); EOT: -40

  to 75


Version 1.0 

User Manual 


Summary of Contents for LNP-2804GN-SFP-T

Page 1: ...itches LNP 2804GN SFP T User Manual V1 0 i LNP 2804GN SFP T 28 Port Industrial Gigabit PoE Managed Ethernet Switches with 24 10 100 1000Tx and 4 Gigabit Combo Ports 4 10 100 1000Tx RJ45 4 100 1000 SFP...

Page 2: ...Notice Copyrights 2017 by Antaira Technologies LLC All rights reserved Reproduction adaptation or translation without prior permission of Antaira Technologies LLC is prohibited except as allowed under...

Page 3: ...to try to correct the interference by one or more of the following measures Reorient or relocate the receiving antenna Increase the separation between the equipment and receiver Connect the equipment...

Page 4: ...rdware Description 10 2 1 Physical Dimensions 10 2 2 Front Panel 10 2 3 Back Panel 11 2 4 LED Indicators 11 2 5 Reset Button 13 2 6 Ethernet Ports 13 2 7 Cabling 13 2 8 Wiring the Power Inputs 14 2 9...

Page 5: ...82 28 4 15 DHCP Auto Provision 29 4 16 Management VLAN 31 4 17 System Time 32 4 18 L2 Switching 34 4 19 Port Configuration 34 4 20 Port Mirror 35 4 21 Link Aggregation 36 4 22 802 1Q VLAN 40 4 23 Q in...

Page 6: ...tions 75 4 42 802 1x 78 4 43 IP Security 80 4 44 QoS 81 4 45 General 81 4 46 QoS Basic Mode 89 4 47 Rate Limit 91 4 48 Management 93 4 49 LLDP 93 4 50 SNMP 98 4 51 Power Over Ethernet 101 4 53 DHCP Se...

Page 7: ...al V1 0 vii 4 64 Backup Manager 126 4 65 Upgrade Manager 127 4 66 Dual Image 128 4 67 Save Configuration 129 4 68 User Account 129 4 69 Reset System 130 4 71 Reboot Device 131 5 Command Line Interface...

Page 8: ...increase determinism and improve network management for remote SCADA systems or control networks The LNP 2804GN SFP T is IP30 rated and rack mount design with extended temperature range EOT 40 C to 7...

Page 9: ...e Installation IP30 protection metal housing Rack mount design 1 4 Package Contents 1 LNP 2804GN SFP T 1 Quick installation guide 1 Rack Mount Kit 1 RJ45 to DB9 Serial Console cable 1 5 Safety Precaut...

Page 10: ...ysical dimensions of Antaira s LNP 2804GN SFP T series 28 Port Industrial Gigabit PoE Managed Ethernet Switches with 24 10 100 1000Tx and 4 Gigabit Combo Ports 4 10 100 1000Tx RJ45 4 100 1000 SFP Slot...

Page 11: ...ndicator has a different color and has its own specific meaning see below in Table 2 1 LED Color Description SYS Green On System is operating normally Off System is powered down system crash operation...

Page 12: ...rature range Off IC sensor detects normal operating temperature SFP LED Green On SFP or GBIC plug in and link up Blink Packet transmit and receive Off SFP or GBIC plug out or link down PoE Left LED Po...

Page 13: ...X The RJ 45 ports are auto sensing for 10Base T 100Base TX or 1000Base T connections Auto MDI means that the switch can connect to another switch or workstation without changing the straight through o...

Page 14: ...ion See the following for terminal block connector views Figure 2 6 Terminal Receptor Power Input Contacts To wire the power inputs 1 Make sure the power is not connected to the switch or the power co...

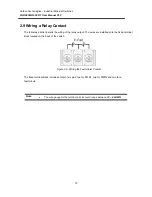
Page 15: ...the wiring of the relay output The wires are installed onto the fixed terminal block located on the back of the switch Figure 2 8 Wiring the Fault Alarm Contact The fixed terminal block includes a to...

Page 16: ...ounting Installation 3 1 Rack Mounting 1 Align the rack mount brackets with the holes on the switch 2 Secure the rack mount brackets with the provided screws 3 Align the switch with the posts on the r...

Page 17: ...ce You can change the default password after you have successfully logged in 4 Click Login to enter the management interface Figure 4 1 4 2 Recommended Practices Antaira recommends creating a best pra...

Page 18: ...r saving all the desired settings perform a system save Tools Save Configuration The changes are saved 4 4 Monitoring 4 5 Device Information The Device Information menu lists information pertaining to...

Page 19: ...t MAC Address Displays the MAC address of the switch IP Address Displays the assigned IP address of the switch Subnet Mask Displays the assigned subnet mask of the switch Gateway Displays the assigned...

Page 20: ...ting The level options are emerg Indicates system is unusable It is the highest level of severity alert Indicates action must be taken immediately crit Indicates critical conditions error Indicates er...

Page 21: ...fOutNUcastPkts ifOutDiscards ifInMulticastPkts ifInBroadcastPkts ifOutMulticastPkts and ifOutBroadcastPkts The ensuing list for Ether Like MIB Counters settings are informational only dot3StatsAlignme...

Page 22: ...each trunk It displays membership status link state and membership type for each port To access this page click Monitoring Link Aggregation The ensuing table for Link Aggregation Group Status setting...

Page 23: ...t LLDP Statistics of all the interfaces Refresh Click Refresh to update the data on the screen with the present state of the data in the switch The ensuing table for LLDP Port Statistics settings are...

Page 24: ...nformation for IP multicasting To access this page click Monitoring IGMP Statistics Figure 4 8 Monitoring IGMP Statistics The following table describes the function in Figure 4 8 Function Description...

Page 25: ...kage information for IP multicasting To access this page click Monitoring MLD Statistics The following table describes the items in the previous figure Item Description Clear Click Clear to refresh ML...

Page 26: ...k the radio button to select the IP Address Setting mode Static or DHCP IP Address Enter a value to specify the IP address of the interface The default is 192 168 1 254 Subnet Mask Enter a value to sp...

Page 27: ...2 4 13 IPv6 Settings To access this page click System IPv6 Settings Figure 4 10 System IPv6 Settings The following table describes the items in the previous figure Item Description Auto Configuration...

Page 28: ...d DHCPv6 Client 4 14 DHCP Client Option 82 The DHCP Client Option 82 configurable Circuit ID and Remote ID feature enhances validation security by allowing you to select naming choices sub options You...

Page 29: ...ition Remote ID String Enter the remote string ID of the corresponding class Remote ID Hex Enter the remote hex string of the corresponding class Remote ID UserDefine Enter the remote user definition...

Page 30: ...ion The following table describes the items in the previous figure Item Description Status Select the radio button to enable or disable the DHCP Auto Provisioning Setting Apply Click Apply to save the...

Page 31: ...anagement interface To access this page click System Management VLAN Figure 4 13 System Management VLAN The following table describes the items in the previous figure Item Description Management VLAN...

Page 32: ...Antaira Technologies Industrial Ethernet Switches LNP 2804GN SFP T User Manual V1 0 32 4 17 System Time To access this page click System System Time Figure 4 14 System System Time...

Page 33: ...Time Zone Click the drop down menu to select a system time zone Daylight Saving Time Click the drop down menu to enable or disable the daylight saving time settings Daylight Saving Time Offset Enter t...

Page 34: ...to select the port for the L2 Switch setting Enabled Click the radio button to enable or disable the Port Setting function Speed Click the drop down menu to select the port speed Auto Auto 10M Auto100...

Page 35: ...igure 4 16 L2 Switching Port Mirror The following table describes the items in the previous figure Item Description Session ID Click the drop down menu to select a port mirroring session from the list...

Page 36: ...f IP traffic across two or more links To access this page click L2 Switching Link Aggregation Load Balance Figure 4 17 L2 Switching Link Aggregation Load Balance The following table describes the item...

Page 37: ...ACP Ports Click the drop down menu to select designated ports GE1 28 Apply Click Apply to save the values and update the screen The ensuing table for LAG Management Information settings are informatio...

Page 38: ...Auto Auto 10M Auto100M Auto 1000M Auto 10 100M 10M 100M or 1000M Flow Control Click the radio button to enable or disable the Flow Control for the LAG Port Apply Click Apply to save the values and upd...

Page 39: ...peer device also implementing LACP To access this page click L2 Switching Link Aggregation LACP Port Settings Figure 4 21 L2 Switching Link Aggregation LACP Port Settings The following table describe...

Page 40: ...e AP group while the inner VLAN ID is assigned dynamically by the AAA server VLAN Management The management of VLANs is available through the VLAN Settings page Through this page you can add or delete...

Page 41: ...nk8 PVID Enter the VLAN ID you want assigned to untagged or priority tagged frames received on this port The value ranges 1 to 4094 The default is 1 Accepted Type Click the radio button to specify whi...

Page 42: ...e for Port VLAN Status settings are informational only Port Interface VLAN Mode PVID Accept Frame Type and Ingress Filtering Port to VLAN The Port to VLAN page allows you to add a port to a VLAN and s...

Page 43: ...VLANs 4 23 Q in Q Q in Q is commonly referred as VLAN stacking in which VLANs are nested by adding two tags to each frame instead of one Network service provider and users both can use VLANs and make...

Page 44: ...ng table for QinQ Global Information settings are informational only Outer VLAN Ethtype Port Settings The Port Settings page allows you to define the outer PVID and outer mode for a selected port Q in...

Page 45: ...pecified networks Apply Click Apply to save the values and update the screen The ensuing table for QinQ Port Information settings are informational only Port Outer PVID and Outer Mode 4 24 GARP The Ge...

Page 46: ...r each port Leave All Time Enter a value to specify the Leave All Time controls how frequently Leave All PDUs are generated A Leave All PDU indicates that all registrations will shortly be deregistere...

Page 47: ...feature reduces energy consumption through intelligent functionality Traffic detection Energy Efficient Ethernet EEE compliance Inactive link detection Inactive link detection function automatically r...

Page 48: ...ltering The following table describes the items in the previous figure Item Description Unknown Multicast Action Select the configuration protocol Drop Flood or Router Port to apply for any unknown mu...

Page 49: ...een The ensuing table for IGMP Snooping Information settings are informational only IGMP Snooping State IGMP Snooping Version and IGMP Snooping V2 Report Suppression The ensuing table for IGMP Snoopin...

Page 50: ...k Apply to save the values and update the screen The ensuing table for IGMP Querier Status settings are informational only VLAN ID Querier State Querier Status Querier Version and Querier IP IGMP Stat...

Page 51: ...d Life Sec Router Ports To access this page click L2 Switching Multicast IGMP Snooping Router Ports The ensuing table for Router Ports settings are informational only VLAN ID Port and Expiry Time Sec...

Page 52: ...ooping Information settings are informational only MLD Snooping State MLD Snooping Version and MLD Snooping V2 Report Suppression The ensuing table for MLD Snooping Table settings are informational on...

Page 53: ...al only VLAN ID Querier State Querier Status Querier Version and Querier IP MLD Static Group The MLD Static Group page allows you to configure specified ports as static member ports To access this pag...

Page 54: ...are informational only VLAN ID Port and Expiry Time Sec 4 27 Jumbo Frame Jumbo frames are frames larger than the standard Ethernet frame size of 1518 bytes The Jumbo Frame function allows the configur...

Page 55: ...8 L2 Switching Spanning Tree STP Global Settings The following table describes the items in the previous figure Item Description Enabled Click the radio button to enable or disable the STP status BPDU...

Page 56: ...elect Enabled or Disabled to setup the admin profile for the STP port Path Cost 0 Auto Set the port s cost contribution For a root port the root path cost for the bridge 0 means Auto Edge Port Click t...

Page 57: ...Settings Figure 4 40 L2 Switching Spanning Tree STP Bridge Settings The following table describes the items in the previous figure Item Description Priority Click the drop down menu to select the STP...

Page 58: ...Bridge Root Port and Last Topology Change STP Port Advanced Settings The STP Port Advanced Settings page allows you to select the port list to apply this setting To access this page click L2 Switching...

Page 59: ...n Figure 4 42 L2 Switching Spanning Tree MST Config Identification The following table describes the items in the previous figure Item Description Configuration Name Enter the identifier used to ident...

Page 60: ...informational only MSTI ID and VID List MST Instance Priority Settings The MST Instance Priority Settings allows you to specify the MST instance and the bridge priority in that instance To access thi...

Page 61: ...ed Root Bridge Root Path Cost Designated Bridge Root Port and TCNLast Topology Change The ensuing table for STP Port Status settings are informational only Port Identifier Priority Port Id Path Cost C...

Page 62: ...ccess this page click L2 Switching X Ring X Ring Settings Figure 4 45 L2 Switching X Ring X Ring Settings The following table describes the items in the previous figure Item Description State Select E...

Page 63: ...ensuing table for Information settings are informational only Ring ID Role Port 1 Port 2 and Delete click to delete the desired Ring ID 4 31 Loopback Detection The Loopback Detection function is used...

Page 64: ...Global Information settings are informational only State Interval and Recover Time Port Settings The Port Settings page allows you to select ports that are detected by the loopback detection function...

Page 65: ...nd Loop Status 4 32 MAC Address Table The MAC Address Table provides access to the Static MAC Settings MAC Aging Time and Dynamic Forwarding 4 33 Static MAC The Static MAC page allows you to configure...

Page 66: ...and update the screen The ensuing table for Static MAC Status settings are informational only No MAC Address VLAN Port and Delete click to delete the desired MAC address 4 34 MAC Aging Time The MAC Ag...

Page 67: ...Port Click the drop down menu to select the port number to show or clear dynamic MAC entries If a port VLAN or MAC address is not selected the whole dynamic MAC table is displayed or cleared VLAN Clic...

Page 68: ...ngs The following table describes the items in the previous figure Item Description Unit Select pps or bps control units for the Storm Control function Preamble IFG Select Excluded or Included to setu...

Page 69: ...e for the selected port during a Storm Control incident The options are Drop and Shutdown Type Enable Click the radio button to enable Broadcast Unknown Multicast or Unknown Unicast Broadcast Select t...

Page 70: ...ed Select Enabled or Disabled to define the selected Port FDB Learn Limit 0 64 Enter the variable 0 to 64 to set the learn limit for the FDB setting Violation MAC Notification Select Enabled or Disabl...

Page 71: ...or Protected to define the port type Apply Click Apply to save the values and update the screen The ensuing table for Protected Ports Status settings are informational only Protected Ports and Unprote...

Page 72: ...Antaira Technologies Industrial Ethernet Switches LNP 2804GN SFP T User Manual V1 0 72 Figure 4 59 Security DoS Prevention DoS Global Settings...

Page 73: ...abled or Disabled to set the maximum ping size for the IPv4 protocol IPv6 Ping Max Size Click Enabled or Disabled to set a maximum ping size for the IPv6 protocol Ping Max Size Setting Enter the varia...

Page 74: ...Packets IPv4 Ping Max Packet Size IPv6 Ping Max Packet Size Smurf Attack TCP Min Header Length TCP Syn SPORT 1024 Null Scan Attack X Mas Scan Attack TCP SYN FIN Attack TCP SYN RST Attack and TCP Frag...

Page 75: ...informational only Port and DoS Protection 4 41 Applications The Applications function allows you to configure various types of AAA lists TELNET The TELNET page allows you to combine all kinds of AAA...

Page 76: ...62 Security Applications SSH The following table describes the items in the previous figure Item Description SSH Service Click Enabled or Disabled to set up Ethernet encapsulation remote access throu...

Page 77: ...ion Timeout Enter the variable in minutes 0 to 86400 to define the timeout period for the HTTP session Apply Click Apply to save the values and update the screen The ensuing table for HTTP Information...

Page 78: ...e values and update the screen The ensuing table for HTTPS Information settings are informational only HTTPS Service and Session Timeout 4 42 802 1x The 802 1x function provides port based authenticat...

Page 79: ...entication for network access Security Key Enter the variable to define the network security key used in authentication Reauth Period Enter the variable in seconds to define the period of time between...

Page 80: ...ues and update the screen The ensuing table for 802 1x Port Authorization settings are informational only Port and Port State 4 43 IP Security This section provides a means to configure the IP Securit...

Page 81: ...nter the source IP address to apply the IP Security function IP Mask Enter the IP address for use in masking the previous IP Address Services Enter the type of services to associate with the entry set...

Page 82: ...ve The QoS implementation is based on the prioritization values in Layer 2 frames QoS Properties The QoS Properties allows you to set the QoS mode To access this page click QoS General QoS Properties...

Page 83: ...or the QoS function Remark IP Precedence Click Disabled or Enabled to setup the Remark IP Precedence for the QoS function Apply Click Apply to save the values and update the screen The ensuing table f...

Page 84: ...The following table describes the items in the previous figure Item Description Queue Queue entry for egress port Strict Select Strict to assign the scheduling designation to the selected queue WRR Se...

Page 85: ...ping The following table describes the items in the previous figure Item Description CoS to Queue Mapping Class of Service Displays the CoS for the queue entry Queue Click the drop down menu to select...

Page 86: ...e for Queue Mapping Information settings are informational only Queue and Mapping to CoS DSCP Mapping The DSCP to Queue mapping function maps queue values in incoming packets to a DSCP value that QoS...

Page 87: ...P Enter the DSCP entry to define the precedence values Queue Click the drop down menu to select the queue designation for the DSCP value Queue to DSCP Mapping Queue Displays the queue value for the DS...

Page 88: ...suing table for Queue Mapping Information settings are informational only Queue and Mapping to DSCP IP Precedence Mapping The IP Precedence Mapping allows you to set IP Precedence mapping To access th...

Page 89: ...to save the values and update the screen The ensuing table for IP Precedence Mapping Information settings are informational only IP Precedence and Mapping to Queue The ensuing table for Queue Mapping...

Page 90: ...Apply Click Apply to save the values and update the screen The ensuing table for QoS Information settings are informational only Trust Mode Port Settings The Port Settings page allows you to define a...

Page 91: ...gure the bandwidth control for a listed port To access this page click QoS Rate Limit Ingress Bandwidth Control Figure 4 77 QoS Rate Limit Ingress Bandwidth Control The following table describes the i...

Page 92: ...the previous figure Item Description Port Enter the port number to set the Egress Bandwidth Control State Select Disabled or Enabled to set the Egress Bandwidth Control state Rate Kbps Enter the value...

Page 93: ...set the CIR rate for the Egress queue Apply Click Apply to save the values and update the screen The ensuing table for GE1 Egress Per Queue Status settings are informational only Queue Id and Egress...

Page 94: ...ons include Filtered Bridged or Flooded Transmission Interval Select the interval at which frames are transmitted The default is 30 seconds and the valid range is 5 to 32767 seconds Holdtime Multiplie...

Page 95: ...to save the values and update the screen Figure 4 82 Management LLDP LLDP Port Settings Optional TLVs Selection The following table describes the items in the previous figure Item Description Port Sel...

Page 96: ...4 83 Management LLDP LLDP Port Settings VLAN Name TLV VLAN Selection The following table describes the items in the previous figure Item Description Port Select Enter the port number to associated wi...

Page 97: ...tional only Port Selected VLAN and Detail click the radio box and click Detail to displays the details LLDP Remote Device Info The LLDP Remote Device Info page allows you to view information about rem...

Page 98: ...on between network devices Through SNMP the health of the network or status of a particular device can be determined SNMP Settings The SNMP Settings page allows you to set the SNMP daemon state enable...

Page 99: ...es the items in the previous figure Item Description Community Name Enter a community name up to 20 characters Access Right Click the radio box to specify the access level read only or read write Appl...

Page 100: ...The field requires a user password MD5 specify HMAC MD5 96 authentication level SHA specify HMAC SHA authentication protocol Password Enter the characters to define the password associated with the au...

Page 101: ...a defined community name Version Click the drop down menu to designate the SNMP version credentials v1 or v2c Add Click Add to save the values and update the screen The ensuing table for Trap Host St...

Page 102: ...imum available power OverLoad Disconnect Mode Click the drop down menu to designate the overload mode Overload Port First Port Based Priority Apply Click Apply to save the values and update the screen...

Page 103: ...elect Enabled or Disabled to designate the power limit classification Legacy Mode Select Enabled or Disabled to designate the legacy mode option for the port Priority Click the drop down menu to confi...

Page 104: ...re the DHCP server mode enabled or disabled To access this page click Management DHCP Server Status Settings Figure 4 92 Management DHCP Server Status Settings The following table describes the items...

Page 105: ...e Item Description Lease Time Type in the value designating the lease time 60 864000 in seconds for each setting lease Low IP Address Type in the value designating the lowest range in the IP address p...

Page 106: ...gs are informational only Lease Time Low IP Address High IP Address Subnet Mask Gateway DNS and Clear click to clear IP pool Port Settings The Port Settings page allows you to configure selected ports...

Page 107: ...e in the IP address pool Subnet Mask Type in the value designating the subnet mask for the IP address pool Gateway Type in the value designating the gateway for the IP address pool DNS Type in the val...

Page 108: ...Gateway Type in the value designating the gateway for the IP address pool DNS Type in the value designating the DNS for the IP address pool Apply Click Apply to save the values and update the screen...

Page 109: ...e switch on which the request was received Remote ID Format Click the drop down menu to select the format of the remote ID string or hex Remote ID Content Enter the remote ID string of the host Low IP...

Page 110: ...lick to clear the settings Lease Entry To access this page click Management DHCP Server Lease Entry The ensuing table for Lease entry Table settings are informational only IP Address Client Mac Start...

Page 111: ...nal only Active Profile Id Profile Settings The Profile Settings page allows you to select the server IP the server port and sender mail for the listed profile To access this page click Management SMT...

Page 112: ...on Profile ID Click the drop down menu to select the identification type for the profile 1 or 2 Target Mail Enter the email address of the target client Apply Click Apply to save the values and update...

Page 113: ...ntent Assign the content of the email The maximum length is 64 characters alphanumeric symbols dots underlines dashes and spaces Apply Click Apply to save the values and update the screen 4 55 RMON Re...

Page 114: ...port number for the selected entry Owner Enter the name of the owner of the RMON group Apply Click Apply to save the values and update the screen The ensuing table for Statistics Information settings...

Page 115: ...Enter value in seconds 1 to 3600 to designate a specific interval time for the collection of samples Owner Enter the name of the owner of the RMON history group Apply Click Apply to save the values a...

Page 116: ...ing Threshold Enter the falling alarm threshold trigger Rising Event Index Enter the rising event index 1 65535 to define the alarm group Falling Event Index Enter the falling event index 1 65535 to d...

Page 117: ...k Apply to save the values and update the screen The ensuing table for Event Information settings are informational only Index Description Type Community Owner and Delete click to delete the desired i...

Page 118: ...est Result settings are informational only Port Channel A Cable Length A Channel B Cable Length B Channel C Cable Length C Channel D and Cable Length D 4 58 Ping Test The Ping Test page allows you to...

Page 119: ...seconds The default value is 1 The value ranges from 1 to 5 The interval entered is not retained across a power cycle Size in bytes Enter the size of ping packet The default value is 56 The value ran...

Page 120: ...rnet Switches LNP 2804GN SFP T User Manual V1 0 120 4 59 IPv6 Ping Test The IPv6 Ping Test page allows you to configure the Ping Test for IPv6 To access this page click Diagnostics IPv6 Ping Test Figu...

Page 121: ...wer cycle Size in bytes Enter the size of ping packet The default value is 56 The value ranges from 8 to 5120 The size you enter is not retained across a power cycle Ping Results Display the reply for...

Page 122: ...lick Diagnostics System Log Local Logging Figure 4 108 Diagnostics System Log Local Logging The following table describes the items in the previous figure Item Description Target Enter the local loggi...

Page 123: ...ss of the log server Server Port Enter the Udp port number of the log server Severity Click the drop down menu to select the severity level for local log messages The default is emerg The level option...

Page 124: ...DDM page allows you to setup the diagnostic alarm status To access this page click Diagnostics DDM Figure 4 110 Diagnostics DDM The following table describes the items in the previous figure Item Desc...

Page 125: ...ate Low Alarm Click Enabled or Disabled to set the alarm state Low Warning Click Enabled or Disabled to set the alarm state Apply Click Apply to save the values and update the screen The ensuing table...

Page 126: ...Enabled or Disabled to set the alarm state Event Click Power Failure Fiber Link down or Port Link down to set the alarm event Apply Click Apply to save the values and update the screen 4 63 Tools 4 6...

Page 127: ...up server Backup Type Click a type to define the backup method image running configuration startup configuration flash log or buffered log Image Click the format for the image type LNP 2804GN SFP T x...

Page 128: ...ver File Name Enter the file name of the new firmware version Upgrade Type Click a type to define the upgrade method image startup configuration or running configuration Image Click the format for the...

Page 129: ...ion 0 1 settings are informational only Flash Partition Image Name Image Size and Created Time 4 67 Save Configuration To access this page click Tools Save Configuration Click Save Configuration to FL...

Page 130: ...the password entry to confirm the profile password Privilege Type Click the drop down menu to designate privilege authority for the user entry Admin or User Apply Click Apply to create a new user acco...

Page 131: ...console or telnet to management switch by CLI CLI Management by RS 232 Serial Console 115200 8 none 1 none Before configuring by an RS 232 serial console use an RJ45 to DB9 F cable to connect the swi...

Page 132: ...the Windows Run command as below Note Telnet may not be installed by default on some windows systems Step 2 The Login screen will appear Use the keyboard to enter the Username and Password and then pr...

Page 133: ...igure show ip name server configure show ip mode configure Time ntp time update configure ntp client timeserver ip_addr_string configure clock set hh mm ss day month year configure clock timezone area...

Page 134: ...member vlan no switchport pvid interface no switchport filter interface show name vlan show member vlan show switchport pvid interface show switchport filter interface PoE power inline never interfac...

Page 135: ...erface spanning tree admin edge on interface spanning tree stp disable interface no spanning tree mode configure no spanning tree priority configure no spanning tree forward time configure no spanning...

Page 136: ...e show spanning tree mst revision configure show spanning tree mst instance instance_ID vlan configure show spanning tree mst instance_ID priority configure show spanning tree mst instance_ID cost int...

Page 137: ...start configure no event syslog authentication failure configure no event syslog interface INTERFACE_NAME up configure no event syslog interface INTERFACE_NAME down configure show event syslog power1...

Page 138: ...4 e mail_address configure no smtp enable configure no smtp sender configure no smtp subject configure no smtp server address configure no smtp server port configure no smtp authentication enable con...

Page 139: ...sion 1 2c 3 traps inform configure snmp trap community trap_community_name configure snmp trap inform retry retry_time configure snmp trap inform timeout retry_interval configure snmp trap v3 user use...

Page 140: ...le configure no monitor source configure no monitor destination configure show monitor enable configure show monitor source configure show monitor destination configure QoS qos queue schedule strict w...

Page 141: ...rface Trunk trunk group group static lacp interface_list configure DHCP Server Relay dhcp service server configure dhcp server included address IP_START IP_END configure dhcp server default gateway ro...

Page 142: ...cp relay untrust interface UPnP upnp enable configure upnp advertisement interval SEC configure no upnp enable configure no upnp advertisement interval configure show upnp enable configure show upnp a...

Page 143: ...dot1x authentication server 1 share key configure show dot1x authentication server 2 ip configure show dot1x authentication server 2 port configure show dot1x authentication server 2 share key configu...

Page 144: ...onfiguration File to from USB 1 CLI enable configure terminal copy running config usb path Fill in the folder and filename behind the copy running config usb command Ex file1 folder file2 2 CLI enable...

Page 145: ...path Fill in the folder and filename behind the copy usb startup config command Ex file1 folder file2 Upgrade via TFTP CLI enable configure terminal tftp server ip IP_ADDRESS tftp file name UPGRADE_FI...

Page 146: ...rotocol Web browser Telnet Serial console TFTP SNMPv1 v2c v3 Port Speed Duplex Configuration IPv6 IEEE 802 1Q GVRP Port based VLAN X Ring 802 1w D RSTP STP IP Access security port security DHCP client...

Page 147: ...lative Humidity 10 to 95 non condensing Regulatory Approvals EMI CE FCC EN55022 Class A EMS IEC61000 4 2 3 4 5 6 8 IEC61000 6 2 IEC61000 6 4 Stability Testing IEC60068 2 32 Free fall IEC60068 2 27 Sho...

Reviews: