XP-3
ANTIGRAVITY BATTERIES
//
310 527 2330
//
INFO@ANTIGRAVITYBATTERIES.COM
Page 5 of 8
USER MANUAL
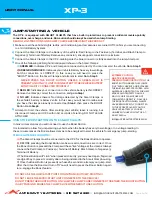
JUMP-STARTING A VEHICLE
The XP-3 is equipped with SMART CLAMPS that have built-in protections to prevent accidental reverse-polarity
connections, over-charge, and more. But caution should always be used when Jump Starting.
READ ALL INSTRUCTIONS AND SAFETY GUIDE BEFORE USING THIS PRODUCT.
Make sure all the vehicle’s lights, radios, air conditioning and accessories are turned Off. Confirm you are connecting
to a 12-Volt Battery System.
Connect the Smart Clamps to the Battery of the vehicle: Red Clamp to the Positive (+) Terminal, and Black Clamp to
Negative (-) Terminal of Battery. Remove any corrosion; ensure good connection to terminals.
Connect the Smart Clamps to the XP-3, making sure the blue connector is fully seated into the Jump-Start port.
One of the following LED Light indications will show on the Smart Clamps:
A)
GREEN LED
: Indicates XP-3 and Clamps are connected correctly. You can now start the vehicle.
Go to Step 5
.
B)
GREEN BLINKING LED
: Indicates your Vehicle Battery has very low voltage,
but the connection is CORRECT. In this case you will need to press the
“BOOST” Button on the Smart Clamps and attempt to start.
Go to Step 5
.
NEVER PRESS THE BOOST BUTTON UNLESS A GREEN LIGHT IS
PRESENT AND ONLY IF UNIT IS CONNECTED TO THE VEHICLE BATTERY
WITH POLARITY CONNECTED PROPERLY!
C)
RED LED
: Indicates your connection to the vehicle battery is INCORRECT.
Remove the Clamps, correct the connection, and
go to Step 1
.
D)
NO LED
: Indicates there is No Voltage detected by the Smart Clamps or
the vehicle’s battery is below 2 volts. In this case you will need to make sure
you have the clamps properly connected per
Step 2
, then press the BOOST
Button.
Go to Step 5
.
Attempt to Start the vehicle. After starting your vehicle, leave it running, but
disconnect Clamps and XP-3 within 40 seconds of starting. DO NOT LEAVE
ATTACHED.
1)
2)
3)
4)
EXTREME CAUTION
MUST BE USED WhEN
PRESSINg ThE BOOST BUTTON.
ThE
BOOST BUTTON mAKES ThE CLAmPS
“LIVE” wITh CURRENT, AND BYPASSES
ThE BUILT-IN SAFETY FEATURES. hIGh
AmPERAGE, AND POTENTIAL FOR hEAT,
SPARKS AND PROPERTY DAmAGE
mAY OCCUR IF CLAmPS ARE NOT
CONNECTED CORRECTLY. ONLY USE
ThE BOOST BUTTON whEN CLAmPS
hAVE BEEN CORRECTLY CONNECTED
TO ThE PROPER POLARITY ON ThE
VEhICLE’S BATTERY. IF YOU ARE
UNSURE wITh USE CONTACT US AT:
310 527 2330
OR
INFO@ANTIGRAVITYBATTERIES.COm
5)
DO NOT USE THE JUMP-START PORT FOR ANYTHING BUT JUMP-STARTING!
DO NOT LEAVE THE MICRO-START UNIT CONNECTED TO THE VEHICLE!
DO NOT PRESS THE BOOST BUTTON ON CLAMPS IF CLAMPS ARE CONNECTED TOGETHER. THE BOOST BUTTON
IS A BYPASS AND MAKES THE CLAMPS LIVE WITH ENERGY! USE CAUTION.
USING THE BOOST BUTTON ON THE SMART CLAMPS:
In most circumstances you will not need to use the Boost Button.
It is intended to allow for jump-starting a vehicle when the battery has very low voltage, or no voltage reading. In
these circumstances the Boost allows clamps to be energized to start the vehicle for emergency jump-starting.
PLEASE NOTE THE FOLLOWING:
A)
The Smart Clamps must be connected to the XP-3 for the Boost Button to operate.
B)
BEFORE pressing the Boost Button make sure all connections are correct. Once
the Boost Button is pressed the Clamps will have “live” voltage at the clamps. Always
connect the Red Clamp to Positive (+) Terminal of Battery. Black Clamp to Negative (-)
Terminal of Battery.
C)
The Boost Button will “click” when pressed correctly; you may need a pen, fingernail
or edge of key to press it correctly due to being indented in the Smart Clamp housing.
D)
Once the Boost Button is pressed you have 25 seconds to attempt your jump-start.
After that time the Boost will turn off. You will need to press the Boost Button again
to re-engage the Boost feature.


