6 Operation
C58IB004EN-D
27
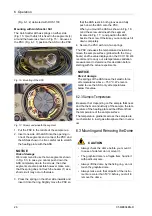
To
mount the dome
, carry out the following steps:
1. Make sure the O-ring and the contact surface of
the dome are free from dust.
2. Place the dome on the O-ring.
3. Turn the dome until the three clasps rest under-
neath the fixing screws.
4. Fix the 3 screws using the screw driver from the
accessory box.
5. Check whether the dome is mounted firmly and
cannot fall off the instrument due to the move-
ment on the goniometer.
To
remove the dome
, carry out the following steps:
1. Turn off the heater on the CCU 100 temperature
control unit (refer to the
CCU 100 Instruction
Manual
).
2. Make sure all parts of the DHS 1100 are cooler
than 50 °C.
3. Loosen the 3 screws using the screw driver from
the accessory box.
4. Take the dome by the fixing ring and turn it until
the three clasps are free.
5. Lift the dome off the housing.
6.4 Operation of DHS 1100 with PEEK
Dome
• For operation with a PEEK dome, the
- dome cooling nozzle or
- the HT dome cooling nozzle must be
mounted.
• When you operate DHS 1100 with a graphite
dome:
- remove the dome cooling nozzle and mount
the blind cover or
- remove the HT dome cooling nozzle and
replace it by the standard cooling ring deliv-
ered with the DHS 1100.
• Only evacuate and vent DHS 1100 when the
sample plate temperature is < 50 °C.
Otherwise the dome can implode.
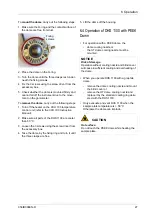
Fixing
screws
NOTICE
Risk of damage
Operation without cooling nozzle and blind cover
will cause insufficient cooling and overheating of
the dome.
CAUTION
Hot surface
Do not touch the PEEK dome while heating the
sample plate.


