VERTICAL CONTACT TOASTER
14
P/N 1010838 Rev. P 10/16
Burger King
MAINTENANCE (continued)
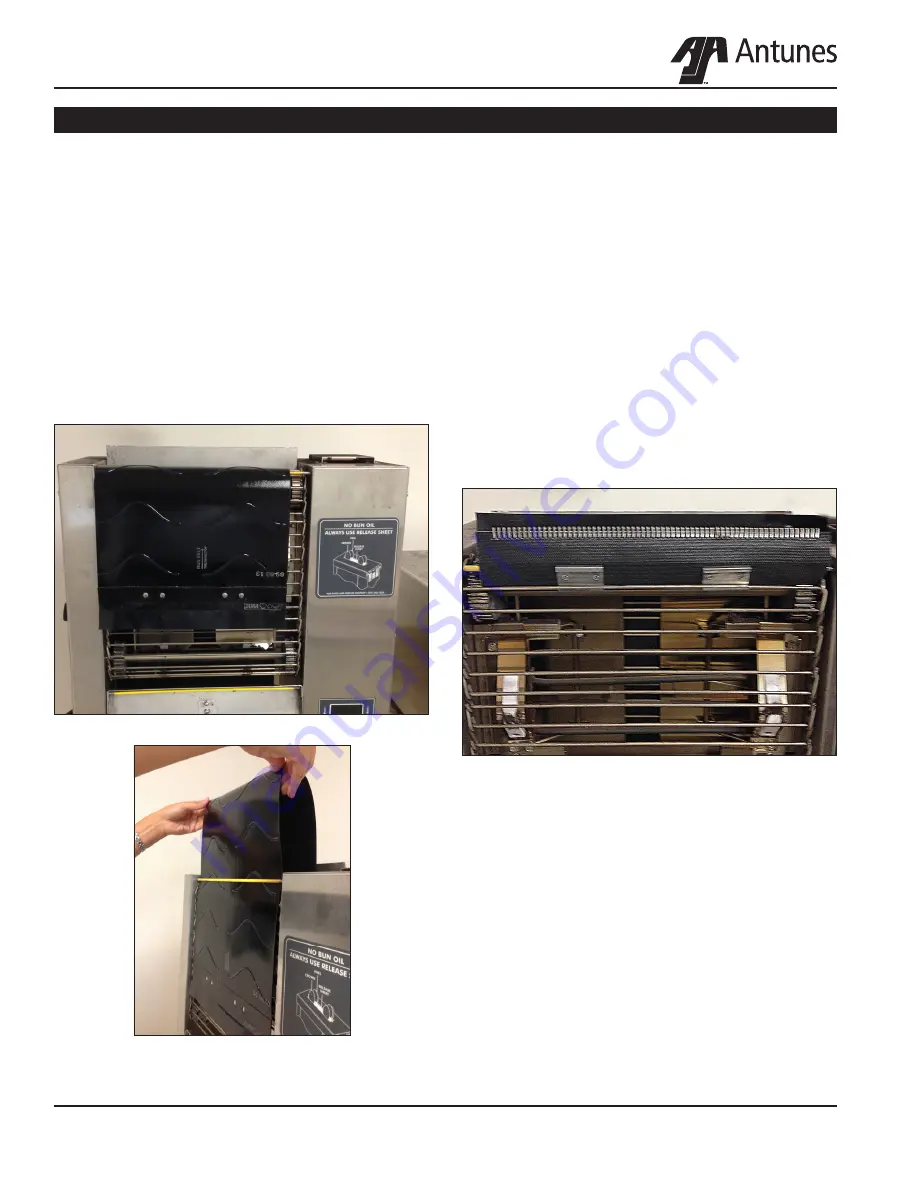
2. Before installing new conveyor belt wraps, wipe
conveyers chain links with sanitized towel (see
owners manual for instructions). Pick belt up from
the center and feed flap end beneath yellow bar
and lower belt until the other end of the belt is on
the bottom of the toaster. Ensure the “Run Belt
This Direction” arrow follows the same directional
path as the wire belt. Feed belt from the bottom
through bottom yellow bar until both ends are ap-
proximately in the middle of the toaster.
3. Starting at a conveyor link in approximately the
middle of the conveyor chain, attach the top hook
of each clip to a conveyor link and gently push the
belt downward to attach the bottom of the clip to
the link directly below the top hook.
NOTE: There are 2 different size conveyor links,
ensure the clips are attached to the larger 3/4”
links, do not attached to small 1/2” links.
Replacing Belt Wraps
NOTE: Depending on toaster usage and how well
they are cleaned daily, the Belt Wraps may last in
excess of 6 months. Additional Belt Wraps may be
purchased from your Authorized Service Agency.
1. With power off and toaster cool, set crown and
heel compression knobs to 6 & F. Remove top
cover and both conveyor covers. Remove current
belts by either removing lacing pin or using scis-
sors or razor knife, carefully cut the belt free of
the wire, drive belt.
NOTE: Check conveyers chains for proper tension
and remove a link if necessary (see page 12).
4. Verify both clips on the belt wraps are secured to
the links on the conveyor chains. Then position
both ends of the new belt together and line up so
the lacing is even. Insert the pin to join both sides
of the belt together.
5. Verify belt alignment is even from side to side of
each belt. Reinstall both conveyor covers and
top cover. Set the compression knobs to 3 and E.
Plug in the power cord and turn the unit on.


