®
P/N 1011596 Rev. A 05/21
8
Installation
1.
Open the large box. It should
contain:
a.
Plate-Mounted RO System
b.
Prefilter Cartridge
c.
Prefilter Carbon Cartridge
d.
RO Cartridge
e.
Owner’s Manual
NOTE:
If any parts are damage, contact
Antunes Technical Service
IMMEDIATELY at:
+1-877-392-7854 (toll free).
2.
Remove all packing materials
and protective coverings from the
system and bracket.
3.
A tank is not included with the RO
system. The tank must be sourced
separately.
Equipment Setup
Plumbing
NOTE:
The system must be connected
to the COLD water line. Do NOT
connect the system to the hot
water line.
The RO system uses the following
connections:
Connection
Description
System Inlet
3/8” OD Tube
System Outlet
(Product Water)
1/4” OD Tube
Drain
1/4” OD Tube
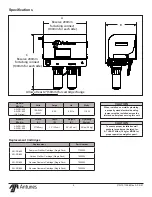
Figure 3.
Cover Removal and Mounting the System
When making a plumbing connection to
the system, use a back-up wrench on the
supporting plumbing. Always use a quality,
approved pipe sealant or thread seal
tape on pipe threads. Do NOT allow pipe
sealant inside pipes.
Do NOT over tighten the connections.
Use plastic fittings when connecting to the
plastic connections of the system.
If soldered plumbing is used, do NOT
apply heat to, or near, the filtration system.
Use union (O-ring seal) connections for
ease of installation and future servicing.
Suggested Tools and Supplies for
Installation
The following tools and supplies are
suggested to help with the installation:
y
Screwdriver
y
Adjustable Wrenches
y
Drill with Bits
y
Level
y
Tape Measure
y
Pipe Dope or Thread Seal Tape
y
Two Gallon Bucket
y
Fresh, Unscented Liquid
Chlorine Bleach
y
Pipe Wrenches
y
Hose or pipe for drain line
Mounting the System
The RO System comes with a Mounting
Bracket for the system. When mounting
the system, pay attention to the following
guidelines:
y
Allow sufficient access for
prefilter and RO membrane
replacement. The prefilter should
have at least 2” below each
bowl for cartridge change.
y
Do not mount the system or tank
above an electrical outlet.
y
Mount the system near a drain
for flushing operations.
y
Mount the system after the
base filtration system and
before the equipment selected
for this water quality.
y
Secure the Mounting Bracket into
wall studs or with the appropriate
heavy duty mounting hardware.
Refer to
Figure 3A
for cover removal.
1.
Remove the cover by first
unfastening the two thumb screws
at the front of the system (Yellow
arrows).
2.
Lift cover. Set cover aside.
Refer to Figure 3B for mounting hole
locations. Plan your mounting accordingly.
Follow these steps to secure the RO
system to the wall
(See Figure 3B)
:
1.
Secure the RO system to the wall
using the holes provided (red
arrows).
2.
Make sure the mounting hardware
secures the system into wall studs
or use the appropriate mounting
expansion screws.
Refer to the tank manufacturer for tank
mounting instructions.
It is recommended that the tank be
mounted as close to the system as
possible.
3A
3B


