10
P/N 1011369 Rev. B 07/17
WARNING
Align the ends of the Silicone Belt properly
(Figure 7) or the belt may be damaged.
WARNING
The unit can retain heat. Be sure to wear Heat-
Resistant Gloves to avoid personal injury.
REPLACING THE SILICONE
BELT (EVERY 2–4 MONTHS)
NOTE: The Silicone Belt should last 2–4
months. Additional Silicone Belts may be
purchased from your Authorized Service
Agency.
1. Turn the unit off, unplug the power
cord, and allow the unit to cool. Set
the Bun Thickness Adjustment Control
to 7.
2. Put on Heat Resistant gloves and
remove the Top Cover and Heat Shield.
3. Face the front of the toaster. Push the
front of the conveyor IN and DOWN
so it locks into place. This releases the
belt tension and allow it to be free.
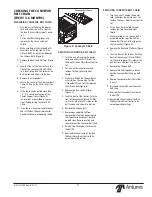
INCORRECT
CORRECT
Figure 7. Aligning Belt Teeth
REPLACING THE RELEASE
SHEET (EVERY 3-5 WEEKS)
NOTE: Depending on toaster usage and on
how well it is cleaned daily, the Release
Sheet should last between 21–35 days.
1. Turn the power off, unplug the power
cord, and allow the unit to cool.
2. Remove the Release Sheet Bracket.
Discard the old Release Sheet. Keep
the Bracket.
3. Slide the Release Sheet Bracket
through the end of the new Release
Sheet (Figure 1).
4. Hang the Release Sheet Bracket onto
the Bun Load Platform. Insert the loose
end of the Release Sheet into the
toaster (Figure 1). Turn the unit on and
allow the Conveyor Belt to draw the
Release Sheet into the unit. Turn the
unit off.
Figure 6. Removing Silicone Belt
4. Make sure flap of the Silicone Belt is
accessible on the top side. Pull the
Silicone Belt Pin out of the zipper on
the Silicone Belt (Figure 6).
5. Disconnect the two clips on the inside
of the Belt Wrap from the conveyor
Belt Chain.
6. Remove and discard the old Silicone
Belt. The Silicone Belt connects to
the Conveyor Belt Chain using clips
attached to the belt. Disconnect these
clips when removing the Silicone Belt.
7. Wipe the Conveyor Belt Chain with a
clean towel dampened sanitizer and
allow to air dry.
8. Install the new Silicone Belt in the front
of the toaster above the Platen. Wrap
the Silicone Belt around the Conveyor
Belt Chain with the zipper flap exposed
to the REAR of the unit (Figures 6 and
7).
9. Be sure to connect the clips on the
Silicone Belt to the Conveyor Belt Chain
before proceeding.
NOTE: Align the edges of the Silicone Belt
properly (Figure 7) or the Silicone Belt
may be damaged.
10. Connect the Silicone Belt with the Belt
Pins.
11. Set the Bun Thickness Adjustment
Control to the correct operating set-
ting.
12. Reassemble the unit and test before
returning to service.
Silicone Belt Teeth
Silicone
Belt Flap


