1007 & 3007 ROLL GROOVER
14
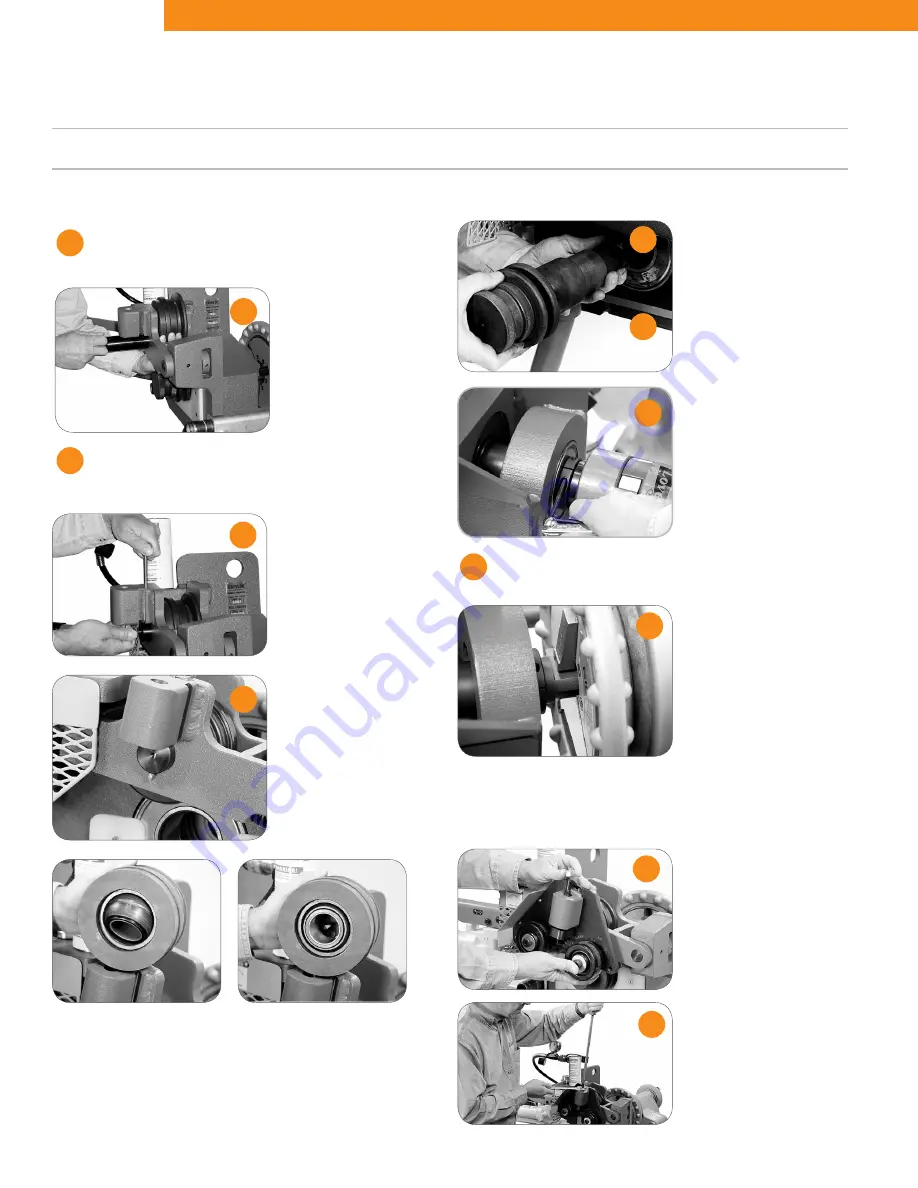
Position roller between the
front and back plates of
the grooving head aligning
the rollers bushings to
receive the top shaft as it
is inserted from the front
of the machine.
Thoroughly clean and inspect top shaft to ensure that it is free
from all burrs and galling.
Insert the hinged collar into the shaft slot and tighten the socket cap screw
(3/16" allen wrench).
Push the shaft inward, through the top rollers bushings,
stopping when the back of the shaft is flush with the back of
the grooving head.
Insert the bottom roll shaft
through the front of the groover
base exposing the triangular
shaped tailpiece at the back
of the Groover.
Lubricate shaft for ease
of installation.
MODEL 3007 ONLY
Align the flats on the triangular
shaft with the Ridgid 300
*
chuck jaws. Slide the Groover
back on the mounting arms to
insert the triangular shaft
tailpiece into the chuck jaws.
Securely tighten the Ridgid
300 chuck jaws.
Note: Select the correct mounting plate for either steel pipe, Advanced Copper
Method, or CTS Copper System.
Rotate the top shaft to align
the cross drilled hole with
the corresponding hole in
the groover head. Remove
thumb screw from top shaft
and return it to its proper
storage position.
Insert the quick release pin.
When properly installed, the
spring loaded locking ball on
the bottom portion of the pin
will extend below the bottom
of the top shaft.
Note:
Top rollers for the Advanced Copper Method utilize a spherical
bearing that the top shaft passes through. This bearing must be aligned
such that the top shaft hole is perpendicular to the face of the roll prior to
pin installation.
DO NOT FORCE TOP SHAFT.
When properly aligned,
the top shaft will slide in with little effort.
MODEL 1007 ONLY
Align the flats on the triangular
shaft with the motor–– drive
coupling and insert the shaft
into the coupling.
Note:
Push the shaft in from the
front to fully expose the collar
receiving slot at the back end of
the Groover.
2
1
3
3
1A
1B
4
4
5
2
1
2
C. GUIDE ROLL MOUNTING PLATE
A. TOP (GROOVED) ROLL
B. BOTTOM (DRIVE) ROLL
GROOVING ROLL CHANGE - ROLL INSTALLATON
Insert the adjustment shaft
from the bottom, into the hole
in the mounting block at the
front of the groover head.
Slide the shaft up to expose
threaded portion above the
top of the mounting block and
install the hex nut.
Using a large slotted
screwdriver and a 3/4" wrench,
lightly snug the hex nut in
place.
With 2"- 6" grooving rolls – Install the top roll first, then install the bottom roll. With 8" – 12" and 14" – 16" grooving rolls – Install the bottom roll first,
then install the top roll.
NOTE


