14
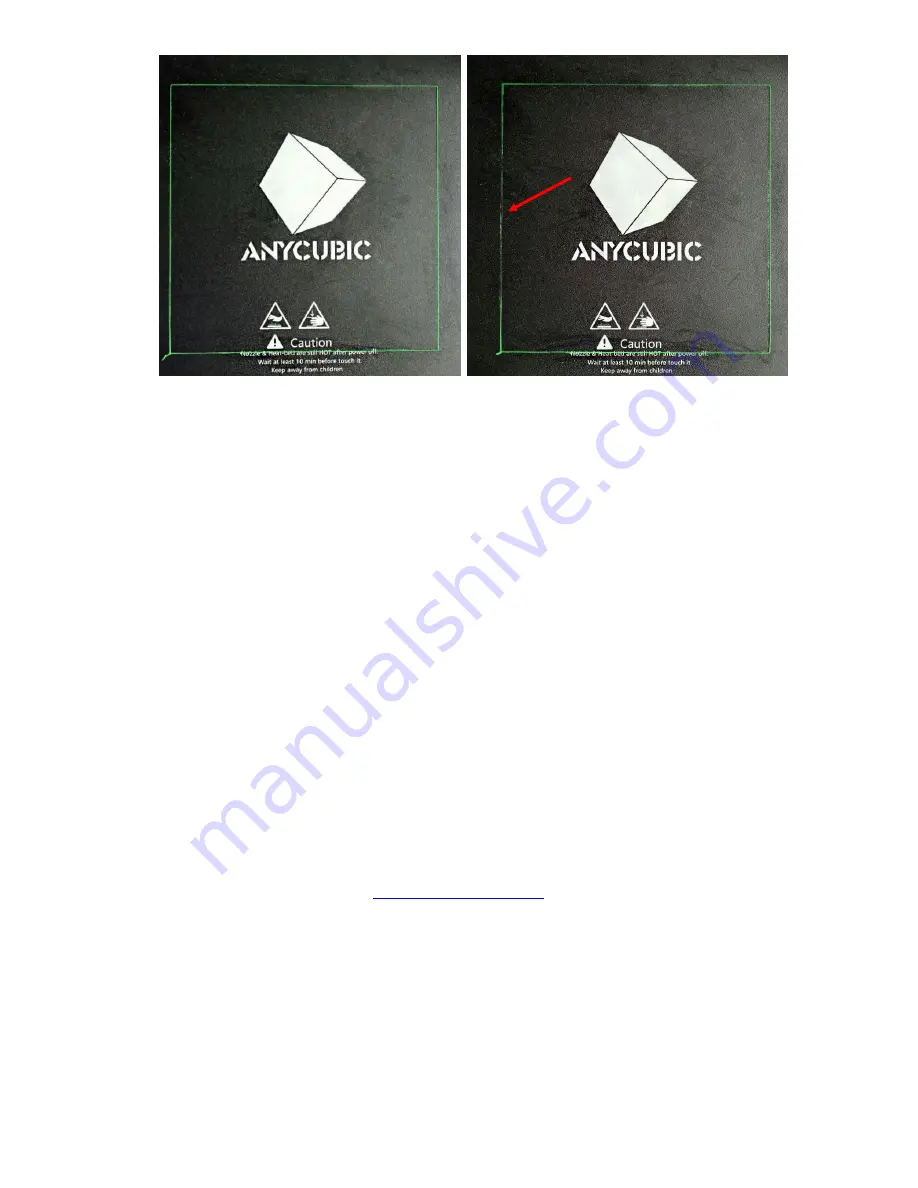
(Figure 16)
As shown in
Fig. 16B
, you may need to manually fine tune after assisted leveling to
achieve satisfying results. After fine tune, please scrape off the previous one, and run
another “Check (Heating)” to verify.
Never direct the scrapper toward your hands.
For first time users, it may take few times to get satisfying results as shown in Fig. 16A.
However, it is still OK to go for the next step even if the result is like Fig. 16B shows.
There will be more explanation on how to fine tune the leveling
(refer to next step 8).
8. Insert the SD card (back side facing up) into the slot at the bottom right side of the base.
Click on the Home “Print” into the print files interface. Click on the exist file
“owl_pair”(author: etotheipi,
www.thingiverse.com
), and click “Print”(
Fig. 17
). The
machine will automatically heating and print the file (heating bed first then the nozzle).
Again, if the filament has not been inserted to the hotend yet, please do so manually.
Use the tweezer to carefully remove the extruded filament before printing.
Leveling is good and the
filament evenly extruded to the
platform.
Too close to the nozzle, you may
manually tighten the two nuts at
the left side by ~half-circle.
(one circle~0.5mm)
A
B


