-76-
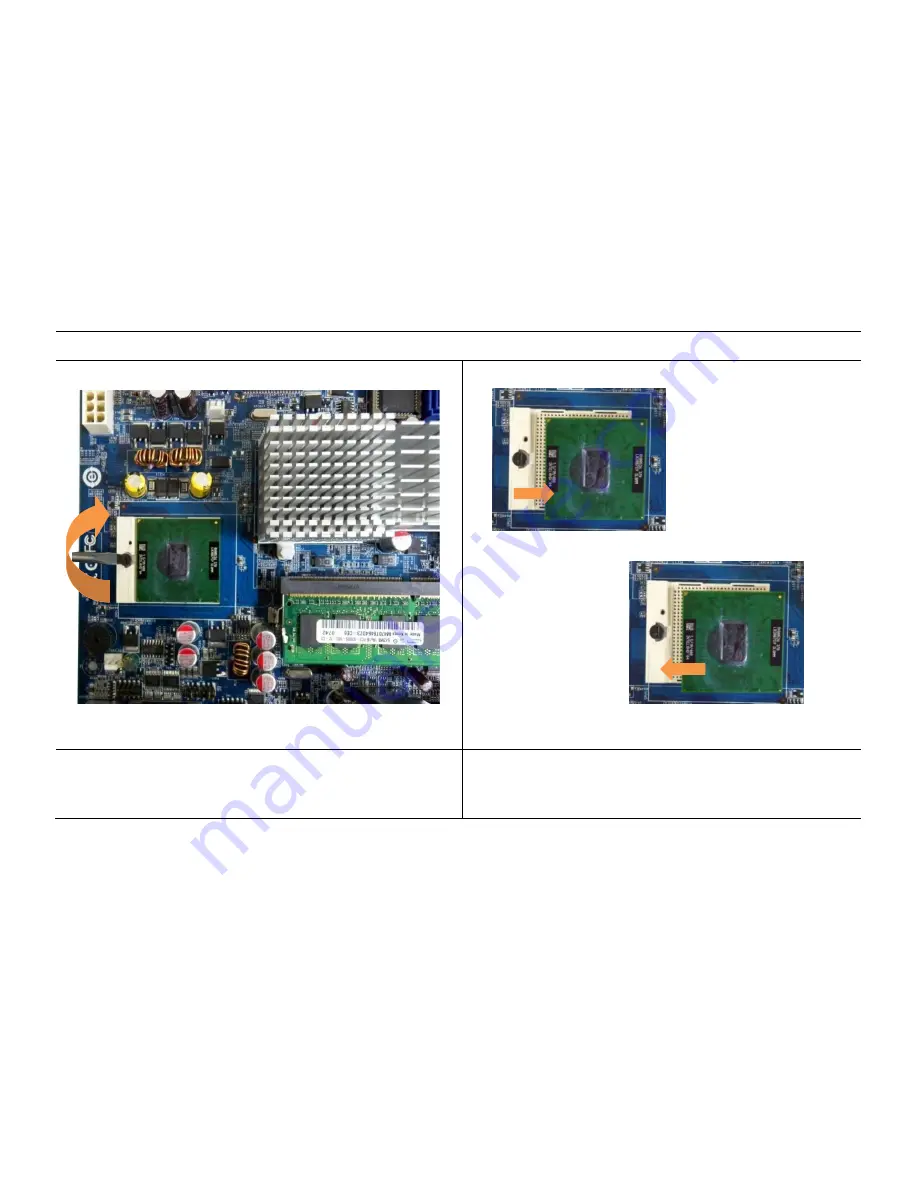
[CPU change]
1.
Turn CPU fixture to 180
° clockwise like the above with
(-) driver.
2.
Pull up the CPU from motherboard.
3.
Insert new CPU in proper position.
4.
Complete CPU replacement in turning CPU fixture against clockwise
with (-) driver.
[Pull out]
[Insert]
» It is easy to be damaged on CPU handling in force in wrong position.
Please refer Motherboard jumper setting for CPU position.
Summary of Contents for POS610
Page 1: ......
Page 9: ...9 Packing details AnyShop main unit Driver CD User manual Power code...
Page 10: ...10 Options 12 inch LCD Monitor Front Rear Customer display Front Rear...
Page 13: ...13 Rear view CUSTOMER DISPLAY HDD I O PORT STAND USB PORT...
Page 22: ...22 Speaker and MIC connection 1 Speaker connection 2 MIC connection...
Page 23: ...23 Printer connection Connect printer cable among Serial Parallel and USB port you required...
Page 36: ...36 3 4 Advanced chipset features...
Page 49: ...49 3 9 Set password You can set password It is able to enter change the options of setup menus...
Page 56: ...56 Chapter 5 Motherboard jumper setting 5 1 Motherboard jumper setting...
Page 57: ...57...
Page 61: ...61 5 4 CMOS Clear 3 2 1 Protect CMOS 3 2 1 Clear CMOS...
Page 64: ...64 3 Pull out main unit from the stand 4 Complete main unit dissection...


