background image

5. Communication   

5.1 Camera   

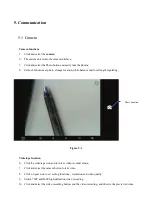
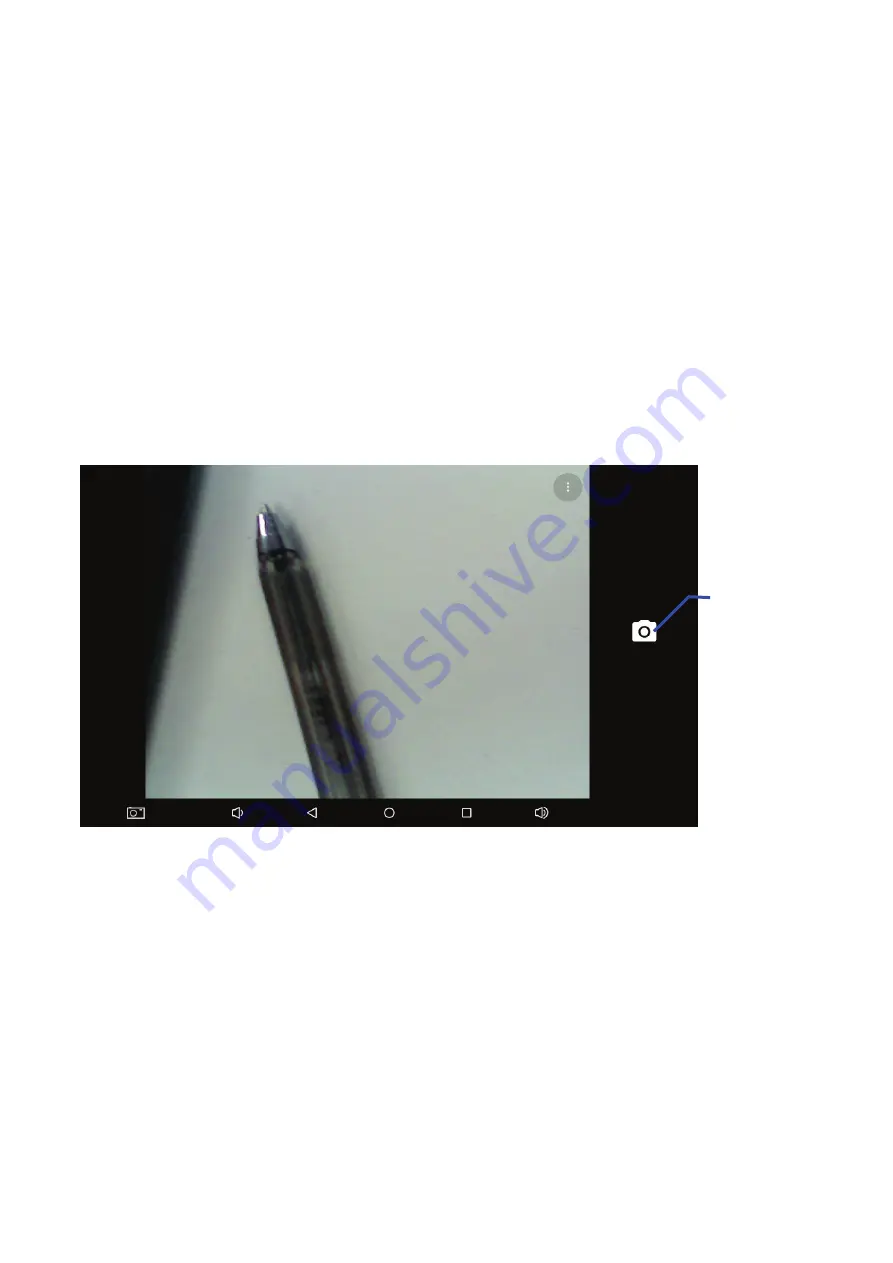
Camera functions   

5.


Click and select the 

camera

;   

6.


The system enters into the camera interface;   

7.


Click and select the Photo button and easily take the photos;   

8.


Set such functions as photo, storage location, white balance and focal length regulating;   


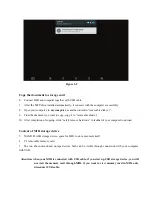
Figure 5-1 


Videotape function 

6.


Click the videotape icon and turn it as video recorder mode;   

7.


Click and select the camera button to take video;   

8.


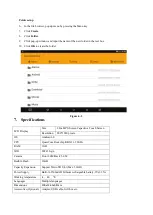
Click o n gear icon to set setting functions - resolution and video quality;   

9.


Switch 720P and 480P high-definition video recording. 

10.


Click and select the video recording button, end the video recording, and observe the previewed video.   

Photo function   

Summary of Contents for A832

Page 1: ...AOC Manual De Usuario Model A832...

Page 2: ...ormaci n Acerca de la informaci n m s detallada por favor consulte las instrucciones de seguridad y los temas que necesitan de su atenci n Por favor no use dispositivo cuando usted est manejando por t...

Page 3: ...los derechos leg timos de los dem s Por favor acatar estrictamente las explicaciones pertinentes en este manual cuando se utiliza la l nea de datos del USB de lo contrario el dispositivo o un ordenad...

Page 4: ...aje se muestra en barra de notificaci n por favor haga clic en el cuadro de la columna y deslice su dedo sobre la pantalla para abrir la lista de notificaci n Haga clic en las opciones para ver la inf...

Page 5: ...insuficiente de la tarjeta SD M s Servicio WIFI est conectado RED est disponible S mbolo de bater a Modo avi n Cargando Bluetooth ya est conectado 3 Inicio r pido 3 1 Funci n de las teclas Las descrip...

Page 6: ...ndido durante unos segundos la opci n de apagado aparecer 2 Haga clic en OK 3 3 Desbloqueo y cierre de la pantalla La m quina se cerrar autom ticamente cuando la pantalla est en desuso 1 Despu s de qu...

Page 7: ...exto o interrelaci n en la p gina web o mover acceso directo en la interfaz de la p gina principal y el men del programa principal s lo presiona sobre el elemento Deslice r pidamente o deslizar Desliz...

Page 8: ...bilidad en los programas de aplicaci n puede presionar la tecla p gina de inicio para volver a la interfaz principal Interfaz Prinicpal personalizada Cambiar Fondo de pantalla 1 Pulse en la interfaz d...

Page 9: ...ento para su MID en primer lugar 1 Conecte su MID con el ordenador mediante el uso de la l nea de transmisi n USB 2 Haga clic en la barra de estado 3 Entre a las opciones de estado haga clic para eleg...

Page 10: ...copia haga clic en Quitar hardware con seguridad en la barra de tareas de su ordenador para descargar Tipos de almacenamiento en MID 1 Dispositivo de almacenamiento NAND FLASH espacio para almacenar l...

Page 11: ...seguir el procedimiento indicado para evitar da os a la tarjeta de almacenamiento 1 En la interfaz de la p gina principal pulse la tecla Mennu a continuaci n haga clic en ajuste 2 Deslice el men de a...

Page 12: ...ar la tarjeta de presentaci n electr nica con los tel fonos m viles pda y un ordenador port til que soporte bluetooth Puede conectar el teclado el rat n y el joystick que sea compatible con bluetooth...

Page 13: ...oraci n para buscar el equipo todos los equipos del bluetooth buscadas por su MID pueden mostrar en esta funci n Figura 4 3 5 Comunicaci n 5 1 C mara Funciones de la c mara 1 Haga clic en y seleccione...

Page 14: ...icono de la cinta de v deo para cambiar a modo de grabaci n de v deo 2 Haga clic en y seleccione el bot n rojo para grabar video 3 Haga clic en icono de engranaje para ajustes de resolucion y de cali...

Page 15: ...Figura 5 2 Figura 5 3 Grabaci n de Video Cortar frente o parte posterior...

Page 16: ...En el explorador de archivos pulse y seleccione el archivo que desea administrar 2 Abra el men incluyendo Cortar Copiar Borrar Renombrar Mover a Copiar reproducir m sica Seleccionar todo directorio y...

Page 17: ...y la barra de progreso de la b squeda aparecer en la barra de notificaciones 5 Cuando se haya completado la b squeda aparecer el cuadro de di logo para confirmar si desea mostrar los resultados 6 Haga...

Page 18: ...iempo para reiniciar su Tablet PC No se puede copiar archivos en el dispositivo Compruebe si el dispositivo est conectado al ordenador correctamente Compruebe si el espacio de memoria est llena Compru...

Page 19: ...tente corregir la interferencia mediante una o m s de las siguientes medidas Reorientar o reubicar la antena receptora Aumentar la separaci n entre el equipo y el receptor Conectar el equipo a una tom...

Page 20: ...AOC Tablet User Manual Model A832...

Page 21: ...ing MID please read information in this section and make your children learn about the information About more detailed information please refer to safety instructions and matters needing attention Ple...

Page 22: ...ers Please strictly follow up by relevant explanations in this manual when using USB data line otherwise MID or personal computer may be damaged Please don t use the MID in humid environment such as b...

Page 23: ...n a prompt message shows on your notice panel please click the column box and slide on the screen with your finger to open the notice list Click options needing to check to see detailed information Th...

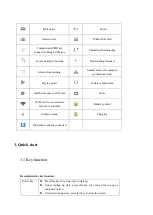
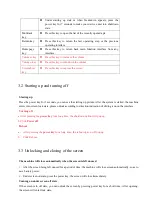
Page 24: ...ng music In data synchronism Insufficient space of SD card More WIFI service is connected network is available Battery symbol Airplane mode Charging Bluetooth is already connected 3 Quick start 3 1 Ke...

Page 25: ...After the system is started the machine enters into screen lock state please unlock according to direction indication of sliding icon on the interface Turning off a After pressing the power key for a...

Page 26: ...ID There are various ways to skim the main screen menu and application program etc on your MID Click to select When you want to use screen keyboard entry and you want to select items on the homepage i...

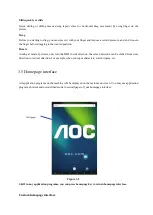
Page 27: ...ctures only turn the MID in side direction the screen direction can be shifted from cross direction to vertical direction For example when you input characters watch cinema etc 3 5 Homepage interface...

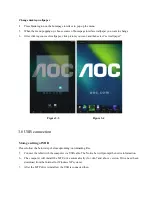
Page 28: ...t set wallpaper Figure 3 3 Figure 3 4 3 6 USB connection Storage setting of MID Please follow the below steps before uploading downloading files 5 Connect the tablet with the computer via USB cable Th...

Page 29: ...fter completion of copying click safely remove hardware in taskbar of your computer to unload Content of MID storage device 3 NAND FLASH storage device space for MID to store document itself 4 TF remo...

Page 30: ...firstly to avoid failure or damage of the storage card 5 In the homepage interface press the menu key then click setting 6 Pull the setting menu downwards then click storage 7 Click SD card setting 8...

Page 31: ...s mobile phones and pda 5 You can synchronously exchange pims data with mobile phones pda and laptop to support the bluetooth data of outlook E mail address 6 You can exchange the electronic name card...

Page 32: ...e for name of bluetooth which indicates that your MID bluetooth can be searched by other bluetooth equipments this default time for this opening is of 120 seconds 9 Scan and look for equipment you can...

Page 33: ...ite balance and focal length regulating Figure 5 1 Videotape function 6 Click the videotape icon and turn it as video recorder mode 7 Click and select the camera button to take video 8 Click o n gear...

Page 34: ...Figure 5 2 Figure 5 3 Videotape function Cut Front or Rear...

Page 35: ...ing Figure 6 1 Copy files 6 In the file browser press and select the file you want to operate 7 Pop up operating menus including Copy Delete Move Paste Rename Send and Create shotcut etc 8 Click Copy...

Page 36: ...Size 8 Inch IPS Screen Capacitive Touch Screen Resolution 800 1280 pixels OS Android 6 0 CPU Quad Core Rockchip RK3126 1 2GHz RAM 1GB WiFi 802 11b g n Camera Front 2 0M Back 5 0M Built in Flash 16GB...
Page 37: ...may cause harmful interference to radio communications However there is no guarantee that interference will not occur in a particular installation If this equipment does cause harmful interference to...

Reviews: