background image

3.3

3.3

3.3

3.3 Power

Power

Power

Power Sav

Sav

Sav

Saving

ing

ing

ing Modes

Modes

Modes

Modes and

and

and

and lock

lock

lock

lock screen

screen

screen

screen

.

Press the “POWER” key shortly after starting up, system enter to power save and lock mode.

Press the “POWER” key or tap the touch screen, system will return to On in 1 second

The primary operation of the device will not stop under the power save mode, just the LCD is
shut and with black screen. For example: playing music, movie, etc

Switch OFF: When the device is in the OFF mode, press and hold the “POWER” key for 3
seconds, the screen will display the power off interface, choose the power off item to confirm,
the system will shut automatically

Note

When the device with low battery it will alarm continuous and shut automatically without

charging. If the device can not start up please check if the battery is low, and try it again after the
battery is charged.

3.4

3.4

3.4

3.4 Battery

Battery

Battery

Battery management

management

management

management and

and

and

and charging

charging

charging

charging....

3.4.1 Charge the battery for 6-8 hours to make sure the battery is fully charged when firstly use.
3.4.2 Insert the micro port of the battery adaptor into DC slot on the device, and connect the other
side with the power socket. Then the desktop icon of the battery keep rolling which shows it is
charging, please wait until the battery is fully charged, don’t disconnect the power when charging.
Once the battery is fully charged, the Icon on the desktop will stop rolling.

Note

In order to keep the battery working in the best condition, please pay attention as below:

Please don’t charge the power in high temperature.

No need to release the power for this Li- battery, you can charge the power even there is still
some power in the battery, no need to wait it runs out.

In order to keep the battery in good condition, please make sure to charge the power once per
two weeks if you don’t use this device for a long time.

Summary of Contents for D80A11-2M

Page 1: ...Tablet PC Model Name D80A11 2M Brand Name AOC FCC ID 2AAQHD80A11 2M...

Page 2: ...sh User User User User Manual Manual Manual Manual Thanks for buying the Tablet PC This manual is to introduce the functions of the device as well as matters which need attention Please read this manu...

Page 3: ...A Earphone Socket B Micro SD card C Mic D USB E HDMI F DC SOCKET G POWER BUTTON...

Page 4: ...tput 5V 5V 5V 5V 2000 2000 2000 2000 mA mA mA mA 7 Do not disconnect the device from PC when downloading uploading or formatting or it will cause programming errors of the device 8 Do not dismounting...

Page 5: ...ay area Long Press Press the item for more than 1 2 seconds 2 3 2 3 2 3 2 3 Features Features Features Features Overview Overview Overview Overview CPU ROCKCHIP 3188 Cortext A9 up to1 2 GHz 8 touch pa...

Page 6: ...A WAV APE FLAC AAC OGG etc Pictures Pictures Pictures Pictures JPG BMP PNG TIFF etc Ebooks Ebooks Ebooks Ebooks TXT PDF CHM HTML PDB UMD FB2 LRC EPUB Office Office Office Office Files Files Files File...

Page 7: ...fter the battery is charged 3 4 3 4 3 4 3 4 Battery Battery Battery Battery management management management management and and and and charging charging charging charging 3 4 1 Charge the battery for...

Page 8: ...Icon Icon Icon Icon Function Function Function Function instruction instruction instruction instruction Back to main menu Note when the system finds new devices Show current power status Set the aler...

Page 9: ...n this device it support reading the files in TF card Insert the TF card into the card slot in right way when take it out just push the TF toward to the inside then the slot will release the TF card t...

Page 10: ...a Data Data enabled enabled enabled enabled was chosen Then go back to Wireless Wireless Wireless Wireless Networks Networks Networks Networks 4 2 3 Insert External 3G by USB host 4 2 4 Choose Mobile...

Page 11: ...Audio Audio Audio Function Function Function Function Enter the music player In music player mode double click the favorite in the list to play music as shown in the following picture Drag the playing...

Page 12: ...he video player interface open the video files The device supported video file format MKV AVI RM RMVB MP4 MOV VOB DAT FLV 3GP etc When no video files in the video player playlist the system will autom...

Page 13: ...ger you can check all files in the device including files in built in Memory and external card Also there is a quick view for pictures and videos 6 6 6 6 6 6 6 6 E book E book E book E book Function F...

Page 14: ...ecord Click menu icon to access settings The device also supports other internet browsers detail functions of those internet browsers refer to their own instructions 6 8 6 8 6 8 6 8 Email Email Email...

Page 15: ...ick email titles to read emails long press email titles to access options Click menu icon to access settings Refresh Checking new emails Compose Write new emails Folders Manage emails to different fol...

Page 16: ...operate the following steps before installation Please check Settings Settings Settings Settings Applications Applications Applications Applications make sure Unknown Unknown Unknown Unknown sources s...

Page 17: ...file you want to cancel software Click the software uninstall the software 6 12 3 6 12 3 6 12 3 6 12 3 Exit Exit Exit Exit Go back to the main interface Note All installed applications will be shown i...

Page 18: ...an take photograph and record video clips Click on the applications tab to display all applications then click take photos or camera shooting into the shooting model Before filming you can click on ca...

Page 19: ...Settings Settings Settings Click setting icon to enter system settings then you can change wireless networks sound display location security Applications accounts sync Privacy Storage language keyboa...

Page 20: ...Storage Setting Setting Setting Setting In this setting you can check storage use and Mount Erase TF cards Notice Before you fetch out TF Card if you have inserted TF card please Unmount TF card firs...

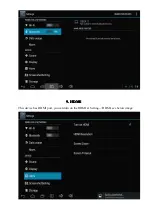
Page 21: ...9 9 9 9 HDMI HDMI HDMI HDMI This device has HDMI port you can turn on the HDMI at Setting HDMI see below image...

Page 22: ...rphone 6 6 6 6 Why Why Why Why I I I I can can can can not not not not install install install install applications applications applications applications Please check Settings Settings Settings Setti...

Page 23: ...are designed to provide reasonable protection against harmful interference in a residential installation This equipment generates uses and can radiate radio frequency energy and if not installed and...

Reviews: