For veterinary use only
-
15 -
Prepare the endoscope imaging processor and compatible equipment before each use. Install and connect the
equipment according to the procedures described in this chapter and the instruction manuals for ancillary
equipment.
Inspect and ensure the reliable grounding is available, and the fuse is in good condition, and all ventilation
grills are uncovered and unblocked.
Ensure that the power switches of the endoscope imaging processor are OFF.
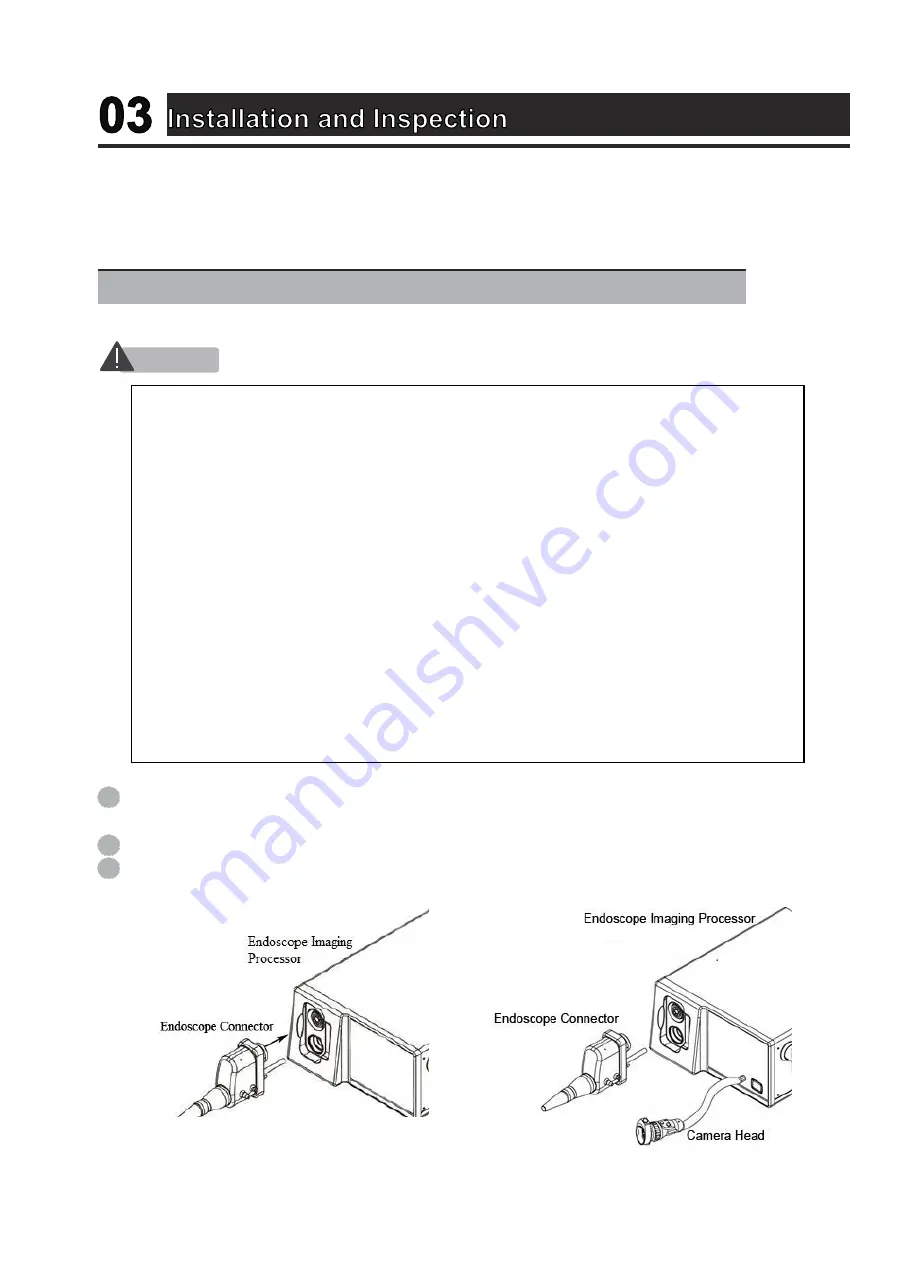
Firmly insert the endoscope connector or camera head (for rigid endoscopes) into the output socket or
OTV connector of the endoscope imaging processor as shown in the Figure 3.1.1.
a.VET-OR1200HD, VET-OR1200HD-Li
b.VET-OR1200R
Figure 3.1.1 Connection of the endoscope and imaging processor
3.1 Endoscope imaging processor installation and connection
CAUTION
1
2
3
⚫
Do not place any object on the top of the endoscope imaging processor. Otherwise,
damage to the equipment may result.
⚫
Do not cover or block the ventilation grills of the endoscope imaging processor. Ventilation
grills blockage will overheat and cause damage to the device.
⚫
Ensure reliable grounding. Power supply requirements:
−
Users need to provide 100-240V AC and 50/60 Hz power supply; if the voltage is not
stable, automatically regulated power supply must be provided (over 1000W, residential
used voltage regulator shall not be used.) Contact AOHUA for any questions. The same
voltage regulator cannot be shared with other electrical products with large electricity
consumption.
−
The user has to provide the power supply with reliable and safe grounding.
−
For frequent power outage regions, UPS (Uninterruptible power supply) is
recommended to use to ensure the normal operation of this system. Connect the power
cord of the endoscope imaging processor with the power supply input inlet of the UPS.
⚫
Turn OFF all system components before connecting them. Otherwise, equipment may be
damaged.
Summary of Contents for VET-OR1200HD
Page 1: ......


