background image

3  Prerequisite Tasks 

(1) Configure the PC to obtain an IP address and DNS server address(es) automatically. 
(2) Check the proxy server. If the PC uses the proxy server to access the Internet, you 
must disable the proxy service. 
(3) Run the Web browser and enter 

http://192.168.1.1

 (default IP address of the LAN 

port of the DR814Q) in the address bar of the browser. 

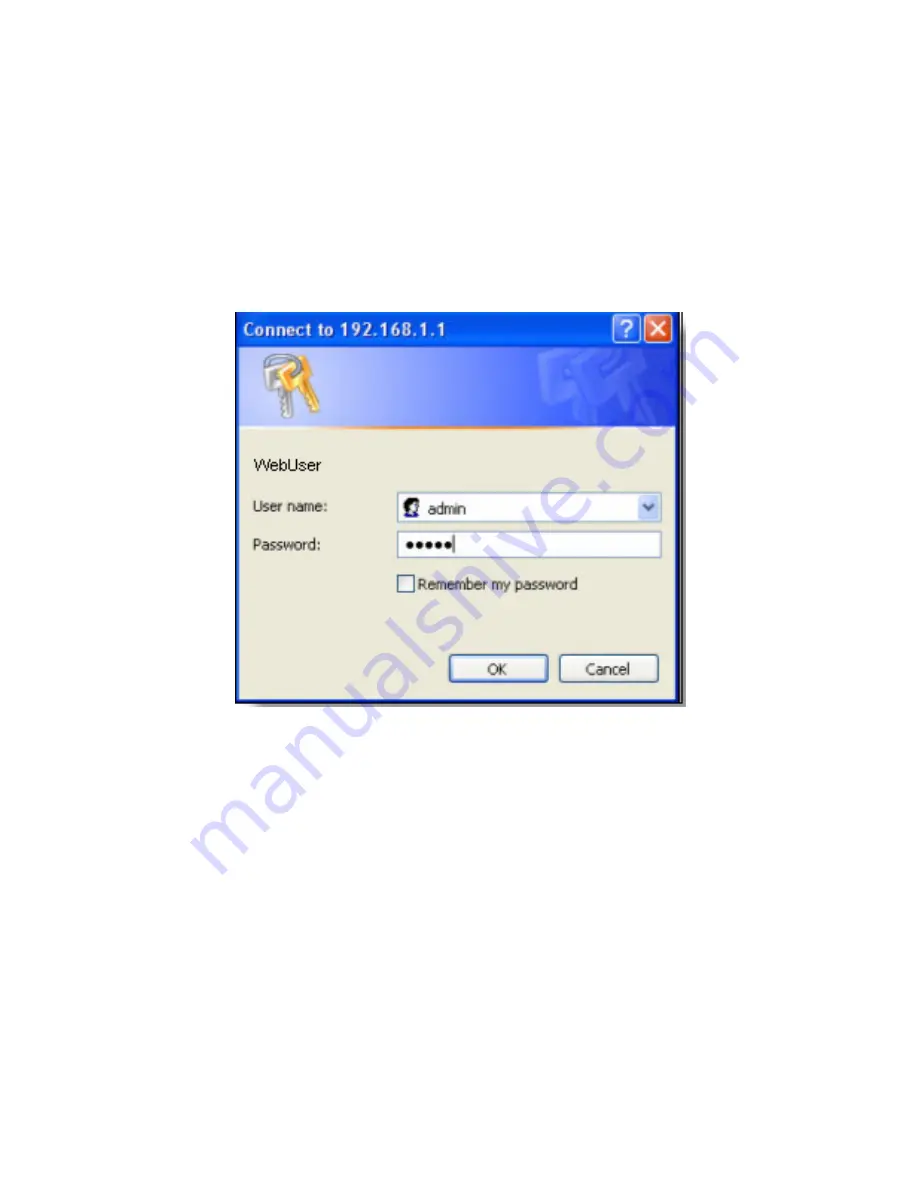
(4) The login dialog box appears, as shown in Figure 2. Type in the default username 
(admin) and the password (admin), and then click <OK>. You can change the password 
after entering the Web configuration page. 


Figure 2  

Type in the username and password 


Note: 1. The DR814Q provides the automatic dialing function, thus the dialing 

software (PPPoE dialing software, for example) provided by the operation 
system or other client dialing software is not needed and can be uninstalled. 

2. Only English input is supported by the DR814Q. 


4  Configuration Guidelines 

After you log into the Web configuration page, follow those simple steps to finish the quick 
setup of the DR814Q: 

Summary of Contents for DR814Q

Page 1: ...gh to hold the DR814Q Fix the DR814Q and power adapter well on the wall when wall mounting it z Reserve more than 10 cm 4 in of clearance around the DR814Q chassis for heat dissipation z Wire the port cable indoors Outdoor cabling is prohibited to prevent the signal port from damages that may be caused by overvoltage and overcurrent from lightning strike 2 2 Device Connection I Connect to an ADSL ...

Page 2: ... adapter 1 Attach one end of the included power adapter to the DR814Q and the other end to the power socket 2 Approximately one minute after the power on of the DR814Q the states of the LEDs on the front panel should be those listed in Table 1 Table 1 LED description LED State Description Power ON The power is ON and the operation is normal Link ON The ADSL link is normal Act Blinking Data is bein...

Page 3: ... 2 Type in the default username admin and the password admin and then click OK You can change the password after entering the Web configuration page Figure 2 Type in the username and password Note 1 The DR814Q provides the automatic dialing function thus the dialing software PPPoE dialing software for example provided by the operation system or other client dialing software is not needed and can b...

Page 4: ...e the username and password required for the dial up connection which are provided by your ISP and then click Apply Figure 3 Quick Start PPPoE Login To access a network by DHCP in which case the IP address can be automatically obtained from your ISP s DHCP server Select the DHCP option type in the VPI VCI value specified by your ISP and then click Apply Figure 4 Quick Start DHCP Login 4 ...

Page 5: ... replaced the previous 0 0 0 0 indicating that the DR814Q has connected to a network Figure 5 Status III Save configuration Click Save Config in the navigation bar to enter the Save configuration page Click Save to save the configuration you have made Figure 6 Save configuration Note For more details of installation and advanced configuration refer to the user manual in the CD In addition you can ...

Page 6: ...d to the ADSL port on the DR814Q and the telephone port respectively The Web configuration page cannot be accessed Make sure that z The LAN LED is ON z The proxy service has been disabled z The PC and the DR814Q are in the same network segment z You can ping the IP address of the LAN port on the DR814Q 192 168 1 1 successfully The login password is forgotten The default username and password are b...

Reviews: