69
A
A
X
X
4
4
T
T
I
I
I
I
-
-
5
5
3
3
3
3
/
/
A
A
X
X
4
4
T
T
I
I
I
I
-
-
5
5
3
3
3
3
N
N
O
O
n
n
l
l
i
i
n
n
e
e
M
M
a
a
n
n
u
u
a
a
l
l
P
P
h
h
o
o
e
e
n
n
i
i
x
x
-
-
A
A
W
W
A
A
R
R
D
D
B
B
I
I
O
O
S
S
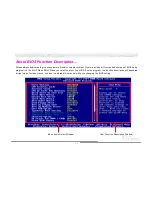
System parameters can be modified by going into BIOS Setup menu, this menu allows you to configure the system parameters
and save the configuration into the 128 bytes CMOS area, (normally in the RTC chip or in the main chipset).
The AwardBIOS™ that installed in the Flash ROM of the motherboard is a custom version of an industry standard BIOS. The
BIOS provides critical low-level support for standard devices such as hard disk drives, serial and parallel ports.
Most BIOS settings of AX4T II-533 / AX4T II-533N has been optimized by AOpen’s R&D engineering team. But the default
setting of BIOS still can’t fine-tune the chipset controlling entire system. Therefore this chapter aims to guide you through the
process of configuring your system using setup.
Currently there are two kinds of beep sound when system fails booting at POST. The first type of beep sound consists of a
single long beep and two short beeps, indicating a video error has failed BIOS from initializing video screen for displaying any
additional information. The 2
nd
type of beep sound is a single long beep that beeps repeatedly, signaling a DRAM error has
occurred. You may look over the indicated error according to different beep significances.
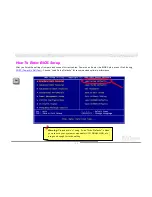
To enter to BIOS setup menu, press <Del> when POST (Power-On Self Test) screen is shown on your monitor.
Note: Because the BIOS code is the most often
changed part of the motherboard design, the BIOS
information contained in this manual may be
different with actual BIOS that come with your
motherboard.


