


27
4-6.
收銀機
(RJ-11)
軟體配置
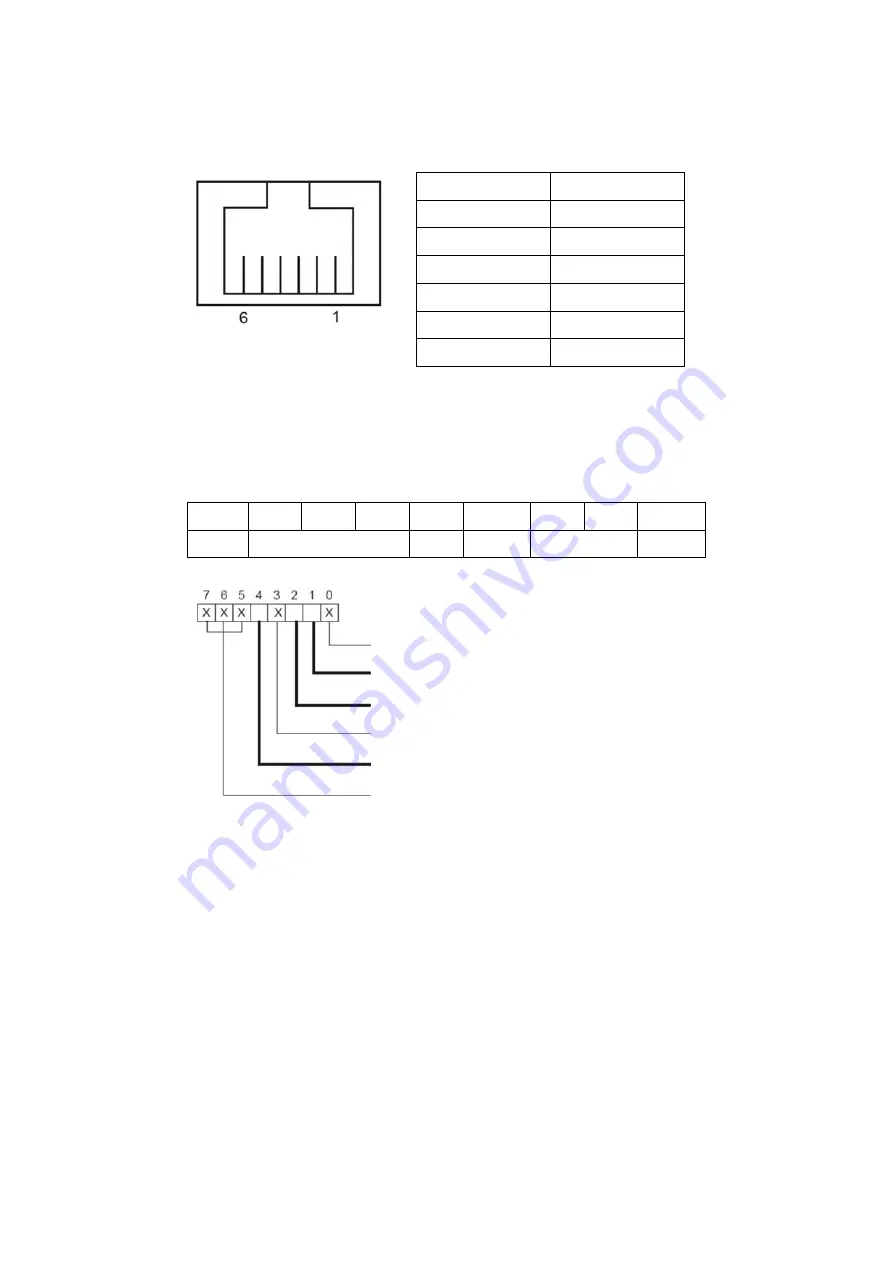
您可以透過收銀機連接埠來安裝收銀機,安裝前請先行檢視連接頭的針腳位置。
收銀機連接頭針腳位置
Pin Signal
1 GND
2 DOUT
bit0
3 DIN
bit0
4
12V / 24V
5 DOUT
bit1
6 GND
收銀機控制器登入
收銀機控制器使用一組輸入
/
輸出位址來控制收銀機
屬性
:
讀
/
寫
尺寸
:
8
位元
BIT BIT7
BIT6
BIT5 BIT4 BIT3 BIT2
BIT1 BIT0
Attribute Reserved Read
Reserved
Write
Reserved
Reserved
Cash Drawer "DOUT bit1" pin output control
Cash Drawer "DOUT bit0" pin output control
Reserved
Cash Drawer "DIN bit0" pin input status
Reserved
Summary of Contents for WARM TOUCH WT19M-RH
Page 1: ...1 WARM TOUCH WT19M RH WT19M RHI 技術手冊 ...
Page 12: ...12 Note 本產品僅限橫放使用 轉成直式或其他角度時請洽經消 商 2 系統視圖 2 1 前視圖 ...
Page 13: ...13 1 觸控式螢幕 2 IR 接收器 and LED 說明 2 2 後視圖 3 麥克風接口 4 硬碟門蓋 5 掛架螺絲孔 6 通風孔 ...
Page 15: ...15 2 4 尺寸 面板尺寸 系統尺寸 WT19M RH 495 6 W x 292 2 H x 16 35 D typ 532x332x60mm WxHxD ...
Page 16: ...16 3 系統組裝 3 1 硬碟置換 1 請轉至系統背面 2 在系統背面拆卸一顆螺絲打開硬碟背蓋 Õ ...
Page 18: ...18 ...
Page 22: ...22 4 3 互動式媒體資訊站支架組裝 ...
Page 23: ...23 ...
Page 24: ...24 Tickness 68 3mm 4 4 無線網路安裝 連接至外部天線 ...
Page 26: ...26 3 在硬碟槽上將 CF 卡裝上 SATA 橋接板 鎖上 3 顆螺絲 4 置換 CF 卡時只要將 CF 卡從橋接板中取出即可 5 反向操作一遍至第一步驟蓋上硬碟門蓋 ...
Page 35: ...35 6 跳線設定 6 1 對於 Huronriver 主機板 6 1 1 主機板置換 ...
Page 36: ...36 6 1 2 輸入 輸出板置換 6 1 3 跳線設定 RJ50 DB9F 系列傳輸線 ...


