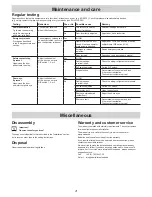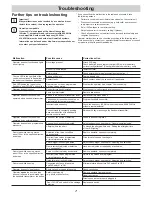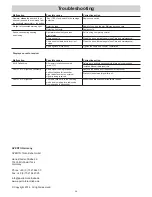
Installation
13
HM
II
II
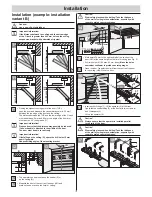
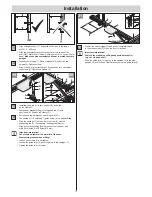
• Align ceiling bracket (1). The position should be in the range
of (W = 0…600 mm).
• Align the operator horizontally to the rear of the centre of the
door (HM). Mark the drill holes. Drill two holes (Ø 10 x max. 65 mm
deep).
Make the holes somewhat shallower in prefab concrete
garages.
• Insert anchor
fi
ttings (1). Place U-washers (3) under the two
screws (2). Tighten screws.
• Align C-track (4) at correct height. If required by this, reposition
the screws (5). Tighten the screws (5).
2
3
5
4
3
N
1
19
2
7
3
6
5
1
N
20
4
8
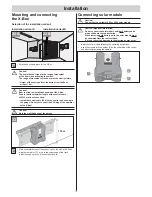
• Installing push rod (1): insert long bolt (2) and slide
on the clamp (3).
• Fasten door bracket
fi
tting (4) to the push rod (1) with
short bolts (5). Slide on the clamp (3).
• Pull once on the emergency unlocking cord (N).
The carriage (1) is unlocked. Tighten screw (8) on header
fi
tting.
• Slide the carriage (1) all the way to the front (3) with the
connecting rod (2). If necessary, loosen guide idler (4).
• Align door bracket
fi
tting (5) with the centre of the door and
mark 5 drill holes. Drill 5 holes (Ø 5 mm).
Important information!
Use screws suitable for the material of the door.
Wear safety glasses when drilling!
• Insert 5 hex screws (6) and tighten.
• Loosen the guide idler (4) push it right up to the carriage (7).
• Tighten the guide idler (4) screw.
4
N
1
2
6
max.30°
4
5
3
21
• Loosen the switch-trigger (1) and push it completely back
to the stop position (2). Open the door (3) by hand.
Important information!
Shorten the protruding ceiling suspension bracket (4)
(e.g. cut off and debur).
• Push the guide idler (1) right up to the carriage (5) to the stop
position (6) until it clicks. Tighten the screw on the guide idler (1).
17
18
19
20
21


