12
English
13
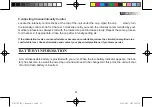
1. Prepare the Skin
Prepare.the.skin.as.previously.discussed.and.according.to.instructions.provided.with.your.electrodes..
Before.attaching.the.electrodes,.identify.the.area.in.which.your.physician/practitioner.has.recommend-
ed.for.electrode.placement.
2. Connect lead wires to the electrodes
Connect.the.lead.wires.to.the.electrodes.before.applying.the.electrodes.to.the.skin.
Note: Be sure both intensity controls for Channel 1 and 2 are turned to the “OFF” position.
3. Place Electrodes on Skin
Place.the.electrodes.on.the.skin.as.recommended.by.your.clinician.
4. Insert Lead Wire Connector to device
Plug.end.of.lead.wire.into.the.channel.output.receptacle.to.be.used,.pushing.plug.in.as.far.as.it.will.go.
5. Select Treatment Settings
Check.and.be.sure.your.unit.is.set.to.the.proper.settings.as.recommended.by.your.physician/practi-
tioner.
CONNECTING THE DEVICE
DIGI STIM_3 languages .indd 12
2013/2/23 AM 09:12:15
Summary of Contents for DIGI-STIM
Page 1: ...Model GM320T SD TENS DIGI STIM_3 languages indd 1 2013 2 23 AM 09 12 12 ...
Page 27: ...25 English DIGI STIM_3 languages indd 25 2013 2 23 AM 09 12 16 ...
Page 53: ...Español 51 DIGI STIM_3 languages indd 51 2013 2 23 AM 09 12 18 ...
Page 77: ...Português 75 DIGI STIM_3 languages indd 75 2013 2 23 AM 09 12 20 ...
Page 80: ...Português 78 DIGI STIM_3 languages indd 78 2013 2 23 AM 09 12 20 ...


