background image


Unpacking the Appliance 

 
Remove the appliance from the box and remove protective packaging from the appliance. 
 
Place the packaging inside the box and store or dispose of safely. 
 
 
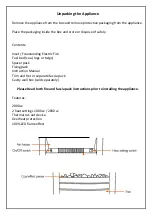
Contents: 
 
Inset / Freestanding Electric Fire 
Fuel bed (coal, logs or twigs) 
Spacer pack 
Fixing pack 
Instruction Manual 
Trim and fret or separate fascia pack. 
Cavity wall box (sold separately) 
 

Please Read both fire and fascia pack instructions prior to installing the appliance. 


Features: 
 
2000 w 
2 heat settings 1000 w / 2000 w 
Thermal cut-out devise 
Overheat protection 
100% LED flame effect 


Summary of Contents for Lux Arcus

Page 1: ... Fire Please ensure you read both the Fire and the Fascia instructions before installation is started Installation and User Instructions Please read all of the instructions carefully and retain for future reference Edition A 08 15 ...

Page 2: ...ser maintenance Children should be supervised to ensure thatthey do not playwith the appliance This appliance is notatoy Thisappliancecontains nouserserviceable parts Ifthe powersupply cord plugor any partofthe appliance is malfunctioning or ifithas been droppedordamaged onlyaqualifiedelectricianshouldcarryoutrepairs Improperrepairs mayplacethe useratriskofharm Keep the appliance and its power sup...

Page 3: ...ethatwill switch the appliance on automatically as there is a risk of fire if the heater is covered or positioned incorrectly Do notcleanthe appliance with abrasive chemicals or materials such as scourers as they may damage the appliance andimpair future function The appliance should be used on astable heatresistantsurface The appliance must notbe located immediately below or nextto a mains power ...

Page 4: ...of this appliance can become very hot and cause burns particular attention has to be given where children and vulnerable people are present Caution Hotsurface Donottouchthehotsection orheating components of the appliance S 6891 BS 8303 Failure to comply with these regulations could lead to prosecution and deem the warranty Invalid This appliance must be installed in accordance with the rules in fo...

Page 5: ...Contents Inset Freestanding Electric Fire Fuel bed coal logs or twigs Spacer pack Fixing pack Instruction Manual Trim and fret or separate fascia pack Cavity wall box sold separately Please Read both fire and fascia pack instructions prior to installing the appliance Features 2000 w 2 heat settings 1000 w 2000 w Thermal cut out devise Overheat protection 100 LED flame effect ...

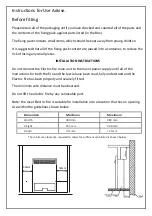
Page 6: ... Do not connect the Electric fire main unit to the mains power supply until all of the instructions for both the fire and the fascia have been read fully understood and the Electric fire has been properly and securely fitted The minimum safe distance must be observed Do not lift the electric fire by any removable part Note the Inset Electric fire is suitable for installation into a location that h...

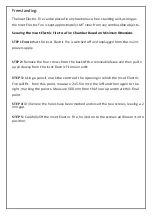
Page 7: ...TEP 2 Remove the four screws from the back of the removable fascia and then pull h up and away from the Inset Electric Fire main unit STEP 3 Using a pencil mark the centre of the opening in which the Inset Electric Fire will fit from this point measure 215 5 mm to the left and then again to the right marking the points Measure 560 mm from the floor up and mark this final point STEP 4 Drill where t...

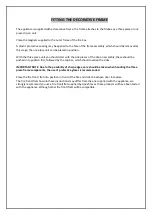
Page 8: ...p on assembly these should be pushed into position first followed by the top bar which should overlap the sides IMPORTANT NOTE Due to the possibility of sharp edges care should be taken when handling the three piece frame components the use of protective gloves is recommended Place the fire front fret into position in front of the fire and slide the ashpan door into place The fire front fret shown...

Reviews: