AEx-8XXP(H) Series User Manual
4
Notice
1.
Under certain extreme circumstances, the label may generate an
ignition-capable level of electrostatic charge. Therefore the equipment shall not
be installed in a location where the external conditions are conducive to the
build-up of electrostatic charge on the label. In addition, the label shall only be
cleaned with a damp cloth.
2.
Warning – in locations where high external humidity and internal temperature
variations (e.g. frequent on-off cycles) may cause condensation inside the
equipment, the interior should be periodically inspected.
3.
When the device is mounted in a hazardous area, connection and
disconnection of external connectors while live is only permitted if the potentially
explosive atmosphere is shown to be absent.
4.
The “9-36” Vdc rated supply shall be protected such that transients are limited
to a maximum of 119 V; no such protection is required for the signal lines.
5.
Equipotential bonding facilities on the outside of enclosure are assessed as
providing effective connection of a conductor with a cross-sectional area of at least
4 mm2, 10AWG, 600V wire
6. The equipment is suitable for use in class I, division 2, groups A, B, C, D OR
non-hazardous locations only.
7.
Warning- Do not use USB while the circuit is live unless the area is known to
be non-hazardous.
Markings
ATEX and markings, applied to the AEx-8XXP(H) Series Graphic Operator Interface,
are as follows:
AEx-8XXP(H) Series
WARNING: Do not disconnect while circuit is live. Potential
electrostatic charges. Wipe the front panel of the terminal with a
damp cloth before turning on.
II 3G Ex nA ic IIC T4 Gc and CID2 IP66
Temperature < 135°C
Power Input Voltage: DC 9~36V
TUV 15 ATEX 7701 X
IECEx TUR 16.0008X
Summary of Contents for AEx-815P
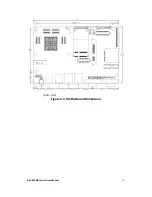
Page 17: ...AEx 8XXP H Series User Manual 16 units mm Figure 2 1 Motherboard Dimensions ...
Page 52: ...AEx 8XXP H Series User Manual 51 Step 5 Click Finish to exit the wizard ...
Page 55: ...AEx 8XXP H Series User Manual 54 Step 5 Click Next to continue Step 6 Click Next to continue ...
Page 63: ...AEx 8XXP H Series User Manual 62 Step 5 Click Finish to complete the installation ...
Page 67: ...AEx 8XXP H Series User Manual 66 Step 6 Click Finish to complete the installation ...


