VITAM-9XXA Series User Manual
24
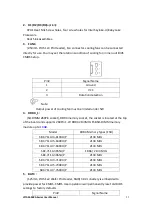
Pin1
Ground
PIN2
VBAT
Procedures of CMOS clear:
a) Turn off the system and unplug the power cord from the power outlet.
b) Remove the lithium battery connection from BAT3 for 10 seconds, and then
connect it.
c) Power on the system again.
d) When entering the POST screen, press the <ESC> or <DEL> key to enter CMOS
Setup Utility to load optimal defaults.
e) After the above operations, save changes and exit BIOS Setup.
6. S_1 (PIN1):
(Switch), ATX Power and Auto Power on jumper setting
.
S-1(Switch)
Mode
Pin1
(
Off
)
ATX Power
Pin1
(
On
)
Auto Power on (Default)
7. BAT2:
(2.0mm Pitch 1x10 Wafer Pin Header), smart battery Interface.
Pin#
Signal Name
Pin1
VCC_BAT1
Pin2
VCC_BAT1
Pin3
VCC_BAT1
Pin4
SMB_DAT_SW
Pin5
SMB_CLK_SW
Pin6
BAT1_TEMP
Pin7
Ground
Pin8
Ground
Pin9
Ground
Pin10
SET_BAT1_ON
Function
Specifications
Nominal voltage (3S1P)
11.1~12.6V
Charge voltage
12.6V
Charge current
0.5C
Summary of Contents for VITAM-9 A Series
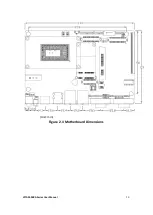
Page 21: ...VITAM 9XXA Series User Manual 20 Unit mm Figure 2 1 Motherboard Dimensions ...
Page 106: ...VITAM 9XXA Series User Manual 105 the installation Step4 Click Next to continue ...
Page 107: ...VITAM 9XXA Series User Manual 106 Step5 Click Finish to complete the installation ...
Page 112: ...VITAM 9XXA Series User Manual 111 Step10 Click Finish to complete the installation ...
Page 116: ...VITAM 9XXA Series User Manual 115 Step6 Click Finish to complete installation ...

