background image

Summary of Contents for TF140 Series

Page 1: ......

Page 2: ...Setting Alert 11 Pager On Off 13 Setting Auto Sleep 14 Setting Alarm 15 Setting Time And Date 16 Setting Scroll 17 Setting Zoom In or Zoom Out 18 Reading Mail Drop 19 Moving The Cursor 20 Reading Personal Message 21 Reading Full Message 22 Backlighting Duplicate 23 Error Message Battery Gauge 24 Set Mail Drop Alert 25 Set Mail Drop History 26 Back Up Batteries 27 Connector 28 Relay Output Data Out...

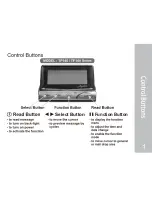
Page 3: ...Function Button Select Button ...

Page 4: ......

Page 5: ......

Page 6: ......

Page 7: ...p shows on screen by flashing Press or to preview the message Press to display your message Press again to view the next screen X X Receiving And Reading Your Message Reading Your Message 5 H If you have set Auto Scroll your pager will scroll through your message screen by screen automatically ...

Page 8: ......

Page 9: ...Press or to move the cursor to select the message to unlock Press then press or to MESSAGE UNLOCK Mode Press to unlock the message X X ...

Page 10: ...ges Press or to move the cursor to select the message you desire Press to read the message Press press or to display MESSAGE DELETE Mode When MESSAGE DELETE is displayed on the screen press to delete the message X X ...

Page 11: ...Press press or to DELETE ALL Mode When DELETE ALL is displayed Press all unlocked and read messages are deleted X Deleting All Messages All unlocked and read messages Deleting All Message 9 ...

Page 12: ......

Page 13: ...e to display SET ALERT Mode Press to enable SET ALERT Press to move the cursor to the desired alarm mode Alert Musical Sleep are optional Volume Press or to move to the cursor to the desired tone or music Press setting the alert is completed X X X X 11 ...

Page 14: ...The or symbol is displayed when the message receiver is in the audible or musical mode When the cursor is moved to the symbol press or to control the volume X ...

Page 15: ......

Page 16: ... Mode Press to select open or close symbol or and adjust the digits press or for moving the cursor Press setting auto sleep mode is completed The screen returns to stand by status is displayed when the Auto Sleep mode is set The enable symbol indicates your pager is under auto sleep mode X X X X X ...

Page 17: ......

Page 18: ......

Page 19: ......

Page 20: ...ss or to ZOOM IN symble Then press to confirm The letters on screen enlarge and become two lines for reading Or press or to move the cursor again to ZOOM OUT symble and press to complete The letters on screen change back to four lines X X X ...

Page 21: ...Press twice to move the flashing icon in the second row Press to read message or press or to move the icon to the desired Mail drop X H The feature allows 14 sets Mail Drop ...

Page 22: ...indicating the present position of the message you are going to read Press the screen shows UP OR ESCAPE Press once the flashing icon can be mored to the top row or the second row such as MAIL DROP AREA or MESSAGE AREA Press the pager returns to standby mode X X X ...

Page 23: ......

Page 24: ......

Page 25: ......

Page 26: ......

Page 27: ......

Page 28: ......

Page 29: ...27 ...

Page 30: ...Connector NOTE DC input power is protected by Fuse 1A 250V Antenna For TP101 TF101 only DC Power Programming Relay Output Option ...

Page 31: ...8 RTS 7 CTS 6 NC 5 GND 4 NO 3 RXD 1 COM 2 TXD ...

Page 32: ...762 00046 0 ...

Reviews:

Related manuals for TF140 Series