background image


Copyright 2014 Applied Logic Engineering, Inc.  All rights reserved. 
 
Statement of Liability 
 

Our products and services are provided "as is" without warranty of any kind, either expressed 
or implied unless otherwise stated. In no event shall Applied Logic Engineering, Inc. be liable for 
any damages including, but not limited to, direct, indirect, special, incidental or consequential 
damages or other losses arising out of the use of or inability to use our products and services. 


Summary of Contents for NavDive

Page 1: ...1 Diver Navigation System User s Guide ...

Page 2: ...is without warranty of any kind either expressed or implied unless otherwise stated In no event shall Applied Logic Engineering Inc be liable for any damages including but not limited to direct indirect special incidental or consequential damages or other losses arising out of the use of or inability to use our products and services ...

Page 3: ... NavDive for the first time Using NavDive while conducting a dive 9 Saving a position to memory 10 Using the Tracking feature 11 Ending the Dive 12 Advanced Use Saving your Entry Position 14 Navigating to a Target 15 System flowchart 19 Working with NavDive data Accessing NavDive s memory card 20 Using the NavDive Log PC Application 20 Pre Dive 21 Post Dive 22 Appendix A File Formats 27 ...

Page 4: ...t based on work we were doing with marine archeologists who needed to translate GPS coordinates they had acquired during side scan sonar surveys into useable data that could be used to guide divers to specific positions while underwater NavDive easily read the coordinates obtained and gave the diver the ability to select any specific target and swim directly to it even in very poor visibility situ...

Page 5: ...s overhead This information is then converted to a usable format and sent on to the diver s display console every second This unit mounts to the diver s flag float The base of the receiver is magnetic so there are many choices in terms of mounting The receiver is also waterproof but only on the surface DO NOT take the receiver below depths of about a foot it is not designed to be waterproof at dep...

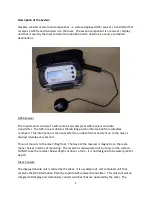
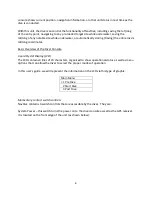
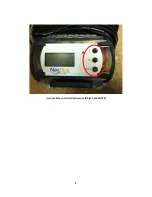
Page 6: ...Overview of the Diver Console Liquid Crystal Display LCD The LCD contains 4 lines of 20 characters organized to show operational status as well as menu options that can allow the diver to select the proper modes of operation In this user s guide we will represent the information on the LCD via this type of graphic Main Menu 1 Pre Dive 2 Start Dive 3 Post Dive Momentary contact switch controls NavD...

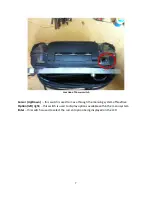
Page 7: ...wn this switch is used to move through the menuing system of NavDive Option left right this switch is used to display options available within the menu system Enter this switch is used to select the current option being displayed on the LCD ...

Page 8: ...8 User interface controls Up Down Left Right and ENTER ...

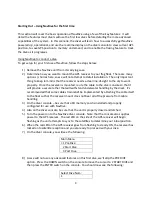
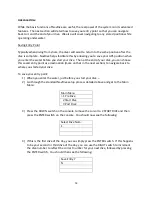
Page 9: ...t will provide a secure tether that will withstand underwater handling by the diver It s recommended that some cable strain relief be implemented by attaching the cable itself to the float so that the receiver mount does not bear all of the pressure from cable handling 3 On the diver console be sure that a SD memory card is installed and properly configured for use with NavDive 4 Also on the diver...

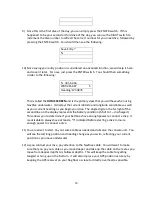
Page 10: ...you begin your dive The single digit on the far right of the second line on the display represents the battery condition 5 full to 1 discharged This allows you to determine if your batteries have enough power to conduct a dive It is advisable to always have at least a 3 indicated before starting a dive to insure enough power to conduct a dive 11 You are all set to start Pay out some cable as neede...

Page 11: ...the RIGHT switch to scroll through the available descriptions that you can select to designate the position to be saved NavDive is preloaded with a number of useful tags i e small wreck large wreck platform geologic etc The last selection in the list is OTHER which can be used if none of the other tags are appropriate 5 Once you have selected the proper tag and it is displayed on the LCD press the...

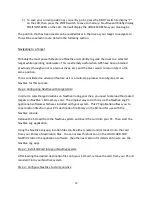
Page 12: ... 3876 4 To disable to tracking feature from the HOME SCREEN press the DOWN switch 3 times The LCD will then show the following Track Position Y 5 Press the RIGHT switch once to change the Y selection on the LCD to N Then press the ENTER switch to turn off tracking NavDive will briefly display a message TRACKING OFF then will return to the HOME SCREEN 6 As a positive indicator that tracking is now ...

Page 13: ...NavDive when then display the Main Menu screen 3 To cancel the END DIVE function press the RIGHT switch to display N on the LCD Then press the ENTER switch NavDive will not terminate the dive and will then display the HOME SCREEN to resume the dive ...

Page 14: ...d entry point as a destination more on that in the next section to navigate back to where you started your dive To save your entry point 1 When you enter the water just before you start your dive 2 Go through the standard NavDive setup process detailed above and get to the Main Menu Main Menu 1 Pre Dive 2 Start Dive 3 Post Dive 3 Press the DOWN switch on the console to move the cursor to 2 START D...

Page 15: ...onfiguring NavDive with target data In order to select target locations on NavDive during your dive you need to preload the desired targets on NavDive s SD memory card The simplest way to do this is via the NavDive Log PC application software which was included with your system This PC application allows you to copy location files from your PC s destination file library on the SD Card for use with...

Page 16: ...e destfilename where destfilename indicates the first destination file that you loaded onto the SD card from the NavDive Log application program You can scroll through the list of all destination files that you loaded by using the LEFT and RIGHT switch 3 Once the correct destination file is chosen and is displayed on the LCD press the ENTER switch The system will then return to the PRE DIVE menu 4...

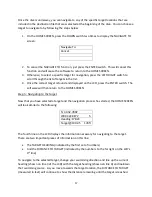
Page 17: ...The software will then return to the HOME SCREEN Step 5 Navigating to the target Now that you have selected a target and the navigation process has started the HOME SCREEN will look similar to the following N 44 32 7892 W093 22 9872 5 Heading 178 23 Target 190 45 178ft The fourth line on the LCD displays the information necessary for navigating to the target There are two important pieces of infor...

Page 18: ... can cancel an active navigation session by following these steps 1 On the HOME SCREEN press the DOWN switch twice to display the NAVIGATE TO screen 2 On the NAVIGATE TO screen just press the ENTER switch when CANCEL is displayed Navigate To Cancel 3 The software will then cancel the navigation session and will return to the HOME SCREEN ...

Page 19: ...19 ...

Page 20: ... to note that to use the Google Earth functions in the NavDIve Log software you must first install Google Earth on your PC and you must have an active Internet connection when using NavDive Log 2 Your PC must have the ability to work with SD Cards If your particular PC does not have this capability built in you can purchase a SD Card reader that plugs into any USB port on your PC These are availab...

Page 21: ...e card with this process Note the SD Card supplied with your NavDive unit is already preformatted and ready to use You only need to use this procedure for new SD Cards that you acquire on your own Create New Location in Library this function allows you to create a new location file that will be added to the library on your PC Note that this file will be blank as no data has been captured for it ye...

Page 22: ...ole and insert it into your PC to View Edit Positions by Location Using this option you can review all waypoints contained in a particular location fie You can view this information in table form or graphically using Google Earth Additionally you can also annotate the record by editing the description for the location saved for example Wooden Wreck After making any changes to the data in the table...

Page 23: ...View Saved Positions by Dive select this option to review the saved positions you created for each dive made You can view the information in a table form or it can be viewed graphically using Google Earth ...

Page 24: ...umn in the data grid to select a particular record Then click on the COPY TO LOCATION button You will then be asked to select a location file in which to save the record in Choose the correct filename and click OK to copy the selected record from the data grid to the location file The record will be appended to the end of the location file s content ...

Page 25: ...tion can be displayed in a table format or can be viewed in Google Earth to allow you to see the exact path you swam during your dive If viewed in the table NavDive Log will show each position saved during the dive Each position is recorded every 10 seconds while the tracking feature was enabled in the NavDive console ...

Page 26: ...26 ...
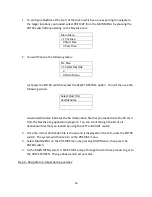
Page 27: ...racking feature The Saved Positions folder contains all of the files saved by NavDive when specific positions are saved during the dive The Descriptions txt file holds all of the text descriptions used when saving a position with NavDive This is a text file that can be edited to add or edit new descriptions as desired When the card is initially formatted the Destinations Saved Paths and Saved Posi...

Page 28: ...W Long coords crlf Example 040913 025111 000 Plane N 4507 5022 W 09326 7368 crlf File structure for Descriptions txt file Filename MUST be Descriptions txt and MUST be located in the root of the SD Card Record format textdescpription crlf Example Platform crlf ...

Reviews: