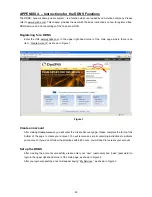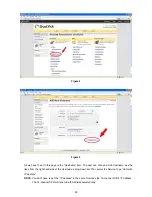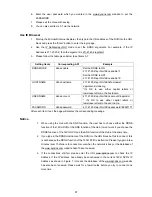
89
APPENDIX 3. – How to
This chapter provides the beginner the basic function settings.
○
m
means press the “menu” button;
○
e
means press the “enter” button.
○
>
means press the “>” (right) button;
○
v
means press the “v” (down) button.
×
1
means press the button once,
×
2
means twice,
×
3
means thrice, and so on.
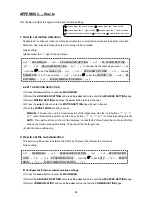
1. How to set motion detection
Scheduled or continuous video recording by all cameras, or selected cameras set to activate to motion
detection. User may select specific area of coverage to be recorded.
Quick setting:
(please follow the “
→
” sign to the next step.)
○
m
×
1
→
MAIN MENU
→
○
v
×
5
→
#6 ADVANCED SETTING
→
○
e
×
1
→
#1 ALARM SETTING
→
○
e
×
1
→
○
v
×
7
→
#8 ALARM INPUT LINK
→
○
e
×
1
→
○
v
to choose the channels as you want
→○
>
×
2
→
turn the
to set the motion ON
→
○
m
×
1
→
○
v
×
1
→
#9 ALARM OUT LINK
→
○
e
×
1
→
choose
ALARM OUT1, 2 or 3 as you want
→
○
>
×
2
→
turn the
to set the MOTION YES
→
○
m
×
4
→
#9
EXIT MENU
→
○
e
×
1
→
#1 EXIT MENU WITH SAVING
→
○
e
×
1
►
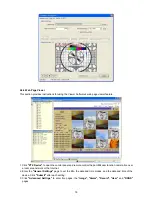
SET THE MOTION DETECTION
(1) Press the
menu
button to enter the
MAIN MENU
.
(2) Select the
ADVANCED SETTING
and press the
enter
button to enter the
ADVANCED SETTING
page
.
(3) Select
MOTION SETTING
and press the
enter
button to select channel.
(4) Press the
enter
button to enter the
MOTION SETTING
page for each channel.
(5) Set the
TARGET ZONE
of each channel.
MANUAL:
The user can use the manual way to set the target area. Use the “call” “^”, “v”, “<”
or “>” to mark the starting point A, and the “seq.” “^”, “v”, “<” or “>” to mark the ending point B.
AUTO:
The user must move in front of the cameras, so that the DVR can detect the motion and fix that
area as the motion area automatically. The area will be the target zone.
(6) Exit the menu with saving.
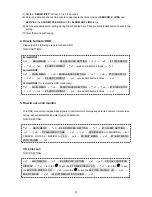
2. How to set the communication
This section outlines how to network the DVRs by LAN over the Internet to a remote pc.
Quick setting:
○
m
×
1
→
MAIN MENU
→
○
v
×
5
→
#6 ADVANCED SETTING
→
○
e
×
1
→
○
v
×
4
→
#5 OPERATION
LOCK
→
○
e
×
1
→
○
v
×
4
→
#5 NETWORK LOCK
→
turn the
to set it OFF
→
○
m
×
3
→
#9 EXIT
MENU
→
○
e
×
1
→
#1 EXIT MENU WITH SAVING
→
○
e
×
1
►
Configure the Ethernet communication settings
(1) Press the
menu
button to enter the
MAIN MENU
.
(2) Select the
ADVANCED SETTING
and press the
enter
button to enter the
ADVANCED SETTING
page.
(3) Select
COMMUNICATION
and press the
enter
button to enter the
COMMUNICATION
page.
Summary of Contents for DVR-3016, DVR-3016D
Page 2: ......
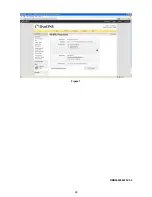
Page 100: ...98 Figure 7 RMN040200255 V5 2 ...


