26
4.4.2 USB Flash Memory Backup Operations
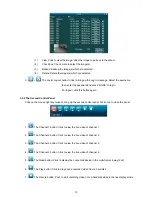
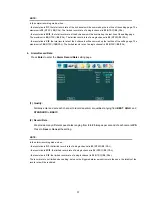
The USB port of the front unit has three functions as shown below:
4.4.2.1 Archive Single image Clips into the USB Flash Memory
Please take the following steps to archive a critical image in a USB flash memory.
(1) Insert a USB flash memory into the USB port of the front unit. You’ll hear a signaling
beep to tell you the disc is ready.
(2) Start playing back the recorded video.
(a)
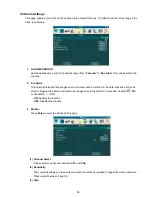
Click the right mouse key to bring up the Playback Control Panel.
(b)
Click the Snapshot
icon to have the screen capture in the playback mode.
(c)
Click the right mouse key to bring up the Playback Control Panel.
(d)
Click the right mouse key to bring up the Main Control Panel.
(e) Click
the
Album icon to enter the Album page. Select the still image(s) you
want then click the Backup item to start to backup the image(s) into the USB
device.
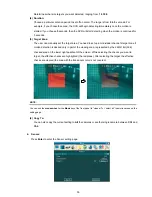
(3) Or, you can also have the snapshot in the live/ record mode.
(a)
Click the right mouse key to bring up the Main Control Panel.
(b)
Click the Snapshot
icon to have the screen capture in the live/ record mode.
(c)
Click the right mouse key to bring up the Main Control Panel.
(d) Click
the
Album icon to enter the Album page. Select the still image(s) you
want then click the Backup item to start to backup the image(s) into the USB
device.
NOTE:
The quantity of pictures that can be stored depends on the USB flash memory capacity. How many pictures
can be stored depends on the USB flash memory capacity. You can have the saved images printed out in
any computer. The image is stored in the JPEG compressed format.
4.4.2.2 Archive Video Clips into a USB Flash Memory
Please take the following steps to archive a critical video in a USB flash memory.
(1) Insert a USB flash memory into the USB port of the front unit. You’ll hear a signaling
beep to tell you the disc is ready.
(2) Start playing back the recorded video.
(3) Press
the
Play
button or click on the mouse right key to bring up the mouse control
panel, and press the
icon by clicking the left mouse button.
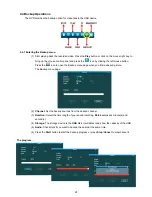
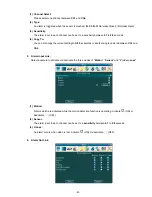
(4) Press
the icon to open the Backup menu page when you find a desired picture.
(5) Set the backup sources from which channel.
(6) Select the time length of your saved recording.
(7) Checkmark if you want to backup the audio at the same time.
(8) Press
the
Start
button to start the backup progress.
(9) The image is stored in the
AVI
compressed format.
NOTE:
The quantity of video that can be stored depends on the USB flash memory capacity. The image is stored
Summary of Contents for DVR-3254S
Page 2: ......
Page 74: ...72 Figure 7 Verifying IP Address of DVR RMN0400372 V1 2 ...


