12 Copyright © Apricorn, Inc., 2000-2007
Chapter 3. General information
3.1 What is disk/partition image?
Backing up disks and partitions is performed in a following way: Apricorn EZ Gig II stores a
sector-by-sector snapshot of the disk, which includes the operating system, registry, drivers,
software applications and data files, as well as system areas hidden from the user. This
procedure is called “creating a disk image,” and the resulting backup archive is often called a
disk/partition image.
Apricorn EZ Gig II stores only those hard disk parts that contain data (for supported file
systems). Further, it does not back up swap file information (pagefile.sys under Windows
NT/2000/XP) and hiberfil.sys (a file that keeps RAM contents when the computer goes into
hibernation). This reduces image size and speeds up image creation and restoration.
A partition image includes all files and folders independent of their attributes (including
hidden and system files), boot record, FAT (file allocation table), root and the zero track of
the hard disk with master boot record (MBR).
A disk image includes images of all disk partitions as well as the zero track with master boot
record (MBR).
By default, files in all Apricorn EZ Gig II archives have a “.tib” extension.
It is important to note that you can restore files and folders from disk/partition images, too.
To do so, mount the image as a virtual disk (see
Chapter 9. Exploring archives and
mounting images
) or start the image restoration and select Restore specified files or
folders.
3.2 Full backups
Apricorn EZ Gig II can create full backups.
A full backup contains all data at the moment of backup creation.
A standalone full backup might be an optimal solution if you often roll back the system to the
initial state (like in a gaming club or Internet café, to undo changes made by the guests). In
this case, you need not re-create the initial full image, so the backup time is not crucial, and
the restore time will be minimal.
3.3 Viewing disk and partition information
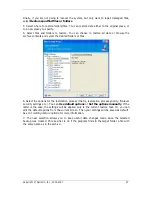
You can change the way data is represented in all schemes you see in various wizards.
To the right are three icons: Arrange Icons by, Choose Details and i (Display the
properties of the selected item), the last duplicated in the context menu invoked by
right-clicking objects.
To sort messages by a particular column, click the header (another click will switch the
messages to the opposite order) or Arrange Icons by button and select the column.
To select columns to view, right-click the headers line or left-click the Choose Details
button. Then flag the columns you want to display.
If you click the i (Display the properties of the selected item) button, you will see the
selected partition or disk properties window.


