background image

65

use and maintenance  

MX 125

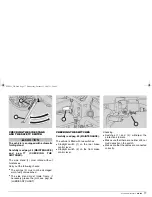
WARNING

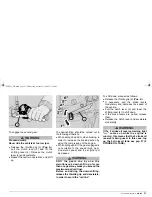
The vehicle may fall down.

Provide for balancing the vehicle, in

order to prevent it from falling down.

Make sure that the vehicle is stable.

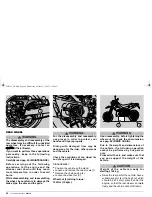
Place a support (5) under the tyre, in such
a way as to keep the wheel in the correct
position after releasing it.

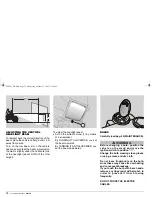
CAUTION

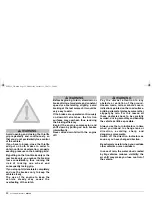
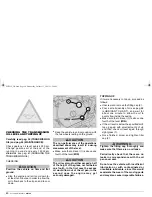
Lower the drive chain (6) outside the

crown gear (7).

WARNING

Do not introduce your fingers between

the chain and the crown gear.

Move the wheel completely forward;
release the drive chain from above,
rotating the rear wheel anticlockwise.

CAUTION

Upon reassembly, introduce the drive

chain from below, rotating the rear

wheel in the travelling direction.

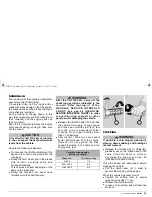
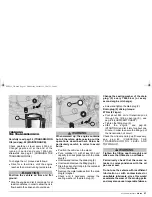
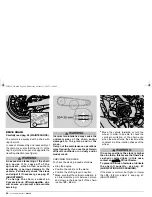
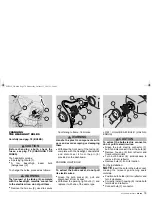
Unscrew and remove the wheel nut (3)
and take the washer (8).

CAUTION

To facilitate the extraction of the wheel

pin, slightly raise the wheel.

Hold the rear wheel and manually
withdraw the wheel pin (9).

CAUTION

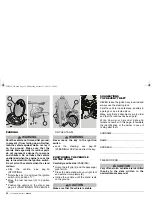
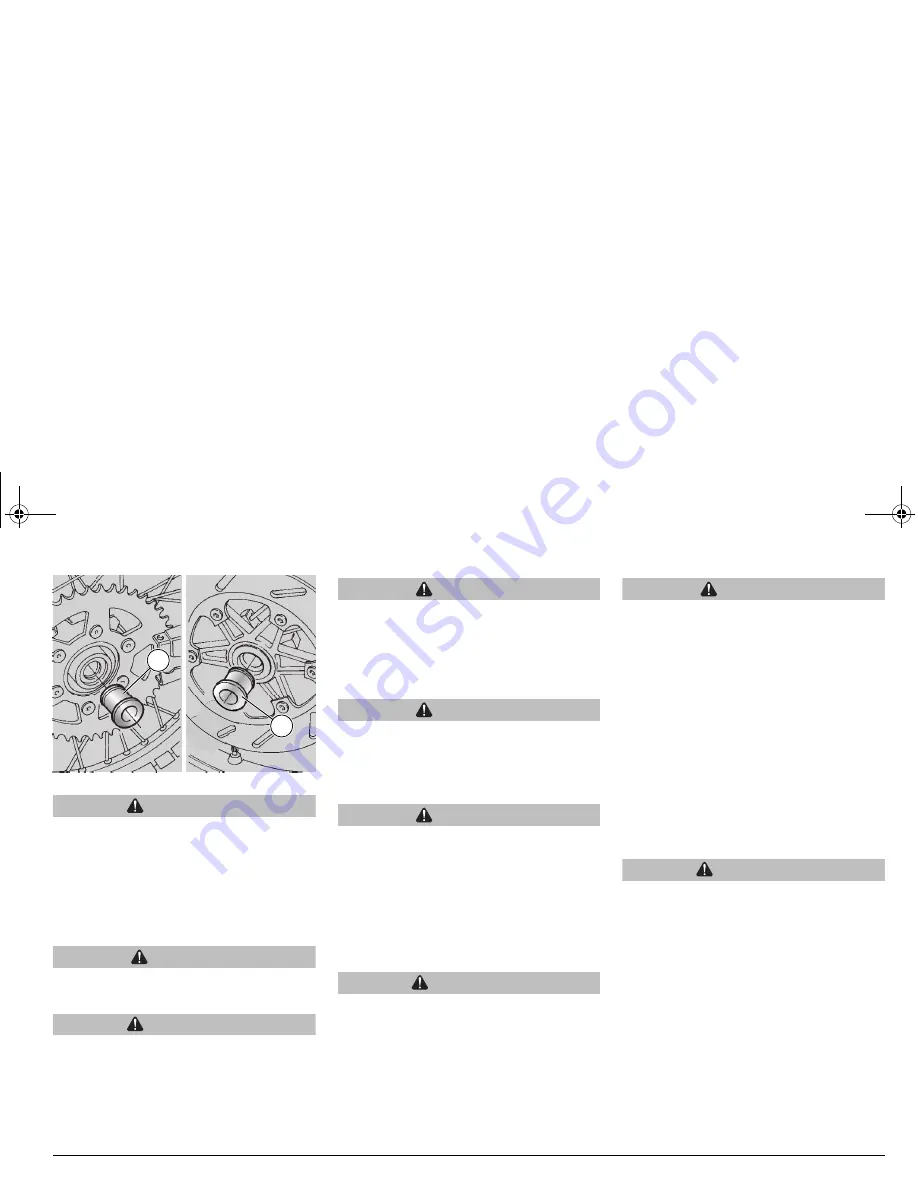
The left (10) and right spacer rings (11)

remain positioned in the respective

seats on the wheel; if they should come

off, reposition them correctly (see

REASSEMBLY).

Withdraw the wheel from the rear fork
from behind, carefully withdrawing the
disc from the brake caliper.

WARNING

Never pull the rear brake lever after

removing the wheel, otherwise the

caliper piston may go out of its seat,

thus causing the outflow of the brake

fluid. In this case consult your 

aprilia

Official Dealer, who will carry out the

proper maintenance operation.

CAUTION

Left (10) and right (11) spacers 

remain

into their seats on the wheels; if they

come off, reposition them correctly 

(see

REASSEMBLY).

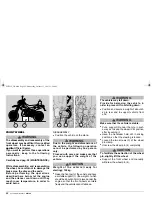
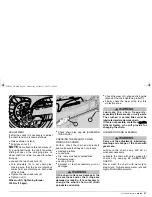
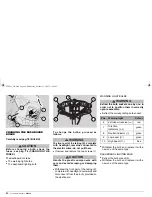
Take the left spacer ring (10).

Take the right spacer ring (11).

Upon reassembly:

Moderately grease the outer seats of the
wheel hub.

Fit the spacer rings (10) (11) with the
longer diameter towards the outside of
the vehicle.

Uniformly apply a moderate quantity of
grease on the wheel pin.

WARNING

After reassembly, pull the rear brake

lever repeatedly and check the correct

functioning of the braking system.

Check the wheel centering.

Have the driving torques, centering and

balancing of the wheel checked by your

aprilia

 Official Dealer, in order to avoid

accidents that may be harmful for you

and/or other people.

Check chain tension.

11

10

MX125_UK.book  Page 65  Wednesday, October 15, 2003  11:24 AM

Summary of Contents for MX 125

Page 1: ...aprilia part 8104766 use maintenancebook MX 125 MX125_S book Page 1 Wednesday October 15 2003 11 04 AM ...

Page 2: ...ANTE en el presente manual precede importantes instrucciones o información INFORMACIONES TÉCNICAS Las operaciones precedidas por este símbolo deben ser repetidas también en el lado opuesto del vehículo De no resultar expresamente descrito los grupos deben ser instalados siguiendo el orden inverso de las operaciones realiza das para el desmontaje Los términos derecha e izquierda se re fieren al pil...

Page 3: ...gor requiere el respeto de normas anticontaminación y antirruido y la realización de comprobaciones periódicas El usuario que utiliza el vehículo en estos países debe dirigirse a un aprilia Concesionario Ofi cial para la sustitución de los componen tes en cuestión con otros homologados para el país correspondiente realizar las comprobaciones periódicas requeridas IMPORTANTE Al comprar el vehícu lo...

Page 4: ... 56 FICHA DE RECONOCIMIENTO 58 DESMONTAJE PANELES LATERALES 58 FILTRO AIRE 59 COMPROBACION NIVEL ACEITE CAMBIO Y RELLENO 60 SUSTITUCION ACEITE CAMBIO 61 RUEDA DELANTERA 62 RUEDA TRASERA 64 CADENA DE TRANSMISION 66 INSPECCION SUSPENSION DELANTERA Y TRASERA 68 SUSPENSION TRASERA 69 COMPROBACION DESGASTE PASTILLAS 70 AJUSTE MANDO ARRANQUE EN FRIO 70 AJUSTE DEL RALENTI 71 AJUSTE MANDO ACELERADOR 71 BU...

Page 5: ...conducción segura CONDUCCI N SEGURA MX125_S book Page 5 Wednesday October 15 2003 11 04 AM ...

Page 6: ...ropiedades particulares La ingestión de algunas medicinas alcohol y sustancias estupefacientes o psicofár macos aumenta notablemente el riesgo de accidentes Asegúrese de que sus condi ciones psico físicas resulten idóneas para conducir y sobre todo tenga mucho cuida do con el cansancio físico y con la somno lencia La mayor parte de los accidentes se debe a la inexperiencia del piloto NO preste NUN...

Page 7: ...ones del firme de la visibilidad etc No choque contra obstáculos que puedan dañar el vehículo o llevar a la pérdida del control del mismo No se quede en la zaga del vehículo que le preceda para aumentar su velocidad PELIGRO Conduzca siempre con ambas manos sobre el manillar y los pies sobre el es tribo o sobre los estribos del piloto según la posición correcta de conduc ción En absoluto evite leva...

Page 8: ... el vehículo ha sufrido un accidente fíje se que no hayan sido dañadas las palan cas de mando los tubos los cables el sis tema de frenado y las partes vitales Eventualmente lleve el vehículo a un Con cesionario Oficial aprilia para que contro le sobre todo el bastidor el manillar las suspensiones los órganos de seguridad y los dispositivos de los que el usuario no consigue valorar su integridad Se...

Page 9: ...rar las características originales del vehículo Evite en absoluto las competiciones con otros vehículos ROPA Antes de empezar a conducir acuérdese de ponerse y de abrocharse siempre y co rrectamente el casco Asegúrese de que esté homologado íntegro de su medida y que tenga la visera limpia Lleve ropa protectora especialmente de colores claros y o reflectantes De tal ma nera puede hacerse visible a...

Page 10: ...s carena dos y los parabrisas de grandes dimensio nes instalados en el vehículo pueden dar lugar a fuerzas aerodinámicas que pueden comprometer la estabilidad del vehículo durante su carrera Compruebe que el equipo esté fijado muy firmemente al vehí culo y que no resulte peligroso durante la conducción No añada ni modifique los dis positivos eléctricos que superen la capaci dad de carga del vehícu...

Page 11: ... ir a chocar contra personas u obstáculos causando la pérdida de control del vehícu lo No transporte ningún tipo de equipaje que no esté fijado firmemente al vehículo No transporte equipaje que sobresalga ex cesivamente del maletero o que cubra los dispositivos de alumbrado y de señaliza ción acústica y visual No transporte animales o a niños sobre el portadocumentos o sobre el maletero No supere ...

Page 12: ...umentos kit herramien tas 6 Portafusibles 7 Manija pasajero 8 Estribo izquierdo pasajero de resorte cerrado abierto 9 Caballete lateral 10 Estribo izquierdo piloto con muelle siempre abierto 11 Tapón de vaciado aceite cambio 12 Palanca mando cambio 13 Tapón de llenado aceite cambio 14 Palanca arranque 1 7 6 5 4 3 2 8 9 13 12 14 10 11 MX125_S book Page 12 Wednesday October 15 2003 11 04 AM ...

Page 13: ... encendido seguro de dirección 8 Tapón radiador líquido refrigerante 9 Radiador derecho líquido refrigerante 10 Claxon 11 Palanca mando freno trasero 12 Estribo derecho piloto con resorte siempre abierto 13 Bomba freno trasero 14 Cadena de transmisión 15 Estribo derecho pasajero de resorte cerrado abierto 16 Enganche para el casco 16 15 3 2 9 8 12 10 13 14 1 4 5 6 7 11 MX125_S book Page 13 Wednesd...

Page 14: ...luces 4 Pulsador ráfagas 5 Retrovisor izquierdo 6 Palanca mando embrague 7 Palanca para el arranque en frío 8 Instrumentos e indicadores 9 Interruptor de encendido seguro de di rección 10 Palanca freno delantero 11 Retrovisor derecho 12 Puño de gas 4 3 1 2 5 6 7 8 9 10 11 12 MX125_S book Page 14 Wednesday October 15 2003 11 04 AM ...

Page 15: ...de 2 Display digital multifunción 3 Luz testigo indicador cambio en punto muerto color verde 4 Luz testigo indicadores de dirección color verde 5 Luz indicadora reserva aceite mezclador color rojo 6 Luz testigo luz larga color azul 1 6 2 3 4 5 MX125_S book Page 15 Wednesday October 15 2003 11 04 AM ...

Page 16: ... significa que el nivel del aceite mezclador está en reserva en este caso restaure el aceite mezclador véase pág 37 DEPOSITO ACEITE MEZCLADOR Luz testigo indicador cambio en punto muerto Se enciende cuando el cambio está en posición de punto muerto Luz testigo indicadores de dirección Centellea cuando está en función la señal de viraje Luz testigo luz larga Se enciende cuando la luz del faro delan...

Page 17: ...corrida 2 distancia par cial recorrida 3 funciones de manteni miento 4 Display central Tiempo de recorrido total y parcial 5 cuentakilómetros parcial 6 Display derecho Velocidad 9 velocidad promedio 7 velocidad máxima 8 y co rriente selector Km mi 10 Selección vehículo KM H MPH Selección de km o mi SPD Velocidad AS Velocidad promedio MS Velocidad máxima TT Cuentakilómetros parcial RT Tiempo de rec...

Page 18: ...ierdo para cambiar la unidad de medida de km a mi KM H a MPH o viceversa Para confirmar presione el pulsador central MODE por aprox 1 5 seg y pase al ajuste del diámetro de la rueda WS ATENCIÓN En cuanto se presiona el pulsador MO DE en el display de la izquierda apare ce el diámetro de la rueda actual y el primer dato destellante MODE KM H MODE M H MODE 55 21 1 MX125_S book Page 18 Wednesday Octo...

Page 19: ...te el pulsador de la izquierda para modificar dicho valor Valor de ajuste 1850 Para confirmar presione el pulsador central MODE por aprox 1 5 seg y pase a la regulación de la hora ATENCIÓN En cuanto se presiona el pulsador MO DE en el display central destella el tipo de visualización de la hora 24h ó 12h MODE 55 11 11 1 KM H MODE 55 11 11 1 KM H MODE 55 19 19 1 KM H MODE MX125_S book Page 19 Wedne...

Page 20: ...derecha para pasar al ajuste minutos Use nueva mente el pulsador de la izquierda para modificar dicho valor Para confirmar presione el pulsador central MODE por aprox 1 5 seg y pase al control lubricación preventiva ATENCIÓN En cuanto se presiona el pulsador MODE en el display de la izquierda destella el símbolo lubricación con el número de in tervenciones preventivas a realizar MODE 12 00 12H MOD...

Page 21: ...pasar al próximo valor Para confirmar presione el pulsador central MODE por aprox 1 5 seg y pase al control mantenimiento preventi vo ATENCIÓN Si la función de control lubricación no se utiliza establezca todos los valores iguales en cero ATENCIÓN En cuanto se presiona el pulsador MO DE en el display de la izquierda destella el símbolo mantenimiento con el núme ro de intervenciones preventivas a r...

Page 22: ...ador izquierdo se modifica el valor del dato Presione el pulsador de la derecha para pasar al próximo valor Para confirmar presione el pulsador central MODE por aprox 1 5 seg y pase al ajuste de la distancia total ODO ATENCIÓN En cuanto se presiona el pulsador MO DE en el display de la izquierda apare ce la inscripción ODO ATENCIÓN Controles a criterio del usuario No con fundirse con los mantenimi...

Page 23: ...a para pasar al próximo valor Para confirmar presione el pulsador central MODE por aprox 1 5 seg y pase al ajuste tiempo de recorrido total ART ATENCIÓN En cuanto se presiona el pulsador MODE en el display central aparece la inscrip ción ART MODE 00 00 1 300 ODO MODE 00 00 1 300 ODO MODE ART 00 00 00 MX125_S book Page 23 Wednesday October 15 2003 11 04 AM ...

Page 24: ...lor del dato Presione el pulsador de la derecha para pasar al próximo valor Para confirmar presione el pulsador central MODE por aprox 2 seg y finali ce las programaciones iniciales MODE ART 00 00 20 MODE ART 00 00 20 MODE 1 DST SPD KM H 11 53 48 0 00 00 0 RT 0 00 MX125_S book Page 24 Wednesday October 15 2003 11 04 AM ...

Page 25: ...ROGRAMACIONES ESTŸNDAR ATENCIÓN Presionando los dos pulsadores exter nos por aprox 2 seg se activa el pro grama de modificación de las PROGRA MACIONES ESTÁNDAR Desde este menú se modifica el diámetro de la rueda la programación de la hora el aviso de lubricación y mantenimiento del vehículo la distancia total recorrida ODO y el tiempo de recorrido total ART El cambio del sistema métrico KM H a MPH...

Page 26: ...la hora y el tiempo de recorrido parcial RT Presionando el pulsador central MODE se pasará a la pantalla B y si se presiona nuevamente a la pantalla C ATENCIÓN Las pantallas B y C permanecerán visua lizadas sólo por 5 seg para luego mostrar nuevamente la pantalla A MODE 1 A DST RT SPD KM H 11 53 48 0 00 0 00 0 0 1 DST 0 MODE A RT SPD KM H 11 53 56 0 00 0 00 0 MODE 1 B DST TT AS KM H 11 53 49 0 00 ...

Page 27: ...uevamente a la pantalla E control lubri cación preventiva ATENCIÓN Las pantallas D y E permanecerán visua lizadas por 5 seg si no se presiona nin gún pulsador para luego mostrar nueva mente la pantalla A MODE 1 DST SPD KM H 11 49 08 7 96 53 30 A RT 30 42 1 MODE 1 SPD KM H 11 49 10 8 02 47 35 D RT 30 44 1 1 SPD KM H 11 49 12 8 04 47 35 E RT 30 46 1 MX125_S book Page 27 Wednesday October 15 2003 11 ...

Page 28: ...ntrol lubrica ción preventiva Presione el pulsador izquierdo para cambiar el valor del dato Presione el pulsador derecho para confir mar dicho valor y pasar al próximo dato Presione la tecla central MODE por aprox 1 5 seg para confirmar los datos relativos a la lubricación preventiva y pa sar a la próxima operación Presione el pulsador izquierdo para cambiar el valor del dato Presione el pulsador ...

Page 29: ... 8 05 54 34 CRON METRO La computadora multifunción está dotada de un sistema de cronometraje que se puede visualizar en la pantalla B como el cuentakilómetros parcial TT Para activar el cronómetro presione el pulsador izquierdo Presione el pulsador central MODE para visualizar la pantalla B Presione nuevamente el pulsador iz quierdo para finalizar el cronómetro MX125_S book Page 29 Wednesday Octob...

Page 30: ...ncia parcial recorrida DST Cuentakilómetros parcial TT Tiempo de recorrido parcial RT Velocidad máxima MS Velocidad promedio AS Presione contemporáneamente por aprox 2 seg el pulsador izquierdo y el pulsador central MODE Aparecerá la pantalla A con los relati vos datos en cero Presione el pulsador central MODE para pasar a la pantalla B y poner en cero los datos Presione nuevamente el pulsador cen...

Page 31: ...seg Presione el pulsador derecho para aumen tar el valor Presione el pulsador izquierdo para dismi nuir el valor Luego de aprox 3 seg el display visualiza la pantalla A con las relativas modificaciones RETROILUMINACI N Presionando la tecla derecha se activa la retroiluminación del display La luz se apaga automáticamente luego de 4 se gundos SUSTITUCI N BATER A Desmonte la cúpula porta faro delante...

Page 32: ...motor Para desactivar el starter vuelva a poner la palanca en su posición inicial 3 INTERRUPTOR INDICADORES DE DIRECCION Desplace el interruptor hacia la izquierda para señalar el giro a la izquierda desplace el interruptor hacia la derecha para indi car el giro a la derecha Apriete el interruptor en el centro para desactivar el indicador de dirección 4 PULSADOR BOCINA Al apretarlo se acciona la b...

Page 33: ...ar la dirección Gire el manillar completamente hacia la izquierda Gire la llave en posición ATENCIÓN Gire la llave y el manillar simultánea mente Presione y gire la llave en sentido anti horario hacia la izquierda y gire despa cio el manillar hasta poner la llave en Extraiga la llave Posición Función Extracción llave Seguro de dirección La direc ción está bloqueada No es posi ble arrancar ni encen...

Page 34: ...m n 1 llave Allen hexagonal curvada 6 mm n 1 llave Allen hexagonal curvada 8 mm n 1 llave de horquilla doble 7x8 mm n 1 llave de horquilla doble 10x13 mm n 1 llave de horquilla simple 19 mm n 1 llave tubular doble 21x24 mm n 1 destornillador de cruz corte n 1 mango para destornillador n 1 destornillador de cruz 3x70 mm Peso máximo permitido 1 5 kg ENGANCHE PARA EL CASCO Gracias al uso del enganche...

Page 35: ...tilice las siguientes herramien tas especiales pedirlas a un Concesiona rio Oficial aprilia Herramienta Operaciones Pag Llave de sec tor con nariz cuadrada 3 Regulacióntuerca amortiguador tra sero 42 Llave espe cial tubular 4 Ajuste juego embrague 69 MX125_S book Page 35 Wednesday October 15 2003 11 04 AM ...

Page 36: ...a cierre con cuidado el tapón Evite el contacto del combustible con la piel la inhalación de vapores la inges tión y el trasiego de un recipiente a otro por medio de un tubo NO ESPARZA EL COMBUSTIBLE EN EL AMBIENTE MANTENGASE LEJOS DEL ALCANCE DE LOS NIÑOS Utilice gasolina super sin plomo según DIN 51 607 número octano mínimo 95 N O R M y 85 N O M M CAPACIDAD DEPOSITO reserva incluida 11 l RESERVA...

Page 37: ...be el aceite conte nido en el depósito mezclador o se sa que el tubo aceite mezclador es preciso dirigirse a un Concesionario Oficial aprilia que efectuará la purga Esta operación es indispensable en cuanto el funcionamiento del motor con aire en la instalación del aceite mezcla dor podría causar graves daños al pro pio motor Para introducir el aceite mezclador en el depósito Desmonte el panel lat...

Page 38: ...ado las partes del cuerpo que hayan estado en contac to con el líquido y además diríjase a un oculista o a un médico si el líquido llegara a contacto con los ojos No esparza el líquido en el ambiente MANTENGASE LEJOS DEL ALCANCE DE LOS NIÑOS PELIGRO Utilizando el líquido de los frenos tenga cuidado con no verterlo sobre las par tes de plástico y pintadas porque podría dañarlas irreparablemente FRE...

Page 39: ...epósito del líquido de los frenos Destornille y quite los dos tornillos 3 Desmonte la tapa 4 PELIGRO Mantenga el líquido en el depósito para lelo al borde del depósito de tal forma se evitan salidas peligrosas del líquido durante el relleno Quite la junta 5 Llene el depósito con líquido para frenos véase pág 88 TABLA DE LUBRIFI CANTES hasta cubrir del todo el cristal Vuelva a colocar correctamente...

Page 40: ...enrosque y quite el tapón 2 ATENCIÓN Para no verter el líquido de los frenos durante el relleno se recomienda man tenga el líquido en el depósito paralelo al borde del depósito en posición hori zontal Quite la junta 4 Con la ayuda de una jeringa rellene el depósito 1 con líquido frenos véase pág 88 TABLA DE LUBRIFICANTES hasta la referencia MAX Coloque correctamente la junta 4 ator nille nuevament...

Page 41: ... 2 por medio de la contratuerca 1 Desenrosque la varilla mando bomba 4 y llévela a contacto con el pistón bomba Enrosque la varilla para garantizar un juego mínimo de 0 5 1 mm entre la va rilla mando bomba 4 y el pistón bomba PELIGRO Asegurarse que haya juego entre la va rilla del mando bomba 4 y el pistón de la bomba para evitar que el freno per manezca accionado causando un des gaste prematuro d...

Page 42: ... los Concesionarios Oficiales aprilia Introduzca la llave especial 5 y afloje la tuerca interior 6 Introduzca un destornillador de corte 7 en la llave especial 5 y atornille completa mente el tornillo de regulación 8 Afloje el tornillo de regulación 8 dándole media vuelta correspondiente a 3 4 mm de carrera de la palanca 9 Por medio del destornillador 7 mantenga bloqueado el tornillo de regulación...

Page 43: ...neumáticos puede comprometer su adherencia a la carre tera y la maniobrabilidad del vehículo Sustituya el neumático si está desgas tado o si un eventual pinchazo en la zona de la banda de rodadura resulta más ancho de 5 mm Tras haber reparado un neumático eje cute el equilibrado de las ruedas Utilice exclusivamente neumáticos según las medidas indicadas por la empresa véa se pág 85 FICHA TECNICA C...

Page 44: ...e emitiendo llamas invisibles En caso de intervenciones de manteni miento se aconseja use guantes de lá tex Para la sustitución diríjase a un Conce sionario Oficial aprilia La solución del líquido refrigerante está compuesta por 50 de agua y por 50 de anticongelante Esta mezcla es ideal para casi todas las temperaturas de funcionamiento y garanti za una buena protección contra la corro sión Se aco...

Page 45: ...g 88 TABLA DE LU BRIFICANTES hasta cubrir completa mente las placas del radiador PELIGRO No supere este nivel porque en caso con trario puede haber una salida del líquido durante el funcionamiento del motor PELIGRO El líquido refrigerante es nocivo si es tragado si llega a contacto con la piel o con los ojos podría causar irritaciones No introduzca los dedos u otros objetos para comprobar la prese...

Page 46: ...rvando por lo tanto el silenciador limpio y eliminando los humos de escape Para el funcionamiento correcto y continuo del catalizador y para reducir eventuales problemas de suciedad en el grupo térmi co y el escape evite recorrer largos tramos con régimen de rotación del motor cons tantemente muy bajo Resultará suficiente alternar a estos mo mentos un régimen de rotación del motor algo elevado aun...

Page 47: ...ambio Controle y o rellene si es necesario 36 37 60 61 Ruedas neumáticos Controle las condiciones de las superficies de los neumáti cos la presión de hinchado el desgaste y daños eventua les 43 Palancas de los frenos Controle que funcionen suavemente Engrase las articula ciones y ajuste la carrera si es necesario 39 40 Embrague La carrera en vacío hasta la extremidad de la palanca em brague debe s...

Page 48: ...ulo Luego Gire la palanca grifo combustible 1 en posición ON Asegúrese de que el desviador luces 2 esté en posición Gire la llave 3 y ponga en el inte rruptor de encendido A este punto en el salpicadero se enciende la luz indicadora roja re serva aceite mezclador véase pág 15 INSTRUMENTOS E INDICA DORES Bloquee la rueda delantera accionando la palanca freno delantero 4 Ponga la palanca mando cambi...

Page 49: ...nte baja cerca o inferior a 0 C podrían surgir algunas dificul tades durante el primer arranque En este caso Gire en sentido antihorario Pos A la palanca para el arranque en frío 6 PELIGRO No actúe sobre el pedal de arranque cuando el motor está encendido Gire moderadamente el puño de gas 8 y simultáneamente actúe por algunas veces con decisión sobre el pedal de arranque 7 luego déjelo de inmediat...

Page 50: ...Con el vehículo parado familiarícese con el uso de los retrovisores Arranque el motor vea pág 48 ARRANQUE Durante los primeros kilómetros conduz ca a velocidad moderada para calentar el motor Con el puño de gas 2 suelto Pos A y el motor al ralentí accione del todo la palanca del embrague 3 Ponga la primera marcha empujando ha cia abajo la palanca mando cambio 4 Suelte la palanca freno accionada al...

Page 51: ...IGRO Reduzca una marcha a la vez la reduc cion simultánea de varias marchas pue de causar la superación del régimen de potencia máxima sobre regimen Antes y durante la reduccion de una marcha reduzca la velocidad soltando el acelerador para evitar sobre regi men Para efectuar la reduccion Suelte el puño de gas 2 Pos A Si es necesario accione moderadamen te las palancas del freno y reduzca la ve lo...

Page 52: ...ntamiento de las pastillas con suce siva reducción de la eficacia de los fre nos Aproveche la compresión del motor re duciendo la marcha y utilizando ambos frenos de manera intermitente En los tramos en bajada no conduzca con el motor apagado PELIGRO Ponga cuidado en todo tipo de obstácu lo o variación de la geometría del firme de la carretera Las carreteras estropea das los carriles los sumideros...

Page 53: ...en la columna fin rodaje de la FICHA DE MANTENIMIENTO PERIO DICO véase pág 56 FICHA DE MAN TENIMIENTO PERIODICO para evitar daños a los demás a sí mismo y o al ve hículo Entre los 800 y los 1500 km de recorrido conduzca más agresivamente varíe la velocidad y use la aceleración máxima sólo por breves momentos para permitir un mejor acoplamiento de los compo nentes no supere los 3 4 de la apertura d...

Page 54: ...e la dirección véase pág 33 SE GURO DE DIRECCION y extraiga la lla ve 1 COLOCACION DEL VEHICULO SOBRE EL CABALLETE Lea con cuidado al lado APARCAMIEN TO Empuñe la manecilla izquierda 4 y el asa pasajero 5 Empuje el caballete lateral con el pie de recho extendiéndolo del todo 6 Incline el vehículo hasta apoyar el caba llete sobre el suelo ATENCIÓN Asegúrese de la estabilidad del vehículo SUGERENCIA...

Page 55: ... nocivos o incluso tóxicos De no resultar expresamente descrito los grupos deben ser instalados si guiendo el orden inverso de las opera ciones realizadas para el desmontaje En caso de intervenciones de manteni miento se aconseja el uso de guantes de látex Normalmente el usuario puede realizar las operaciones de mantenimiento ordinario pero a veces éstas necesitan un equipo específico y una prepar...

Page 56: ...Final de rodaje luego de 1 mes o 1000 Km 625 mi Cada 12 meses o 4000 Km 2500 mi Cada 24 meses o 8000 Km 5000 mi Batería ajuste bornes c c Bujía d d e Filtro aire c d Juego embrague f f Instalación luces c c Líquido frenos c Líquido refrigerante cada 3 meses c Nivel aceite mezclador controlar antes de cada uso c Aceite cambio e c cada 12000 Km 7500 mi e Orientación faro delantero funcionamiento c P...

Page 57: ...trado ruedas c Cojinetes tubo de dirección y juego de dirección c c Cojinetes ruedas c Discos de freno c c Filtro aceite mezclador d Funcionamiento general del vehículo c c Sistemas de frenado c c Instalación de refrigeración c c Líquido frenos cada año e Líquido refrigerante cada 2 años e Silenciador silenciador de escape c Aceite horquilla y retén aceite cada 2 años e Pistón y anillos cada 2 año...

Page 58: ...a base del cárter motor lado derecho Motor n NUMERO BASTIDOR El número del bastidor 2 está impreso en el manguito de la dirección lado derecho Bastidor n DESMONTAJE PANELES LATERALES Lea con cuidado pág 55 MANTENI MIENTO Coloque el vehículo sobre el caballete ATENCIÓN Las siguientes operaciones se refieren a un solo panel pero tienen validez para los dos Gire en sentido antihorario el tornillo 3 d...

Page 59: ...LIGRO Para no deformar las redecillas de con tención NO fuerce sus partes laterales Agarre la parte central de ambas redecillas de contención 4 y 5 tire y sepárelas Suelte el elemento filtrante 3 de la re decilla de contención 4 Lave el elemento filtrante 3 con disol ventes limpios no inflamables ni con un elevado punto de volatilidad y déjelo se car perfectamente Extienda en toda su superficie un...

Page 60: ...nferior a un cuarto del mismo En el primer caso se produciría una sal ida del aceite en exceso en el segundo caso se podría dañar gravemente el mo tor RELLENO Si es necesario efectuar el relleno Desenrosque y quite el tapón de llenado 2 Coloque una pequeña cantidad de acei te vea pág 88 TABLA DE LUBRIFI CANTES y espere aprox un minuto para que el aceite fluya uniformemente dentro del cárter Asegúr...

Page 61: ...r algunos minutos Limpie los residuos metálicos pegados al imán del tapón de vaciado 2 Controle y si acaso sustituya la arandela de estanqueidad del tapón de vaciado 2 Sustituya la arandela de estanqueidad del tapón de vaciado 2 cada 12000 km o cada dos veces que se sustituye el aceite motor Enrosque y apriete el tapón de vaciado 2 Par de apriete tapón de vaciado 2 27 Nm 2 7 kgm Vierta por la aber...

Page 62: ...do y compruebe si puede soportar el peso del vehículo ATENCIÓN Peso del vehículo en orden de marcha 126 kg Levante la parte delantera y coloque un soporte adecuado 1 con altura 400 mm por debajo del motor de manera que la rueda delantera tenga espacio su ficiente para moverse libremente y para evitar la caída del vehículo PELIGRO Peligro de caída del vehículo Provea a equilibrar el vehículo para q...

Page 63: ... lado derecho del vehículo sentido de marcha Empuje el eje rueda y simultáneamente mueva la rueda para alinear los ejes y la rueda hasta introducir completamente el eje rueda Enrosque y apriete el eje rueda 4 Par de apriete eje rueda 4 80 Nm 8 kgm PELIGRO A causa del peso y del espacio que ocupa el vehículo la operación que sigue a continuación necesita la inter vención de un segundo operador Siga...

Page 64: ...vehículo Controle las condiciones de la llanta si está dañada sustitúyala DESMONTAJE Coloque el vehículo sobre el caballete Destornille y quite los dos tornillos 1 Saque el cubrecadena 2 Afloje la tuerca rueda 3 Par de apriete tuerca rueda 3 100 Nm 10 kgm PELIGRO Durante la instalación antes de apretar la tuerca rueda 3 controle la tensión de la cadena véase pág 66 CADENA DE TRANSMISION A causa de...

Page 65: ...del basculante poniendo cuidado al ex traer el disco de la pinza del freno PELIGRO No accione la palanca del freno trasero tras haber extraído la rueda en caso contrario el émbolo de la pinza del freno podría salirse de su sede causando la pérdida del líquido de los frenos En este caso diríjase a un Concesionario Oficial aprilia que realizará una inter vención de mantenimiento ATENCIÓN Controle la...

Page 66: ...ento más frecuentemente si utiliza el vehículo en condiciones difíciles o so bre carreteras polvorientas y o con bar ro CONTROL DEL JUEGO Para controlar el juego Pare el motor Coloque el vehículo sobre el caballete Ponga la palanca del cambio en punto muerto Controle que la oscilación vertical en un punto intermedio entre el piñón y la coro na en el tramo inferior de la cadena sea de unos 30 35 mm...

Page 67: ...s tóricas Dientes del piñón o de la corona excesi vamente desgastados o dañados PELIGRO Hay que sustituir todo el grupo cadena piñón corona y cadena si los rodillos de ésta resultan dañados si los pernos están aflojados y o si las juntas tóricas están dañadas o faltan Compruebe el desgaste del patín ojo ca dena 6 y de la ruedecilla del tensor de cadena 7 Por último compruebe el desgaste del patín ...

Page 68: ... si se utiliza el vehículo en carreteras polvorientas mojadas o en todo terreno Además realice los siguientes controles Con la palanca del freno delantero accio nada presione varias veces sobre el manillar de manera que la horquilla se hunda La carrera debe ser suave y no debe haber rastro de aceite sobre las barras Controle el apriete de todos los órganos y la funcionalidad de las articulaciones ...

Page 69: ...rga como con carga máxima del vehícu lo Sin embargo se puede personalizar el ajuste según el empleo del vehículo Utilizando la llave 3 correspondien te destornille moderadamente la tuerca de fijación 2 Actúe sobre la tuerca de ajuste 1 ajus te precarga del muelle amortiguador véase tabla Una vez alcanzadas las condiciones óp timas de arreglo apriete completamente la tuerca de fijación 2 Tuerca de ...

Page 70: ...la pinza del freno y las pastillas actuando desde arriba en la parte delantera para la pinza freno delantero 1 desde arriba en la parte trasera para la pinza freno trasero 2 Si el espesor del material de fricción in cluso de una sola pastilla queda reduci do al valor aproximado de 1 mm sustitu ya ambas pastillas PELIGRO Para la sustitución diríjase a un Conce sionario Oficial aprilia AJUSTE MANDO ...

Page 71: ... en sentido antihora rio el número de las revoluciones disminu ye Actuando sobre el puño de gas acelere y decelere algunas veces para controlar el funcionamiento correcto y si el ralentí queda estable ATENCIÓN No actúe sobre el tornillo de regulación aire para evitar variaciones en la regu lación de la carburación PELIGRO En caso de necesidad diríjase a un Con cesionario Oficial aprilia AJUSTE MAN...

Page 72: ...re y o con un cepillo metálico Sople muy fuerte con un chorro de aire para evitar que residuos removidos en tren en el motor Hay que sustituir la bujía si ésta presen ta hendiduras en el aislador electrodos oxidados o incrustaciones excesivas Controle la distancia entre los electrodos por medio de un calibre de espesor Esta tiene que ser de 0 5 0 6 mm si acaso ajústela curvando con cuidado el elec...

Page 73: ...lación adecuada del local y evite la inhalación de gases emitidos durante la recarga de la misma MANTENGASE LEJOS DEL ALCANCE DE LOS NIÑOS PELIGRO No invierta nunca la conexión de los ca bles de la batería Ponga cuidado en no inclinar demasia do el vehículo para evitar salidas peli grosas del líquido de la batería Conecte y desconecte la batería con el interruptor de encendido en posición Conecte ...

Page 74: ... instalar la batería véase pag 75 INSTALACION BATERIA DESMONTAJE BATERIA Lea con cuidado pág 73 BATERIA Asegúrese de que el interruptor de en cendido esté en posición Desmonte el panel lateral izquierdo véa se pág 58 DESMONTAJE PANELES LATERALES Destornille y quite el tornillo 3 del borne negativo Desplace lateralmente el cable negativo 4 Destornille y quite el tornillo 5 Saque la tapa 6 Desmonte ...

Page 75: ...s Controle el nivel del electrolito bateria véase al lado CONTROL NIVEL ELEC TROLITO BATERIA Conecte la batería a un carga baterías Se aconseja una recarga utilizando un amperaje de 1 10 de la capacidad de la misma batería Tras haber realizado la recarga vuelva a controlar el nivel del electrolito y de re sultar necesario rellene con agua desti lada Apriete los tapones de los elementos PELIGRO Vue...

Page 76: ...a el control Ponga en el interruptor de encendi do para evitar un cortocircuito accidental Desmonte el panel lateral izquierdo véa se pág 58 DESMONTAJE PANELES LATERALES Extraiga un fusible a la vez y controle si el filamento 7 está interrumpido Antes de sustituir el fusible encuentre si es posible la causa que ha ocasionado la avería Sustituya el fusible si resulta dañado con otro del mismo amper...

Page 77: ... ha de girar libremente si acaso engrase la articulación véase pág 88 TABLA DE LUBRIFICANTES CONTROL INTERRUPTORES Lea con cuidado pág 55 MANTENI MIENTO En el vehículo se encuentran dos interrup tores Interruptor luz freno 1 sobre palanca mando freno trasero Interruptor luz freno 2 sobre palanca mando freno delantero Para el control Interruptores 1 y 2 extraiga el ele mento de protección Controle ...

Page 78: ... nillo correspondiente 1 ATORNILLANDO sentido horario el haz luminoso se levanta DESTORNILLANDO en sentido antiho rario el haz luminoso baja BOMBILLAS Lea con cuidado página pág 55 MAN TENIMIENTO PELIGRO Antes de sustituir una bombilla coloque el vehículo sobre el caballete y el interruptor de encendido en la pos ición Sustituya la bombilla utili zando guantes limpios o un trapo limpio y seco No d...

Page 79: ...aras no tire de los cables eléctricos Agarre el casquillo portalámparas 6 estí relo y desconéctelo de su alojamiento Extraiga la bombilla de posición 1 y susti túyala con otra del mismo tipo BOMBILLA LUZ DE CRUCE LUZ LARGA ATENCIÓN Para extraer el conector eléctrico bombil la no tire de los cables eléctricos Agarre el conector eléctrico bombilla 7 tire de ello y desconéctelo de la bombilla 8 Quite...

Page 80: ...añarlos Extraiga hacia abajo la cúpula 2 equi pada con faro delantero desconectándo la de la espiga 3 obtenida en el salpica dero LUCES DE AVISO PELIGRO Extraiga un casquillo portalámparas a la vez para evitar emplazarlos de man era incorrecta durante la instalación Extraiga el casquillo portalámparas co rrespondiente Extraiga y sustituya la bombilla con otra del mismo tipo LUZ DE ALUMBRADO SALPIC...

Page 81: ...par as Instale correctamente una bombilla del mismo tipo SUSTITUCION BOMBILLA FARO TRASERO PELIGRO Antes de sustituir una bombilla con trole los fusibles véase pág 76 SUS TITUCION FUSIBLES y la eficacia de los interruptores luces freno véase pág 77 CONTROL INTERRUPTORES Lea con cuidado pág 78 BOMBILLAS Destornille y quite los dos tornillos 4 PELIGRO Durante el reensamblaje apriete con cuidado y mo...

Page 82: ...ble perjudi can la salud Antes de seguir adelante controle que el lugar donde trabaja tenga un adecua do cambio de aire No inhale los vapores de combustible No fume ni utilice llamas libres No es parza el combustible en el ambiente Coloque el vehículo sobre el caballete Pare el motor y espere a que el vehículo se haya enfriado Prepare un recipiente con capacidad su perior a la cantidad de combusti...

Page 83: ...g 49 TABLA CONTROLES PRELIMINARES Para quitar la parte sucia y el barro de las superficies pintadas es necesario utilizar un chorro de agua de presión baja mojar las partes sucias con cuidado quitar barro y suciedad con una esponja blanda para carrocería impregnada en mucha agua y jabón 2 4 partes de jabón en agua Luego enjuague con mucha agua y seque con piel gamuzada Para limpiar las partes exte...

Page 84: ...74 DES MONTAJE BATERIA Lave y seque el vehículo véase pág 83 LIMPIEZA Aplique algo de cera sobre las superfi cies pintadas Hinche los neumáticos véase pág 43 NEUMATICOS Coloque el vehículo de manera que am bos neumáticos estén levantados del suelo utilizando un soporte adecuado Coloque el vehículo en un local fresco sin humedad al amparo de los rayos de sol y donde las variaciones de tempera tura ...

Page 85: ...1 Cilindrada total 124 82 cm Diámetro y carrera 54 mm 54 5 mm Relación de compresión 12 5 0 5 1 Arranque por pedal N revoluciones del motor al ralentí 1200 100 rpm Embrague multidisco en baño de aceite con mando manual en el lado izquierdo del manillar Refrigeración por liquido CAPACIDAD Combustible reserva incluida 11 l Reserva combustible 1 3 l reserva mecánica Aceite cambio 600 cm Líquido refri...

Page 86: ...3 1 12 270 R1 x R2 x R3 1 10 213 R1 x R2 x R3 1 8 901 CARBURADOR Número 1 Modelo DELL ORTO PHBH 28 ALIMENTACION Combustible Gasolina super sin plomo según DIN 51 607 mínimo octano 95 N O R M y 85 N O M M BASTIDOR Tipo Monoviga de doble cuna en tubos de acero de resistencia elevada Ÿngulo inclinación dirección 28 Lanzamiento 127 mm SUSPENSIONES Delantera Upside down Æ40 Carrera 260 mm Trasera Monoa...

Page 87: ...tes del P M S BUJIAS Estándar NGK R BR8 ES Distancia electrodo bujía 0 5 0 6 mm INSTALACION ELECTRICA Batería 12 V 4 Ah Fusibles general 20 A Fusibles central 15 A Fusibles servicios 7 5 A Generador 12 V 180 W BOMBILLAS Luz de cruce luz larga halógena 12 V 35 35 W Luz de posición delantera 12 V 5 W Luz indicadores de dirección 12 V 10 W Luz de posición trasera matrícula freno 12 V 5 21 W Alumbrado...

Page 88: ... del volumen FORK 20W 33 del volumen SAE 15W F A 5W 33 del volumen F A 20W 67 del volumen o FORK 5W 33 del volumen FORK 20W 67 del volumen Cojinetes y otros puntos de lubricación aconsejado AUTOGREASE MP o GREASE 30 Alternativamente al producto aconsejado utilise grasa de marca para cojinetes rodantes campo de temperatura util 30 C 140 C punto de goteo 150 C 230 C elevada protección antioxidante b...

Page 89: ...cánicas del mismo El control previo a la utilización el regular mantenimiento y el uso exclusivo de Recambios Originales aprilia son factores esenciales Para tener informaciones del Concesionario Oficial y o Centro de Asistencia más cercano buscar en las Páginas Amarillas o directamente en el mapa de nuestro Sitio Internet Oficial www aprilia com Solicitando Recambios Originales aprilia se dispond...

Page 90: ...tral Parc 255 Blv R Ballanger B P 77 93421 Villepinte Succursale en France Tel 0033 1 49634747 Fax 0033 1 49638750 Relations clienteles 0820 027915 A SPIRIT A S Saldova 38 180 00 Praha 8 Karlin A SPIRIT A S Sede operativa Bubenska 43 170 00 Praha 7 Tel 0042 02 96547142 Fax 0042 02 96547145 Email pistek aspirit cz AVTO TRIGLAV d o o Baragova 5 1113 Ljubljana Tel 00386 1 5883 421 Fax 00386 1 5883465...

Page 91: ... Hammervej 32 7900 Nikobing Mors Tel 0045 97 722233 Fax 0045 97 722143 33 Email thomas aprilia dk TUONTI NAKKILA OY P o B 18 29250 Nakkila Tel 00358 2 5352500 Fax 00358 2 5372793 Email satu saarinen aprilia fi RO GROUP INT sede operativa Str Depozitelor 41 43 Jud Arges Pitesti Tel 0040 248211004 Fax 0040 248211004 Email marian ion rogroup ro Z A O ITALMOTO sede operativa Ul Preobragenskaya 5 7 107...

Page 92: ...32 Singapore Tel 0065 6299 6251 Fax 0065 6297 5684 Email jeorjb yahoo com AH LAM MOTORCYCLE CO LTD 29 Hak Po Street Mongkok Kowloon Hong Kong Tel 00852 23859229 Fax 00852 23857920 Email garyyip ahlam com hk PERFECT MOTORS COMPANY LIMITED No 281 Jungshing North Street Sanchung City 241 Taipei Tel 00886 2 85111156 Fax 00886 2 85111148 Email taiwan eisyu msa hinet net AL RADWAN INTERNATIONAL GROUP Bl...

Page 93: ...ne G T Road P O Dujana 203207 Dadri Ghaziabad UP Tel 0091 98100 19315 Fax 0091 98100 19300 MOTO TECNICA S A Avenia Petapa 38 78 Local B Zona12 Guatemala Tel 0050 2 3606815 Fax 0050 2 3327847 DUARTE BASTOS CASTENDO LDA Rua Dr António José de Almeida n 238 Benguela Tel 00244 7 232669 Fax 00244 7 235106 Email marco castendo netc pt MX125_S book Page 93 Wednesday October 15 2003 11 04 AM ...

Page 94: ...iento MX 125 94 ESQUEMA ELÉCTRICO MX 125 16 19 18 14 20 21 27 28 23 15 13 12 11 10 9 28 28 28 8 7 6 28 4 5 29 28 28 32 31 22 28 27 31 26 25 28 24 28 34 33 2 3 1 MX125_S book Page 94 Wednesday October 15 2003 11 04 AM ...

Page 95: ... 17 Testigo luz de cruce 18 Bombilla alumbrado salpicadero 19 Luz testigo luz larga 20 Luz testigo indicadores de dirección 21 Testigo nivel de aceite 22 Interruptor cambio en punto muerto 23 Bocina 24 Indicador de dirección delantero derecho 25 Bombilla luz de cruce luz larga 26 Bombilla luz de posición delantera 27 Indicador de dirección delantero izquierdo 28 Conectores múltiples 29 Bujía 30 Fa...

Page 96: ...es por haber elegido el vehículo y les recomienda No esparzan aceite combustible sustancias y componentes contaminantes en el ambiente No mantengan el motor encendido si no es necesario Eviten ruidos molestos Respeten la naturaleza MX125_S book Page 96 Wednesday October 15 2003 11 04 AM ...

Page 97: ...aprilia part 8104766 use maintenancebook MX 125 MX125_GR book Page 1 Tuesday October 14 2003 7 17 PM ...

Page 98: ...ΚΟ στο παρόν εγχειρίδιο προηγείται σοβαρών πληροφοριών ή οδηγιών ΤΕΧΝΙΚΕΣ ΠΛΗΡΟΦΟΡΙΕΣ Οι εργασίες πριν από τις οποίες υπάρχει αυτό το σύµβολο πρέπει να επαναλαµβάνονται και από την άλλη πλευρά του δικύκλου Αν δεν περιγράφεται επακριβώς η επανασυναρµολόγηση των τµηµάτων ακολουθεί την αντίστροφη σειρά της συναρµολόγησης Οι όροι δεξί και αριστερό χρησιµοποιούνται λαµβάνοντας υπόψη ότι ο οδηγός βρίσκε...

Page 99: ...άποιες χώρες η ισχύουσα νοµοθεσία επιβάλλει την τήρηση των κανονισµών που αφορούν στη ρύπανση και την ηχορύπανση και προβλέπουν την πραγµατοποίηση περιοδικών ελέγχων Ο χρήστης που χρησιµοποιεί το δίκυκλο σε αυτές τις χώρες πρέπει να απευθύνεται στον Επίσηµο Αντιπρόσωπο της aprilia για την αντικατάσταση των συγκεκριµένων εξαρτηµάτων µε άλλα που είναι εγκεκριµένα στη συγκεκριµένη χώρα να πραγµατοποι...

Page 100: ... ΣΥΝΤΗΡΗΣΗΣ ΣΕΡΒΙΣ 56 ΣΤΟΙΧΕΙΑ ΑΝΑΓΝΩΡΙΣΗΣ 58 ΑΦΑΙΡΕΣΗ ΠΛΑΪΝΑ ΦΕΡΙΝΓΚ 58 ΦΙΛΤΡΟ ΑΕΡΑ 59 ΕΛΕΓΧΟΣ ΣΤΑΘΜΗΣ ΛΑ ΙΟΥ ΣΤΟ ΚΙΒΩΤΙΟ ΤΑΧΥΤΗΤΩΝ ΚΑΙ ΣΥΜΠΛΗΡΩΜΑ 60 ΑΝΤΙΚΑΤΑΣΤΑΣΗ ΛΑ ΙΑ ΚΙΒΩΤΙΟΥ ΤΑΧΥΤΗΤΩΝ 61 ΕΜΠΡΟΣ ΤΡΟΧΟΣ 62 ΠΙΣΩ ΤΡΟΧΟΣ 64 ΑΛΥΣΙ Α ΜΕΤΑ ΟΣΗΣ 66 ΕΛΕΓΧΟΣ ΑΝΑΡΤΗΣΗΣ ΕΜΠΡΟΣ ΚΑΙ ΠΙΣΩ 68 ΑΝΑΡΤΗΣΗ ΠΙΣΩ 69 ΕΛΕΓΧΟΣ ΦΘΟΡΑΣ ΣΤΑ ΤΑΚΑΚΙΑ 70 ΡΥΘΜΙΣΗ ΧΕΙΡΙΣΤΗΡΙΟΥ ΕΚΚΙΝΗΣΗΣ ΜΕ ΚΡΥΟ 70 ΡΥΘΜΙΣΗ ΡΕΛΑΝΤΙ 71 ΡΥΘΜΙΣΗ Γ...

Page 101: ...áóöáëÞò ïäÞãçóç áóöáëÞò ïäÞãçóç GUIDA SICURA MX125_GR book Page 5 Tuesday October 14 2003 7 17 PM ...

Page 102: ...η και ή σε ιδιόκτητους χώρους Η λήψη ορισµένων φαρµάκων οινοπνεύµατος και ναρκωτικών ουσιών ή ψυχοφαρµάκων αυξάνει σηµαντικά τον κίνδυνο ατυχηµάτων Βεβαιωθείτε ότι η ψυχοφυσική σας κατάσταση είναι κατάλληλη για οδήγηση δίνοντας ιδιαίτερη προσοχή στη φυσική κόπωση και στην υπνηλία Τα περισσότερα ατυχήµατα οφείλονται στην έλλειψη πείρας του οδηγού ΠΟΤΕ µη δανείζετε το δίκυκλο σε αρχάριους και σε κάθ...

Page 103: ...ες του οδοστρώµατος την ορατότητα κλπ Μην προσκρούετε σε εµπόδια που θα µπορούσαν να προκαλέσουν ζηµιά στο δίκυκλο και να σας κάνουν να χάσετε τον έλεγχό του Μην παραµένετε πίσω από οχήµατα που προηγούνται για να αυξήσετε την ταχύτητά σας Οδηγείτε πάντα και µε τα δύο χέρια πάνω στο τιµόνι και τα πόδια στο µαρσπιέ ή στα υποπόδια του οδηγού στη σωστή θέση οδήγησης Αποφεύγετε να σηκώνεστε όρθιοι ή να...

Page 104: ...ε σε κάποιο ατύχηµα ή χτυπήσετε ή πέσετε µε το δίκυκλο βεβαιωθείτε ότι οι µανέτες ελέγχου οι σωλήνες τα καλώδια το σύστηµα φρένων και τα ζωτικά µέρη δεν έχουν υποστεί ζηµιά Πηγαίνετε το δίκυκλο για έλεγχο σε έναν Επίσηµο Αντιπρόσωπο της aprilia ζητώντας να δοθεί ιδιαίτερη προσοχή στο σκελετό το τιµόνι τις αναρτήσεις τα όργανα ασφάλειας και εκείνα τα εξαρτήµατα την ακεραιότητα των οποίων δεν είναι ...

Page 105: ... χαρακτηριστικών του δικύκλου Αποφεύγετε το συναγωνισµό µε άλλα οχήµατα Αποφεύγετε να οδηγείτε εκτός δρόµου ΕΝ ΥΣΗ Πριν από την οδήγηση να θυµάστε να φοράτε και να κουµπώνετε σωστά το κράνος Το κράνος πρέπει να είναι εγκεκριµένο ακέραιο να έχει το σωστό µέγεθος και να είναι καθαρή η ζελατίνα του Να φοράτε προστατευτική ένδυση αν είναι δυνατό ανοικτού και ή αντανακλαστικού χρώµατος Έτσι θα είστε ορ...

Page 106: ...α φέρινγκ και τα παρµπρίζ µεγάλων διαστάσεων που είναι τοποθετηµένα στο δίκυκλο µπορεί να προκαλέσουν αεροδυναµικές πιέσεις τέτοιες που να θέτουν σε κίνδυνο την ισορροπία του δικύκλου κατά την οδήγηση ειδικότερα στις µεγάλες ταχύτητες Βεβαιωθείτε ότι όλα τα εξαρτήµατα είναι καλά στερεωµένα στο δίκυκλο και δεν ενέχουν κινδύνους κατά την οδήγηση Μην προσθέτετε και µην τροποποιείτε τα ηλεκτρικά εξαρτ...

Page 107: ...το κράνος επειδή υπάρχει κίνδυνος να χτυπήσουν πρόσωπα ή εµπόδια και να προκαλέσουν απώλεια ελέγχου του δικύκλου Μη µεταφέρετε καµία αποσκευή που δεν είναι καλά στερεωµένη στο όχηµα Μη µεταφέρετε αποσκευές που εξέχουν υπερβολικά από τις µπαγκαζιέρες ή που καλύπτουν τα εξαρτήµατα φωτισµού και ηχητικής ή οπτικής σήµανσης Μη µεταφέρετε ζώα ή παιδιά στη θήκη εγγράφων ή την µπαγκαζιέρα Μην υπερβαίνετε ...

Page 108: ... 6 Ασφαλειοθήκη 7 Χειρολαβή συνεπιβάτη 8 Αριστερό µαρσπιέ συνεπιβάτη µε αυτόµατο µηχανισµό άνοιγµα κλείσιµο 9 Πλευρικό σταντ 10 Αριστερό µαρσπιέ οδηγού µε ελατήριο πάντα ανοιχτό 11 Τάπα εκκένωσης λαδιού κιβωτίου ταχυτήτων 12 Λεβιές ταχυτήτων 13 Τάπα γέµισης λαδιού κιβωτίου ταχυτήτων 14 λεβιές εκκίνησης 1 7 6 5 4 3 2 8 9 13 12 14 10 11 MX125_GR book Page 12 Tuesday October 14 2003 7 17 PM ...

Page 109: ...νο 7 ιακόπτης εκκίνησης κλειδαριά τιµονιού 8 Τάπα ψυγείου υγρό ψύξης 9 εξί ψυγείο υγρού ψύξης 10 Ακουστικό σήµα 11 Μανέτα πίσω φρένου 12 εξί υποπόδιο οδηγού µε ελατήριο πάντα ανοιχτό 13 Αντλία φρένου πίσω 14 Αλυσίδα µετάδοσης 15 εξί υποπόδιο συνεπιβάτη µε αυτόµατο µηχανισµό άνοιγµα κλείσιµο 16 Γάντζος κράνους 16 15 3 2 9 8 12 10 13 14 1 4 5 6 7 11 MX125_GR book Page 13 Tuesday October 14 2003 7 17...

Page 110: ...ν 4 Κουµπί σινιάλου µεγάλης σκάλας 5 Αριστερός καθρέφτης 6 Μανέτα συµπλέκτη 7 Μανέτα εκκίνησης µε κρύο 8 Όργανα και δείκτες 9 ιακόπτης εκκίνησης κλειδαριά τιµονιού 10 Μανέτα εµπρός φρένου 11 εξιός καθρέφτης 12 Χειρόγκαζο 4 3 1 2 5 6 7 8 9 10 11 12 MX125_GR book Page 14 Tuesday October 14 2003 7 17 PM ...

Page 111: ...νου χρώµατος 2 Ψηφιακή οθόνη πολλαπλών λειτουργιών 3 Ενδεικτική λυχνία νεκράς πράσινου χρώµατος 4 Ενδεικτική λυχνία φλας πράσινου χρώµατος 5 Ενδεικτική λυχνία λαδιού µίξης κόκκινου χρώµατος 6 Λυχνία φώτων πορείας µεσαία σκάλα µπλε χρώµατος 1 6 2 3 4 5 MX125_GR book Page 15 Tuesday October 14 2003 7 17 PM ...

Page 112: ...νονικής λειτουργίας του κινητήρα σηµαίνει ότι η στάθµη λαδιού µίξης είναι σε ρεζέρβα Στην περίπτωση αυτή προνοήστε για το συµπλήρωµα λαδιού µίξης βλέπε σελ 37 ΡΕΖΕΡΒΟΥΑΡ ΛΑ ΙΟΥ ΜΙΞΗΣ Ενδεικτική λυχνία νεκράς Ανάβει όταν ο µοχλός ταχυτήτων είναι σε νεκρά ταχύτητα Ενδεικτική λυχνία φλας Αναβοσβήνει όταν λειτουργεί το φλας Ενδεικτική λυχνία µεγάλης σκάλας Ανάβει όταν είναι αναµµένη η λάµπα της µεγάλη...

Page 113: ...ολική διανυθείσα απόσταση 2 µερική διανυθείσα απόσταση 3 λειτουργίες συντήρησης 4 Κεντρική οθόνη Χρόνος µερικής και ολικής διαδροµής 5 µερικός χιλιοµετρητής 6 εξιά οθόνη Μέση ταχύτητα 7 µέγιστη ταχύτητα 8 και τρέχουσα ταχύτητα 9 επιλογέας Km mi 10 Επιλογή δικύκλου KM H MPH Επιλογή χλµ km ή µιλίων mi SPD Τρέχουσα ταχύτητα AS Μέση ταχύτητα MS Μέγιστη ταχύτητα TT Μερικός χιλιοµετρητής RT Μερικός χρον...

Page 114: ...λλαγή της µονάδας µέτρησης από km σε mi KM H σε MPH ή αντίστροφα u Για επιβεβαίωση της επιλογής πιέστε το κεντρικό κουµπί MODE για περίπου 1 5 δ και συνεχίστε µε τη ρύθµιση της διαµέτρου του τροχού WS Αφού πιέσετε το κουµπί MODE στην οθόνη αριστερά εµφανίζεται η διάµετρος του τρέχοντος τροχού και το πρώτο στοιχείο που αναβοσβήνει MODE KM H MODE M H MODE 55 21 1 MX125_GR book Page 18 Tuesday Octobe...

Page 115: ... κουµπί αριστερά για αλλαγή της ένδειξης Τιµή ρύθµισης 1850 u Για να επιβεβαιώσετε τη ρύθµιση πιέστε το κεντρικό κουµπί MODE για περίπου 1 5 δ και συνεχίστε µε τη ρύθµιση της ώρας Αφού πιέσετε το κουµπί MODE στην κεντρική οθόνη εµφανίζεται να αναβοσβήνει η ένδειξη της ώρας 24h ή 12h MODE 55 11 11 1 KM H MODE 55 11 11 1 KM H MODE 55 19 19 1 KM H MODE MX125_GR book Page 19 Tuesday October 14 2003 7 ...

Page 116: ...ρύθµιση λεπτά Χρησιµοποιήστε ξανά το κουµπί αριστερά για αλλαγή της εµφανιζόµενης τιµής u Για επιβεβαίωση της ρύθµισης πιέστε το κεντρικό κουµπί MODE για περίπου 1 5 δ και συνεχίστε µε τον προληπτικό έλεγχο λίπανσης Μόλις πιέσετε το κουµπί MODE στην οθόνη αριστερά εµφανίζεται το σύµβολο λίπανσης και δίπλα να αναβοσβήνει ο αριθµός προληπτικών επεµβάσεων που πρέπει να γίνουν MODE 12 00 12H MODE 12 0...

Page 117: ...άσετε στην επόµενη τιµή u Για επιβεβαίωση της ρύθµισης πιέστε το κεντρικό κουµπί MODE για περίπου 1 5 δ και συνεχίστε µε τον προληπτικό έλεγχο συντήρησης Εάν η λειτουργία ελέγχου λίπανσης δεν χρησιµοποιείται επιλέξτε για όλες τις τιµές το µηδέν Μόλις πατήσετε το κουµπί MODE στην οθόνη αριστερά εµφανίζεται το σύµβολο συντήρησης και δίπλα να αναβοσβήνει ο αριθµός προληπτικών επεµβάσεων που πρέπει να...

Page 118: ...ριστερα µπορείτε να αλλάξετε την τιµή του στοιχείου u Πιέστε το κουµπί δεξιά για να περάσετε στην επόµενη τιµή u Για επιβεβαίωση της ρύθµισης πιέστε το κεντρικό κουµπί MODE για περίπου 1 5 δ και συνεχίστε µε τη ρύθµιση της συνολικής απόστασης ODO Μόλις πιέσετε το κουµπί MODE στην οθόνη αριστερά εµφανίζεται η ένδειξη ODO Έλεγχοι που διαχειρίζεται ο χρήστης Να µην συγχέονται µε τα προγραµµατισµένα σ...

Page 119: ...ιά για να περάσετε στην επόµενη τιµή u Για επιβεβαίωση της ρύθµισης πιέστε το κεντρικό κουµπί MODE για περίπου 1 5 δ και συνεχίστε µε τη ρύθµιση της συνολικής διαδροµής ART Μόλις πιέσετε το κουµπί MODE στην κεντρική οθόνη εµφανίζεται η ένδειξη ART MODE 00 00 1 300 ODO MODE 00 00 1 300 ODO MODE ART 00 00 00 MX125_GR book Page 23 Tuesday October 14 2003 7 17 PM ...

Page 120: ...µή του στοιχείου u Πιέστε το κουµπί δεξιά για να περάσετε στην επόµενη τιµή u Για επιβεβαίωση της ρύθµισης πιέστε το κεντρικό κουµπί MODE για περίπου 2 δ και ολοκληρώστε τις αρχικές ρυθµίσεις MODE ART 00 00 20 MODE ART 00 00 20 MODE 1 DST SPD KM H 11 53 48 0 00 00 0 RT 0 00 MX125_GR book Page 24 Tuesday October 14 2003 7 17 PM ...

Page 121: ...ΝΤΑΡ Πιέζοντας τα δύο εξωτερικά κουµπιά για περίπου 2 δ ενεργοποιείται το πρόγραµµα µετατροπής των ΣΤΑΝΤΑΡ ΡΥΘΜΙΣΕΩΝ Από το µενού αυτό µπορείτε να αλλάξετε τη διάµετρο του τροχού τις ρυθµίσεις ώρας την υπενθύµιση λίπανσης και συντήρησης του δικύκλου τη συνολική διανυθείσα απόσταση ODO και το χρόνο συνολικής διαδροµής ART Η αλλαγή του µετρικού συστήµατος από KM H σε MPH ή αντίστροφα γίνεται µόνο µε...

Page 122: ... ταχύτητα την ώρα και το χρόνο µερικής διαδροµής RT Πιέζοντας το κεντρικό κουµπί MODE εµφανίζεται η οθόνη B και εφόσον ξαναπατηθεί η οθόνη C Οι οθόνες B και C παραµένουν ορατές µόνο για 5 δ και στη συνέχεια επενέρχεται η οθόνη A MODE 1 A DST RT SPD KM H 11 53 48 0 00 0 00 0 0 1 DST 0 MODE A RT SPD KM H 11 53 56 0 00 0 00 0 MODE 1 B DST TT AS KM H 11 53 49 0 00 0 00 00 0 1 MODE C ODO ART MS KM H 11...

Page 123: ...ς και εφόσον ξαναπατηθεί η οθόνη E προληπτικός έλεγχος λίπανσης Οι οθόνες D και E παραµένουν ορατές για 5 δ και αν δεν πατηθεί κανένα κουµπί επανέρχεται η οθόνη A MODE 1 DST SPD KM H 11 49 08 7 96 53 30 A RT 30 42 1 MODE 1 SPD KM H 11 49 10 8 02 47 35 D RT 30 44 1 1 SPD KM H 11 49 12 8 04 47 35 E RT 30 46 1 MX125_GR book Page 27 Tuesday October 14 2003 7 17 PM ...

Page 124: ... Πιέστε το αριστερό κουµπί για να αλλάξετε την τιµή του στοιχείου u Πιέστε το δεξί κουµπί για επιβεβαίωση της επιλεγµένης τιµής και µετάβαση στο επόµενο στοιχείο u Πιέστε το κεντρικό πλήκτρο MODE για περίπου 1 5 δ για επιβεβαίωση των στοιχείων για την προληπτική λίπανση και µετάβαση στην επόµενη ρύθµιση u Πιέστε το αριστερό κουµπί για να αλλάξετε την τιµή του στοιχείου u Πιέστε το δεξί κουµπί για ...

Page 125: ... 05 54 34 ΧΡΟΝΟΜΕΤΡΟ Το computer πολλαπλών λειτουργιών είναι εφοδιασµένο µε σύστηµα χρονοµέτρησης που εµφανίζεται στην οθόνη B µε τον ίδιο τρόπο όπως και ο µερικός χιλιοµετρητής TT u Για ενεργοποίηση του χρονόµετρου πιέστε το αριστερό κουµπί u Πιέστε το κεντρικό κουµπί MODE για εµφάνιση της οθόνης B u Πιέστε ξανά το αριστερό κουµπί για να σταµατήσει η χρονοµέτρηση MX125_GR book Page 29 Tuesday Oct...

Page 126: ...ιχεία αυτά είναι Μερική διανυθείσα απόσταση DST Μερικός χιλιοµετρητής TT Μερικός χρόνος διαδροµής RT Μέγιστη ταχύτητα MS Μέση ταχύτητα AS u Πιέστε ταυτόχρονα για περίπου 2 δ το αριστερό κουµπί και το κεντρικό κουµπί MODE Εµφανίζεται η οθόνη A µε τα αντίστοιχα στοιχεία µηδενισµένα u Πιέστε το κεντρικό κουµπί MODE για για να εµφανιστεί η οθόνη B και να µηδενίσετε τα στοιχεία u Πιέστε ξανά το κεντρικ...

Page 127: ...ικό κουµπί MODE για περίπου 3 δ u Πιέστε το δεξί κουµπί για αύξηση της τιµής u Πιέστε το αριστερό κουµπί για µείωση της τιµής u Μετά από 3 δ εµφανίζεται η οθόνη Α µε τις αντίστοιχες µεταβολές ΦΩΤΙΣΜΟΣ u Πιέζοντας το το δεξί κουµπί ενεργοποιείται ο φωτισµός της οθόνης Το φως σβήνει αυτόµατα µετά από 4 δευτερόλεπτα ΑΝΤΙΚΑΤΑΣΤΑΣΗ ΜΠΑΤΑΡΙΑΣ u Αποσυναρµολογήστε το εµπρός φέρινγκ στερέωσης του φαναριού ...

Page 128: ...τίθεται σε λειτουργία το τσοκ για την εκκίνηση του κρύου κινητήρα Για να απενεργοποιήσετε το τσοκ επαναφέρατε το µοχλό στην αρχική του θέση 3 ΙΑΚΟΠΤΗΣ ΦΛΑΣ Μετακινήστε το διακόπτη αριστερά για να δείξετε ότι θέλετε να στρίψετε αριστερά Μετακινήστε το διακόπτη δεξιά για να δείξετε ότι θέλετε να στρίψετε δεξιά Πιέστε το διακόπτη για απενεργοποίηση των φλας 4 ΚΟΥΜΠΙ ΚΟΡΝΑΣ Όταν το πιέζουµε ενεργοποιε...

Page 129: ...ερά u Βάλτε το κλειδί στη θέση Γυρίστε το κλειδί και ταυτόχρονα γυρίστε το τιµόνι u Πιέστε το κλειδί και γυρίστε το αριστερόστροφα γυρίστε ελαφρά το τιµόνι µέχρι να βάλετε το κλειδί στη θέση u Βγάλτε το κλειδί Θεση Λειτουργία Αφαίρεση κλειδιούs Κλειδαριά τιµονιού Το τιµόνι είναι κλειδωµένο εν µπορείτε να βάλετε εµπρός τον κινητήρα ούτε να ανάψετε τα φώτα Μπορείτε να βγάλετε το κλειδί Ο κινητήρας κ...

Page 130: ...1 εξαγωνικό λυγισµένο κλειδί 6 mm 1 εξαγωνικό λυγισµένο κλειδί 8 mm 1 γερµανικό κλειδί 7x8 mm 1 γερµανικό κλειδί 10x13 mm 1 κλειδί γερµανικό κλειδί 19 mm 1 διπλό σωληνωτό κλειδί 21x24 mm 1 διπλό κατσαβίδι ίσιο σταυρωτό 1 λαβή για κατσαβίδι 1 σταυροκατσάβιδο 3x70 mm Μέγιστο επιτρεπόµενο βάρος 1 5 kg ΓΑΝΤΖΟΣ ΚΡΑΝΟΥΣ Χάρη στο γάντζο δεν είναι αναγκαίο να µεταφέρετε το κράνος οπουδήποτε όταν σταθµεύετ...

Page 131: ...οποιήστε τα ακόλουθα ειδικά εργαλεία ζητήστε τα από τον Επίσηµο Αντιπρόσωπο της aprilia Εργαλείο Εργασίες Σελ Κλειδί a settore µε την nasello πινακασ 3 Ρύθµιση δακτυλίου πίσω αµορτισέρ 42 Ειδικό κλειδί σωληνωτό 4 Ρύθµιση διακένου συµπλέκτη 69 MX125_GR book Page 35 Tuesday October 14 2003 7 17 PM ...

Page 132: ... σε άλλο χρησιµοποιώντας ένα σωλήνα ΜΗΝ ΧΥΝΕΤΕ ΤΟ ΚΑΥΣΙΜΟ ΣΤΟ ΠΕΡΙΒΑΛΛΟΝ ΦΥΛΑΞΤΕ ΤΟ ΜΑΚΡΙΑ ΑΠΟ ΤΑ ΠΑΙ ΙΑ Χρησιµοποιήστε αµόλυβδη βενζίνη κατά DIN 51 607 ελάχιστος αριθµός οκτανίων 95 N O R M και 85 N O M M ΧΩΡΗΤΙΚΟΤΗΤΑ ΡΕΖΕΡΒΟΥΑΡ µαζί µε τη ρεζέρβα 11 λίτρα ΡΕΖΕΡΒΑ ΡΕΖΕΡΒΟΥΑΡ 1 3 λίτρα µηχανική ρεζέρβα Για τον ανεφοδιασµό καυσίµου u Ξεβιδώστε και βγάλτε την τάπα του ρεζερβουάρ 1 u Κάντε ανεφοδιασµ...

Page 133: ...εθεί ο σωλήνας λαδιού µίξης πρέπει να απευθυνθείτε σε έναν Επίσηµο Αντιπρόσωπο της aprilia ο οποίος και θα προνοήσει για την εκκένωση Η επέµβαση αυτή είναι απαραίτητη δεδοµένου ότι η λειτουργία του κινητήρα µε αέρα µέσα στο σύστηµα λαδιού µίξης µπορεί να προκαλέσει σοβαρή ζηµιά στον ίδιο τον κινητήρα Για την εισαγωγή του λαδιού µίξης στο ρεζερβουάρ u Αφαιρέστε το αριστερί πλαϊνό φέρινγκ βλέπε σελ ...

Page 134: ...ντε καλά τα µέρη του σώµατος που ενδεχοµένως ήρθαν σε επαφή µε τα υγρά Επίσης απευθυνθείτε σε έναν οφθαλµίατρο ή ένα γιατρό αν τα υγρά έρθουν σε επαφή µε τα µάτια Μη διασκορπίζετε τα υγρά στο περιβάλλον ΦΥΛΑΞΤΕ ΤΟ ΜΑΚΡΙΑ ΑΠΟ ΤΑ ΠΑΙ ΙΑ Χρησιµοποιώντας τα υγρά των φρένων προσέξτε να µη χυθούν στα πλαστικά και τα βαµµένα µέρη γιατί µπορεί να τα καταστρέψουν ΙΣΚΟΦΡΕΝΑ Τα φρένα είναι όργανα απαραίτητα ...

Page 135: ...ου δοχείου υγρών φρένων u Ξεβιδώστε τις βίδες 3 u Βγάλτε το καπάκι 4 ιατηρήστε το υγρό στο ρεζερβουάρ παράλληλο µε το χείλος του ρεζερβουάρ Με τον τ ροπο αυτό αποφεύγετε επικίνδυνες διαρροές κατά το συµπλήρωµα u Αφαιρέστε την τσιµούχα 5 u Γεµίστε το ρεζερβουάρ µε υγρό φρένων σελ 88 ΠΙΝΑΚΑΣ ΛΙΠΑΝΤΙΚΩΝ µέχρι να καλύψετε εντελώς το τζαµάκι u Επαβατοποθετήστε σωστά την τσιµούχα 5 στην υποδοχή u Ξαναβά...

Page 136: ... Για να µην χυθεί υγρό φρένων όταν συµπληρώνετε συνιστάται να διατηρήσετε το υγρό στο ρεζερβουάρ παράλληλο µε το χείλος του ρεζερβουάρ σε οριζόντια θέση και να µην αναποδογυρίζετε το ρεζερβουάρ u Αφαιρέστε την τσιµούχα 4 u Με µια σύριγγα προσθέστε υγρά φρένων στο ρεζερβουάρ 1 βλέπε σελ 88 ΠΙΝΑΚΑΣ ΛΙΠΑΝΤΙΚΩΝ µέχρι την ένδειξη MAX u Τοποθετήστε σωστά την τσιµούχα 4 και ξαναβιδώστε την τάπα 2 u Στερε...

Page 137: ...1 u Ξεβιδώστε τη ράβδο χειρισµού αντλίας 4 και µετακινήστε την µέχρι να έρθει σε επαφή µε το έµβολο της αντλίας u Ξεβιδώστε τη ράβδο ελέγχου αντλίας 5 για να εξασφαλίσετε το ελάχιστο διάκενο 0 5 1 mm µεταξύ της ράβδου ελέγχου αντλίας και του εµβόλου αντλίας Βεβαιωθείτε ότι υπάρχει διάκενο ανάµεσα στη ράβδο ελέγχου αντλίας 4 και το έµβολο της αντλίας για να µην παραµένει πατηµένο το φρένο προκαλώντ...

Page 138: ...µπορείτε να το ζητήσετε στους Επίσηµους Αντιπροσώπους της aprilia u Τοποθετήστε το ειδικό κλειδί 5 και ξεβιδώστε το εσωτερικό παξιµάδι 6 u Τοποθετήστε τώρα ένα κατσαβίδι ίσιο 7 στο ειδικό κλειδί 5 και βιδώστε εντελώς τη βίδα ρύθµισης 8 u Ξεσφίξτε τη βίδα ρύθµισης 8 κατά µισή στροφή που αντιστοιχεί σε 3χ4 mm διαδροµής της µανέτας 9 u Με το κατσαβίδι 7 κρατήστε µπλοκαρισµένη τη βίδα ρύθµισης 8 και µ...

Page 139: ... κίνδυνο το κράτηµά τους στο δρόµο και τον έλεγχο της οδήγησης Αντικαταστήστε το ελαστικό αν είναι φθαρµένο ή αν υπάρχει σκίσιµο στο πέλµα µεγαλύερο από 5 mm Μετά την επιδιόρθωση του ελαστικού κάντε ζυγοστάθµιση στον τροχό Τα ελαστικά πρέπει να αντικαθίστανται µε άλλα του τύπου που προτείνει ο οίκος κατασκευής βλέπε σελ 85 ΤΕΧΝΙΚΑ ΣΤΟΙΧΕΙΑ Ελέγχετε αν οι βαλβίδες των ελαστικών είναι πάντα εφοδιασµ...

Page 140: ...ορεί να προκληθεί φωτιά µε αόρατες φλόγες Όταν κάνετε συντήρηση συνιστάται η χρήση γαντιών από λατέξ Για την αντικατάστασή του απευθυνθείτε σε έναν Επίσηµο Αντιπρόσωπο της aprilia Το διάλυµα του υγρού ψύξης αποτελείται από 50 νερό και 50 αντιψυκτικό Αυτό το µίγµα είναι ιδανικό για το µεγαλύτερο φάσµα των θερµοκρασιών λειτουργίας και εξασφαλίζει καλή προστασία από τη διάβρωση Συµφέρει να διατηρείτε...

Page 141: ...λάκες του ψυγείου u Αν χρειάζεται συµπληρώστε µε ψυκτικό υγρό βλ σελ 88 ΠΙΝΑΚΑΣ ΛΙΠΑΝΤΙΚΩΝ µέχρι να καλυφθούν εντελώς οι πλάκες του ψυγείου Μην ξεπερνάτε αυτή τη στάθµη αλλιώς θα προκληθεί διαρροή του υγρού κατά τη λειτουργία του κινητήρα Το υγρό ψύξης είναι τοξικό αν καταποθεί η επαφή µε το δέρµα ή τα µάτια µπορεί να προκαλέσει ερεθισµούς Μην εισάγετε τα δάκτυλα ή άλλα αντικείµενα για να ελέγξετε...

Page 142: ...αυτόχρονα µειώνει και τους καπνούς από τα καυσαέρια Για τη σωστή και διαρκή λειτουργία του καταλύτη καθώς και για να ελαχιστοποιηθεί η πιθανότητα να λερωθεί το σύστηµα καύσης και εξαγωγής καυσαερίων αποφεύγετε να οδηγείτε για µεγάλες αποστάσεις µε σταθερά χαµηλό επίπεδο στροφών Θα είναι αρκετό για το σκοπό αυτό να εναλλάσσετε τη λειτουργία µε περιόδους λειτουργίας µε µέτρια ανεβασµένες στροφές ακό...

Page 143: ...αχυτήτων Ελέγξτε και ή συµπληρώστε αν χρειάζεται 36 37 60 61 Τροχοί ελαστικά Ελέγξτε την κατάσταση του πέλµατος των ελαστικών την πίεση τη φθορά και τυχόν ζηµιές 43 Μανέτες φρένων Ελέγξτε αν λειτουργούν οµαλά Λαδώστε τις αρθρώσεις και ρυθµίστε τη διαδροµή αν χρειάζεται 39 40 Συµπλέκτης Ελέγξτε τη λειτουργία το διάκενο στην άκρη της µανέτας πρέπει να είναι 10 mm Ο συµπλέκτης πρέπει να λειτουργεί χω...

Page 144: ... Στη συνέχεια u Περιστρέψτε τη στρόφιγγα καυσίµου 1 στη θέση ON u Βεβαιωθείτε ότι ο διακόπτης φώτων 2 βρίσκεται στη θέση u Γυρίστε το κλειδί 3 και βάλτε το διακόπτη εκκίνησης στη θέση Στο σηµείο αυτό στο ταµπλό ανάβει η κόκκινη ενδεικτική λυχνία ρεζέρβουας λαδιού µίξης βλέπε σελ 15 ΟΡΓΑΝΑ ΚΑΙ ΕΙΚΤΕΣ u Μπλοκάρετε τον εµπρός τροχός µε το εµπρός φρένο 4 u Τοποθετήστε το λεβιέ ταχυτήτων 5 σε νεκρά πρά...

Page 145: ...χαµηλών θερµοκρασιών περιβάλλοντος κοντά ή κάτω από 0 C µπορεί να παρουσιαστούν δυσκολίες κατά την εκκίνηση Στην περίπτωση αυτή u Περιστρέψτε αριστερόστροφα Θέση A το µοχλό εκκίνησης µε κρύο 6 Μην πατάτε το πεντάλ εκκίνησης όταν ο κινητήρας λειτουργεί u Περιστρέψτε ελαφρά το γκάζι 8 και ταυτόχρονα πατήστε µετικές φορές αποφασιστικά το πεντάλ εκκίνησης 7 αφήνοντάς το αµέσως µετά Αν εκκινηθεί ο κινη...

Page 146: ...τών Με το δίκυκλο σταµατηµένο εξοικειωθείτε µε τη χρήση των καθρεπτών u Εκκινήστε τον κινητήρα βλέπε σελ 48 ΕΚΚΙΝΗΣΗ u Στα πρώτα χιλιόµετρα της διαδροµής οδηγείτε µε χαµηλή ταχύτητα για να ζεσταθεί ο κινητήρας u Με τη µανέτα γκαζιού 2 ελεύθερη Θέση A και τον κινητήρα στο ρελαντί πατήστε εντελώς το συµπλέκτη 3 u Βάλτε την πρώτη ταχύτητα πατώντας προς τα κάτω το µοχλό ταχυτήτων 4 u Αφήστε το φρένο π...

Page 147: ...βάζετε µία σχέση κάθε φορά Το κατέβασµα περισσότερων σχέσεων ταυτόχρονα µπορεί να προκαλέσει την υπέρβαση του µέγιστου αριθµού των στροφών ριν και κατά το κατέβασµα µίας σχέσης χαµηλώστε ταχύτητα αφήνοντας το γκάζι για να αποφύγετε την υπέρβαση του µέγιστου αριθµού των στροφών Για να κάνετε ένα κατέβασµα u Αφήστε το γκάζι 2 Θέση A u Αν χρειάζεται πατήστε ελαφρά το φρένο για να χαµηλώσετε την ταχύτ...

Page 148: ...ήσετε Χρησιµοποιώντας συνεχώς τα φρένα στις κατηφόρες µπορεί να υπερθερµανθούν τα υλικά τριβής µε επακόλουθο τη µείωση της απόδοσης φρεναρίσµατος Εκµεταλλευτείτε τη συµπίεση του κινητήρα κατεβάζοντας ταχύτητα µε την ενδιάµεση χρήση και των δύο φρένων Στις κατηφόρες µην οδηγείτε µε τον κινητήρα σβηστό Να προσέχετε οποιοδήποτε εµπόδιο ή αλλαγή της γεωµετρίας του οδοστρώµατος Οι ανώµαλοι δρόµοι οι γρ...

Page 149: ...η τέλος στρωσίµατος του ΠΙΝΑΚΑ ΠΕΡΙΟ ΙΚΗΣ ΣΥΝΤΗΡΗΣΗΣ βλ σελ 56 ΠΙΝΑΚΑΣ ΠΕΡΙΟ ΙΚΗΣ ΣΥΝΤΗΡΗΣΗΣ ΣΕΡΒΙΣ για να αποφύγετε ζηµιές σε εσάς τους ίδιους σε άλλους και ή στο δίκυκλο u Μεταξύ των 800 και 1500 km να οδηγείτε πιο ζωηρά να µεταβάλετε την ταχύτητα και να επιταχύνετε στο µέγιστο µόνο για µικρά χρονικά διαστήµατα για καλύτερη προσαρµογή των µηχανικών µέρών Μην ξεπερνάτε τα 3 4 του ανοίγµατος του γ...

Page 150: ...άλτε το κλειδί 1 ΤΟΠΟΘΕΤΗΣΗ ΤΟΥ ΙΚΥΚΛΟΥ ΣΤΟ ΣΤΑΝΤ ιαβάστε προσεκτικά δίπλα ΣΤΑΘΜΕΥΣΗ u Πιάστε την αριστερή µανέτα 4 και τη χειρολαβή του συνεπιβάτη 5 u Σπρώξτε το πλευρικό σταντ µε το δεξί πόδι κατεβάζοντάς το εντελώς 6 u Γείρετε το δίκυκλο µέχρι το σταντ να ακουµπήσει στο έδαφος Βεβαιωθείτε για τη σταθερότητα του δικύκλου ΣΥΜΒΟΥΛΕΣ ΠΡΟΣΤΑΣΙΑΣ ΑΠΟ ΚΛΟΠΗ Μην αφήνετε ΠΟΤΕ το κλειδί στην κλειδαριά κα...

Page 151: ...σιµο ενώ πολλά από αυτά είναι επιβλαβή ή τοξικά Αν δεν περιγράφεται επακριβώς η επανασυναρµολόγηση των τµηµάτων ακολουθεί την αντίστροφη σειρά της συναρµολόγησης Όταν κάνετε συντήρηση συνιστάται η χρήση γαντιών από λατέξ Συνήθως οι εργασίες τακτικής συντήρησης µπορούν να γίνουν από τον κάτοχο του δικύκλου και µερικές φορές µπορεί να απαιτούν τη χρήση ειδικών εργαλείων και µια τεχνική προετοιµασία ...

Page 152: ...ς ή όταν γίνεται χρήση του δικύκλου σε αγώνες Εξαρτήµατα Τέλος στρωσίµατος µετά από 1 µήνα ή 1000 Km 625 mi Κάθε 12 µήνες ή 4000 Km 2500 mi Κάθε 24 µήνες ή 8000 Km 5000 mi Μπαταρία σφίξιµο σφιγκτήρων Μπουζί Φίλτρο αέρα ιάκενο συµπλέκτη Φώτα Υγρό φρένων Υγρό ψύξης Κάθε 3 µήνες Στάθµη λαδιού µίξης ελέγξτε κάθε φορά πριν από τη χρήση Λάδι κιβωτίου ταχυτήτων Κάθε 12000 Km 7500 mi Προσανατολισµός εµπρό...

Page 153: ...ν c c Κεντρική µονάδα RAVE c f Κεντράρισµα τροχών c Έδρανα και διάκενο τιµονιού c c Ρουλεµάν τροχών c ίσκοι φρένων c c Φίλτρο λαδιού µίξης d Γενική λειτουργία δικύκλου c c Κύκλωµα φρένων c c Κύκλωµα ψύξης c c Υγρό φρένων κάθε χρόνο e Υγρό ψύξης κάθε 2 χρόνια e Εξάτµιση σιλανσιέ c Λάδι πηρουνιού κάθε 2 χρόνια e Έµβολο και κολάρα κάθε 2 χρόνια c κάθε 4 χρόνια e Αντλία µίξης και εξαέρωση c f Στρόφιγγ...

Page 154: ...ου κινητήρα Αρ κινητήρα ______________________ ΑΡΙΘΜΟΣ ΠΛΑΙΣΙΟΥ Ο αριθµός πλαισίου 2 είναι χαραγµένος στο λαιµό του τιµονιού στη δεξιά πλευρά Αρ Πλαισίου ______________________ ΑΦΑΙΡΕΣΗ ΠΛΑΪΝΑ ΦΕΡΙΝΓΚ ιαβάστε προσεκτικά στη σελ 55 ΣΥΝΤΗΡΗΣΗ u Τοποθετήστε το δίκυκλο στο σταντ Οι παρακάτω ενέργειες αναφέρονται σε ένα φέρινγκ αλλά ισχύουν και για τα δύο u περιστρέψτε αριστερόστροφα κατά 1 4 της στροφ...

Page 155: ...Αφαιρέστε το φίλτρο 3 µαζί µε τα πλέγµατα 4 και 5 ΚΑΘΑΡΙΣΜΟΣ Για να µην παραµορφωθούν τα πλέγµατα ΜΗΝ πιέζετε τα πλαϊνά τµήµατα u Πιάστε το κεντρικό τµήµα και των δύο πλεγµάτων 4 και 5 και τραβήξτε για να τις χωρίσετε u Ελευθερώστε το φίλτρο 3 από το πλέγµα 4 u Πλύνετε το φίλτρο 3 µε καθαρούς διαλύτες όχι εύφλεκτους ή µε υψηλό σηµείο πτητικότητας και αφήστε το να στεγνώσει καλά u Επαλείψτε όλη την...

Page 156: ...α είναι κάτω από το ένα τέταρτο Στην πρώτη περίπτωση θα προκληθεί διαρροή λαδιού λόγω υπερβολικής ποσότητας στη δεύτερη µπορεί να προκληθεί σοβαρή ζηµιά στον κινητήρα ΣΥΜΠΛΗΡΩΜΑ Αν χρειάζεται συµπληρώστε u Ξεβιδώστε και βγάλτε την τάπα γέµισης 2 u Προσθέστε µικρή ποσότητα λαδιού κλέπε σελ 88 ΠΙΝΑΚΑΣ ΛΙΠΑΝΤΙΚΩΝ και περιµένετε περίπου ένα λεπτό µέχρι να διοχετευτεί το λάδι οµοιόµορφα στο εσωτερικό τ...

Page 157: ...µερικά λεπτά στο δοχείο 1 u Αφαιρέστε τυχόν µεταλλικά υπολείµµατα που µπορεί να κόλλησαν στο µαγνήτη της τάπας εκροής 2 u Ελέγξτε και ενδεχοµένως αντικαταστήστε τη ροδέλα της τάπας εκροής 2 Αντικαταστήστε τη ροδέλα στεγανότητας της τάπας εκροής 2 κάθε 12000 km µε κάθε αλλαγή λαδιού u Βιδώστε και σφίξτε την τάπα εκροής 2 Ροπή σφιξίµατος τάπας εκροής 2 27 Nm 2 7 kgm u Προσθέστε στο άνοιγµα γέµισης 3...

Page 158: ... µπορείτε να κρατήσετε το βάρος του δικύκλου Βάρος δικύκλου κατά την πορεία 126 kg u Σηκώστε το εµπρός τµήµα και τακτοποιήστε το κατάλληλο υποστήριγµα 1 µε ύψος 400 mm κάτω από τον κινητήρα µε τρόπο ώστε ο εµπρός τροχός να έχει ελεύθερο χώρο για να κινείται και το δίκυκλο να είναι καλά στερεωµένο ώστε να µην πέσει Κίνδυνος πτώσης του δικύκλου Φροντίστε να ισορροπήσει το δίκυκλο για να αποφύγετε τη...

Page 159: ...ο µέσα τον πείρο 4 από τη δεξιά πλευρά του δικύκλου µε βάση την κατεύθυνση πορείας u Πιέστε τον πείρο του τροχού και ταυτόχρονα κουνήστε τον τροχό για να ευθυγραµµιστούν οι άξονες του πείρου και του τροχού µέχρι την πλήρη εισαγωγή του πείρου u Βιδώστε και σφίξτε τον πείρο του τροχού 4 Ροπή σύσφιξης πείρου τροχού 4 80 Nm 8 kgm Λόγω του βάρους και του όγκου του δικύκλου η ενέργεια που ακολουθεί απαι...

Page 160: ...τες θέτει σε κίνδυνο την ασφάλειά σας την ασφάλεια άλλων και του δικύκλου Ελέγξτε την νκατάσταση της ζάντας και αν είναι κατεστραµµένη ανατικαταστήστε την ΑΠΟΣΥΝΑΡΜΟΛΟΓΗΣΗ u Τοποθετήστε το δίκυκλο στο σταντ u Ξεβιδώστε και αφαιρέστε τις δύο βίδες 1 u Αφαιρέστε το κάρτερ αλυσίδας 2 u Ξεσφίξτε το παξιµάδι του τροχού 3 Ροπή σύσφιξης παξιµαδιού τροχού 3 100 Nm 10 kgm Κατά την επανασυναρµολόγηση πριν σ...

Page 161: ...ω τον τροχό από την πίσω πλευρά του πηρουνιού προσέχοντας να µη βγει ο δίσκος του φρένου από τη δαγκάνα Μην πατήσετε το µοχλό του πίσω φρένου µετά την εξαγωγή του τροχού διαφορετικά το εµβολάκι της δαγκάνας µπορεί να βγει από την υποδοχή του προκαλώντας διαρροή του υγρού φρένων Σ αυτήν την περίπτωση απευθυνθείτε σε έναν Επίσηµο Αντιπρόσωπο της aprilia ο οποίος θα φροντίσει να κάνει τη συντήρηση Ελ...

Page 162: ...κτελέστε τις εργασίες συντήρησης σε συντοµότερα χρονικά διαστήµατα αν το δίκυκλο υπόκειται σε σκληρή καταπόνηση ή αν χρησιµοποιείται σε περιοχές µε πολύ σκόνη και ή λάσπη ΕΛΕΓΧΟΣ ΙΑΚΕΝΟΥ Για τον έλεγχο του διακένου u Σταµατήστε τον κινητήρα u Τοποθετήστε το δίκυκλο στο σταντ u Βάλτε το λεβιέ ταχυτήτων σε νεκρά u Ελέγξτε ώστε η κάθετη ταλάντωση στο ενδιάµεσο σηµείο ανάµεσα στο πινιόν και στην κορών...

Page 163: ...υς συγκράτησης που λείπουν u όντια των γραναζιών που είναι υπερβολικά φθαρµένα ή χαλασµένα Αν τα ράουλα της αλυσίδας έχουν πάθει ζηµιά οι πείροι είναι χαλαρωµένοι και ή οι δακτύλιοι συγκράτησης είναι χαλασµένοι ή λείπουν πρέπει να αντικατασταθεί όλο το σύστηµα της αλυσίδας γρανάζια και αλυσίδα u Ελέγξτε τη φθορά του τεντωτήρα της αλυσίδας 6 και της ροδέλας τεντώµατος αλυσίδας 7 u Τέλος ελέγξτε τη ...

Page 164: ... του πηρουνιού πιο συχνά αν το δίκυκλο χρησιµοποιείται σε δρόµους µε σκόνη σε βρεγµένο οδόσρωµα και σε ανώµαλο δρόµο Κάντε επίσης του παρακάτω ελέγχους u Με το µοχλό του εµπρός φρένου πιέστε επανειληµµένα το τιµόνι για να µπει µέσα το πηρούνι Η διαδροµή πρέπει να είναι οµαλή και δεν πρέπει να υπάρχουν ίχνη λαδιού στα στελέχη u Ελέγξτε το σφίξιµο όλων των οργάνων και τη λειτουργικότητα των αρθρώσεω...

Page 165: ...όσο µε µικρό φορτίο όσο και µε πλήρες φορτίο Είναι όµως δυνατό να κάνετε την προσωπική σας ρύθµιση ανάλογα µε τη χρήση του δικύκλου u Χρησιµοποιώντας το κατάλληλο κλειδί 3 ξεβιδώστε λίγο το δακτύλιο εµπλοκής 2 u Χρησιµοποιήστε το δακτύλιο ρύθµισης 1 ρύθµιση προφόρτισης ελατηρίου αµορτισέρ βλέπε πίνακα u Αφού κάνετε την κατάλληλη ρύθµιση σφίξτε εντελώς το δακτύλιο εµπλοκής 2 ακτύλιος ρύθµισης 1 Βιδ...

Page 166: ...α του φρένου και τα τακάκια ως εξής από επάνω και εµπρός για τη δαγκάνα του εµπρός φρένου 1 από επάνω και πίσω για τη δαγκάνα του πίσω φρένου 2 u Αν το πάχος του υλικού τριβής ακόµα και σε ένα µόνο τακάκι µειωθεί µέχρι να φτάσει στο 1 mm αντικαταστήστε και τα δύο τακάκια Για την αντικατάστασή του απευθυνθείτε σε έναν Επίσηµο Αντιπρόσωπο της aprilia ΡΥΘΜΙΣΗ ΧΕΙΡΙΣΤΗΡΙΟΥ ΕΚΚΙΝΗΣΗΣ ΜΕ ΚΡΥΟ ιαβάστε πρ...

Page 167: ...στερόστροφα ο αριθµός στροφών µειώνεται u Με τη µανέτα του γκαζιού αυξήστε και µειώστε τις στροφές µερικές φορές για να επαληθεύσετε τη σωστή λειτουργία και ότι το ρελαντί παραµένει σταθερό Μην επεµβαίνετε στη βίδα ρύθµισης του αέρα για να αποφύγετε αλλαγές στη ρύθµιση της ανάµιξης καυσίµου και αέρα Σε περίπτωση ανάγκης απευθυνθείτε σε έναν Επίσηµο Αντιπρόσωπο της aprilia ΡΥΘΜΙΣΗ ΓΚΑΖΙΟΥ ιαβάστε π...

Page 168: ...µα και ή ένα µεταλλικό βουρτσάκι u Φυσήξτε δυνατά µε αέρα για να µην µπουν υπολείµµατα ακαθαρσιών στον κινητήρα Αν το µονωτικό του µπουζί είναι σπασµένο αν τα ηλεκτρόδια είναι διαβρωµένα ή υπάρχουν πολλές επικαθίσεις το µπουζί πρέπει να αντικατασταθεί u Ελέγξτε το διάκενο των ηλεκτροδίων µε ένα παχύµετρο Πρέπει να είναι 0 5 0 6 mm ενδεχοµένως ρυθµίστε το λυγίζοντας προσεκτικά το ηλεκτρόδιο γείωσης...

Page 169: ... διάρκεια επανφόρτισης ή χρήσης προνοήστε για τον κατάλληλο αερισµό του χώρου για να αποφύγετε την εισπνοή των αερίων που εκπέµπονται κατά τη διάρκεια της επαναφόρτισης ΦΥΛΑΞΤΕ ΤΟ ΜΑΚΡΙΑ ΑΠΟ ΤΑ ΠΑΙ ΙΑ Ποτέ µην αντιστρέφετε τη σύνδεση των καλωδίων της µπαταρίας ώστε προσοχή ώστε να µην πάρει υπερβολική κλίση το δίκυκλο για να αποφύγετε διαρροή του υγρού της µπαταρίας Συνδέστε και αποσυνδέστε τη µπα...

Page 170: ...άσσο ή βαζελίνη u Βάλτε στη θέση της τη µπαταρία βλέπε σελ 75 ΤΟΠΟΘΕΤΗΣΗ ΜΠΑΤΑΡΙΑΣ ΑΦΑΙΡΕΣΗ ΜΠΑΤΑΡΙΑΣ ιαβάστε προσεκτικά στη σελ 73 ΜΠΑΤΑΡΙΑ u Βεβαιωθείτε ότι ο διακόπτης εκκίνησης είναι στη θέση u Αφαιρέστε το αριστερό πλαϊνό φέρινγκ βλέπε σελ 58 ΑΦΑΙΡΕΣΗ ΠΛΑΪΝΑ ΦΕΡΙΝΓΚ u Ξεβιδώστε και βγάλτε τη βίδα 3 από τον αρνητικό πόλο u Μετακινήστε πλαγίως το αρνητικό καλώδιο 4 u Ξεβιδώστε και βγάλτε τη βίδ...

Page 171: ...τοιχείων u Ελέγξτε τη στάθµη του ηλεκτρολύτη στη µπαταρία βλέπε δίπλα ΕΛΕΓΧΟΣ ΣΤΑΘΜΗΣ ΗΛΕΚΤΡΟΛΥΤΗ ΜΠΑΤΑΡΙΑΣ u Συνδέστε τη µπαταρία σε µιοα συσκευή φόρτισης u Συνιστάται επαναφόρτιση µε τάση 1 10 της ικανότητας της ίδιας της µπαταρίας u Μετά τη φόρτιση ελέγξτε τη στάθµη του ηλεκτρολύτη και ενδεχοµένως προσθέστε απεσταγµένο νερό u Σφίξτε τις τάπες των στοιχείων Επανατοποθετήστε τη µπαταρία µόνο αφού...

Page 172: ...αι απαραίτητο να ελέγξετε τις ασφάλειες Για τον έλεγχο u Γυρίστε το διακόπτη εκκίνησης στη θέση για την αποφυγή τυχαίου βραχυκυκλώµατος u Αφαιρέστε το αριστερό πλαϊνό φέρινγκ βλέπε σελ 58 ΑΦΑΙΡΕΣΗ ΠΛΑΪΝΑ ΦΕΡΙΝΓΚ u Βγάλτε µία µία τις ασφάλειες και ελέγξτε αν το συρµατάκι 7 είναι κοµµένο u Πριν αντικαταστήσετε την ασφάλεια αναζητήστε την αιτία που προκάλεσε τη βλάβη u Αντικαταστήστε την καµένη ασφάλ...

Page 173: ... να µπορεί να περιστραφεί ελεύθερα ενδεχοµένως γρασσάρετε την άρθρωση βλέπε σελ 88 ΠΙΝΑΚΑΣ ΛΙΠΑΝΤΙΚΩΝ ΕΛΕΓΧΟΣ ΙΑΚΟΠΤΩΝ ιαβάστε προσεκτικά στη σελ 55 ΣΥΝΤΗΡΗΣΗ Στο δίκυκλο υπάρχουν δύο διακόπτες u ιακόπτης φώτων σταµατήµατος 1 στο µοχλό χειρισµού του πίσω φρένου u ιακόπτης φώτων σταµατήµατος 2 στο µοχλό χειρισµού του εµπρός φρένου Για τον έλεγχο u ιακόπτες 1 και 2 αφαιρέστε το προστατευτικό κάλυµµα...

Page 174: ... µε ένα κατσαβίδι την ειδική βίδα 1 ΒΙ ΩΝΟΝΤΑΣ δεξιόστροφα η δέσµη φωτός ανεβαίνει ΞΕΒΙ ΩΝΟΝΤΑΣ αριστερόστροφα η δέσµη φωτός χαµηλώνει ΛΑΜΠΤΗΡΕΣ ιαβάστε προσεκτικά στη σελ 55 ΣΥΝΤΗΡΗΣΗ Πριν αντικαταστήσετε κάποιο λαµπτήρα στηρίξτε το δίκυκλο στο σταντ και γυρίστε το διακόπτη εκκίνησης στη θέση Αντικαταστήστε τη λάµπα φορώντας καθαρά γάντια ή χρησιµοποιώντας ένα καθαρό και στεγνό πανί Μην αφήσετε δ...

Page 175: ...άστε τη βάση του λαµπτήρα 6 τραβήξτε και αποσυνδέστε από την υποδοχή u Αφαιρέστε το λµπτήρα φώτων πορείας 1 και αντικαταστήστε µε έναν καινούργιο ίδιου τύπου ΛΑΜΠΑ ΜΕΓΑΛΗΣ ΜΕΣΑΙΑΣ ΣΚΑΛΑΣ Για την εξαγωγή της ηλεκτρικής σύνδεσης του λαµπτήρα µην τραβάτε τα ηλεκτρικά καλώδια u Πιάστε την ηλεκτρική σύνδεση του λαµπτήρα 7 τραβήξτε την και αποσυνδέστε το λαµπτήρα από την υποδοχή στερέωσης 8 u Σύρατε έξω...

Page 176: ...τε να µην χαραχτούν ή να φθαρούν u Τραβήξτε προς τα κάτω τη µάσκα 2 µαζί µε τον εµπρόσθιο φανό αποσυνδέοντάς τον από την υποδοχή 3 στο ταµπλό ΕΝ ΕΙΚΤΙΚΕΣ ΛΥΧΝΙΕΣ Αφαιρέστε µια θήκη τη φορά για να αποφύγετε λανθασµένη τοποθέτηση κατά τη συναρµολόγηση u Βγάλτε τη θήκη που σας ενδιαφέρει u Βγάλτε και αντικαταστήστε τη λάµπα µε µια ίδιου τύπου ΦΩΤΙΣΜΟΣ ΤΑΜΠΛΟ u Αφαιρέστε τη θήκη της λάµπας 9 u Βγάλτε ...

Page 177: ...ς u Τοποθετήστε σωστά µια λάµπα ίδιου τύπου ΑΝΤΙΚΑΤΑΣΤΑΣΗ ΛΑΜΠΑΣ ΠΙΣΩ ΦΑΝΟΥ Πριν αντικαταστήσετε ένα λαµπτήρα ελέγξτε τις ασφάλειες βλέπε σελ 76 ΑΝΤΙΚΑΤΑΣΤΑΣΗ ΑΣΦΑΛΕΙΩΝ και την αποτελεσµατικότητα των διακοπτών των στοπ βλέπε σελ 77 ΕΛΕΓΧΟΣ ΠΛΕΥΡΙΚΟΥ ΣΤΑΝΤ ιαβάστε προσεκτικά στη σελ 78 ΛΑΜΠΤΗΡΕΣ u Ξεβιδώστε και αφαιρέστε τις δύο βίδες 4 Κατά την επανασυναρµολόγηση σφίξτε προσεκτικά και λίγο τις δύο...

Page 178: ...γαστείτε έχει καλό εξαερισµό Μην εισπνέετε ατµούς καυσίµου Μην καπνίζετε και µην χρησιµοποιείτε ελεύθερη φλόγα Μην χύνετε το καύσιµο στο περιβάλλον u Τοποθετήστε το δίκυκλο στο σταντ u Σβήστε τον κινητήρα και περιµένετε να κρυώσει u Εφοδιαστείτε µε ένα δοχείο χωρητικότητας µεγαλύτερης από την ποσότητα καυσίµου που υπάρχει στο ρεζερβουάρ και τοποθετήστε το στο έδαφος στην αριστερή πλευρά του δικύκλ...

Page 179: ...πικαθίσει στις βαµµένες επιφάνειες να χρησιµοποιήσετε ριπή νερού µε χαµηλή πίεση βρέξτε καλά τα βρώµικα µέρη αφαιρέστε τη λάσπη και τις βρωµιές µε ένα µαλακό σφουγγάρι για αµαξώµατα καλά ποτισµένο µε νερό και σαµπουάν 2 4 µέρη σαµπουάν σε νερό Μετά ξεπλύντε καλά µε νερό και στεγνώστε µε κατεργασµένο δέρµα Για να πλύνετε τα εξωτερικά µέρη του κινητήρα χρησιµοποιήστε απορρυπαντικό που να αφαιρεί τα ...

Page 180: ... σελ 83 ΚΑΘΑΡΙΣΜΟΣ u Περάστε µε κερί όλες τις βαµµένες επιφάνειες u Φουσκώστε τα λάστιχα βλέπε σελ 43 ΛΑΣΤΙΧΑ u Τοποθετήστε το δίκυκλο µε τέτοιο τρόπο ώστε και τα δύο λάστιχα να είναι ανυψώµενα πάνω από το έδαφος χρησιµοποιώντας το κατάλληλο υποστήριγµα u Τακτοποιήστε το δίκυκλο σε χώρο χωρίς θέρµανση χωρίς υγρασία προστατευµένο από τις ακτίνες του ηλίου στον οποίο οι µεταβολές τις θερµοκρασίας εί...

Page 181: ...άµετρος διαδροµή 54 mm 54 5 mm Σχέση συµπίεσης 12 5 0 5 1 Εκκίνηση µε πεντάλ Αρ στροφών στο ρελαντί 1200 100 στροφές λεπτό Συµπλέκτης πολυδίσκος σε λουτρό λαδιού µε µανέτα χειρισµού στην αριστερή πλευρά του τιµονιού Ψύξη υδρόψυκτο ΧΩΡΗΤΙΚΟΤΗΤΑ Καύσιµο µαζί µε τη ρεζέρβα 11 λίτρα Ρεζέρβα καυσίµου 1 3 λίτρα µηχανική ρεζέρβα Λάδι κιβωτίου ταχυτήτων 600 cmC Υγρό ψύξης 0 8 λίτρα 50 νερό 50 αντιψυκτικό ...

Page 182: ... R3 1 10 213 R1 x R2 x R3 1 8 901 ΚΑΡΜΠΥΡΑΤΕΡ Αριθµός 1 Μοντέλο DELL ORTO PHBH 28 ΤΡΟΦΟ ΟΣΙΑ Καυσίµου Βενζίνη super αµόλυβδη κατά DIN 51 607 ελάχιστος αριθµός οκτανίων 95 N O R M και 85 N O M M ΠΛΑΙΣΙΟ Τύπος Μονή δοκός µε διπλή τραβέρσα από χάλυβα υψηλής αντοχής Γωνία κλίσης τιµονιού 28 Προπορεία 127 mm ΑΝΑΡΤΗΣΕΙΣ Εµπρός Upside down Ψ40 ιαδροµή 260 mm Πίσω Μονό αµορτισέρ αερίου ιαδροµή 280 mm ΦΡΕΝ...

Page 183: ... Στάνταρ NGK R BR8 ES ιάκενο ηλεκτροδίου µπουζί 0 5 0 6 mm ΣΥΣΤΗΜΑ Μπαταρία 12 V 4 Ah ΗΛΕΚΤΡΙΚΟ Ασφάλειες γενικά 20 A Ασφάλειες κεντρική µονάδα 15 A Ασφάλειες λειτουργίες 7 5 A Γεννήτρια A 12 V 180 W ΛΑΜΠΤΗΡΕΣ Μεσαία Μεγάλη σκάλα 12 V 35 35 W Φώτα πορείας εµπρός 12 V 5 W Φλας 12 V 10 W Φώτα θέσης πίσω πινακίδας στοπ 12 V 5 21 W Φωτισµός ταµπλο 12 V 2 W ΕΝ ΕΙΚΤΙΚΕΣ Κιβώτιο ταχυτήτων σε νεκρά 12 V 1...

Page 184: ...υ όγκου FORK 20W 33 του όγκου SAE 15W F A 5W 33 του όγκου F A 20W 67 του όγκου ή FORK 5W 33 του όγκου FORK 20W 67 του όγκου Ρουλεµάν και άλλα σηµεία λίπανσης AUTOGREASE MP ή GREASE 30 Εναλλακτικά al συνιστώµενο προϊόν χρησιµοποιήστε γράσσο για ρουλεµάν πεδίο ωφέλιµης θερµοκρασίας 30 C 140 C σηµείο σταγονοποίησης 150 C 230 C υψηλή αντισκωριακή προστασία καλή ανθεκτικότητα στο νερό και στην οξείδωση...

Page 185: ...ίδιου Ο έλεγχος πριν από την οδήγηση η τακτική συντήρηση και η χρήση γνήσιων ανταλλακτικών aprilia αποτελούν ουσιαστικούς παράγοντες Για πληροφορίες σχετικά µε τον Επίσηµο Αντιπρόσωπο και ή το πλησιέστερο Κέντρο Τεχνικής Υποστήριξης συµβουλευτείτε το Χρυσό Οδηγό ή κάντε απευθείας αναζήτηση στο χάρτη που υπάρχει στο Επίσηµο Ιστοχώρο www aprilia com Μόνο εάν ζητάτε Γνήσια Ανταλλακτικά aprilia θα έχε...

Page 186: ...ntral Parc 255 Blv R Ballanger B P 77 93421 Villepinte Succursale en France Tel 0033 1 49634747 Fax 0033 1 49638750 Relations clienteles 0820 027915 A SPIRIT A S Saldova 38 180 00 Praha 8 Karlin A SPIRIT A S Sede operativa Bubenska 43 170 00 Praha 7 Tel 0042 02 96547142 Fax 0042 02 96547145 Email pistek aspirit cz AVTO TRIGLAV d o o Baragova 5 1113 Ljubljana Tel 00386 1 5883 421 Fax 00386 1 588346...

Page 187: ...Hammervej 32 7900 Nikobing Mors Tel 0045 97 722233 Fax 0045 97 722143 33 Email thomas aprilia dk TUONTI NAKKILA OY P o B 18 29250 Nakkila Tel 00358 2 5352500 Fax 00358 2 5372793 Email satu saarinen aprilia fi RO GROUP INT sede operativa Str Depozitelor 41 43 Jud Arges Pitesti Tel 0040 248211004 Fax 0040 248211004 Email marian ion rogroup ro Z A O ITALMOTO sede operativa Ul Preobragenskaya 5 7 1070...

Page 188: ...2 Singapore Tel 0065 6299 6251 Fax 0065 6297 5684 Email jeorjb yahoo com AH LAM MOTORCYCLE CO LTD 29 Hak Po Street Mongkok Kowloon Hong Kong Tel 00852 23859229 Fax 00852 23857920 Email garyyip ahlam com hk PERFECT MOTORS COMPANY LIMITED No 281 Jungshing North Street Sanchung City 241 Taipei Tel 00886 2 85111156 Fax 00886 2 85111148 Email taiwan eisyu msa hinet net AL RADWAN INTERNATIONAL GROUP Blo...

Page 189: ...e G T Road P O Dujana 203207 Dadri Ghaziabad UP Tel 0091 98100 19315 Fax 0091 98100 19300 MOTO TECNICA S A Avenia Petapa 38 78 Local B Zona12 Guatemala Tel 0050 2 3606815 Fax 0050 2 3327847 DUARTE BASTOS CASTENDO LDA Rua Dr António José de Almeida n 238 Benguela Tel 00244 7 232669 Fax 00244 7 235106 Email marco castendo netc pt MX125_GR book Page 93 Tuesday October 14 2003 7 17 PM ...

Page 190: ...ήρηση MX 125 ΗΛΕΚΤΡΙΚΟ ΣΧΕ ΙΑΓΡΑΜΜΑ MX 125 16 19 18 14 20 21 27 28 23 15 13 12 11 10 9 28 28 28 8 7 6 28 4 5 29 28 28 32 31 22 28 27 31 26 25 28 24 28 34 33 2 3 1 MX125_GR book Page 94 Tuesday October 14 2003 7 17 PM ...

Page 191: ... 17 Ενδεικτική λυχνία µεσαίας σκάλας 18 Λαµπτήρας φωτισµού ταµπλό 19 Ενδεικτική λυχνία µεγάλης σκάλας 20 Ενδεικτική λυχνία φλας 21 Λυχνία στάθµης λαδιού 22 ιακόπτης κιβωτίου ταχυτήτων σε νεκρά 23 Ακουστικό σήµα 24 εξί εµπρός φλάς 25 Λαµπτήρας µεσαίας µεγάλης σκάλας 26 Λαµπτήρας φώτων πορείας εµπρός 27 Εµπρός αριστερό φλας 28 Πολλαπλή φίσα 29 Μπουζί 30 Πίσω φανός 31 CDI 32 Pick Up 33 Κεντρική ηλεκτ...

Page 192: ...του δικύκλου και συνιστά Μην διασκορπίζετε τα χρησιµοποιηµένα λάδια τα καύσιµα και τις ρυπογόνες ουσίες στο περιβάλλον Μην αφήνετε αναµµένο τον κινητήρα αν δεν είναι απαραίτητο Αποφεύγετε να κάνετε θόρυβο και να ενοχλείτε Σεβαστείτε τη φύση MX125_GR book Page 96 Tuesday October 14 2003 7 17 PM ...

Page 193: ...aprilia part 8104766 use maintenancebook MX 125 MX125_UK book Page 1 Wednesday October 15 2003 11 24 AM ...

Page 194: ...ntial hazard which may result in minor personal injury or damage to the vehicle NOTE The word NOTE in this manual precedes important information or instructions TECHNICAL INFORMATION The operations preceded by this symbol must be repeated also on the opposite side of the vehicle If not expressly indicated otherwise for the reassembly of the units repeat the disassembly operations in reverse order ...

Page 195: ...ise regulations in force require periodical inspections The user of the vehicle in these countries must contact an aprilia Official Dealer to have the non homologated components replaced with others homologated for use in the country in question carry out the required periodical inspections NOTE Soon after purchasing the vehicle write down the identification data indicated on the SPARE PARTS IDENT...

Page 196: ...RVALS CHART 56 IDENTIFICATION DATA 58 REMOVING THE SIDE COVERS 58 AIR CLEANER 59 CHECKING THE TRANSMISSION OIL LEVEL AND TOPPING UP 60 CHANGING THE TRANSMISSION OIL 61 FRONT WHEEL 62 REAR WHEEL 64 DRIVE CHAIN 66 INSPECTING THE FRONT AND REAR SUSPENSIONS 68 REAR SUSPENSION 69 CHECKING THE BRAKE PAD WEAR 70 ADJUSTING THE COLD START CONTROL 70 IDLING ADJUSTMENT 71 ADJUSTING THE ACCELERATOR CONTROL 71...

Page 197: ...safe drive SAFE DRIVE MX125_UK book Page 5 Wednesday October 15 2003 11 24 AM ...

Page 198: ...th low traffic and or private areas The use of medicins alcohol and drugs or psychotropic substances notably increases the risk of accidents Be sure that you are in good psychophysical conditions and fit for driving and pay particular attention to physical weariness and drowsiness Most road accidents are caused by the driver s lack of experience NEVER lend the vehicle to beginners and in any case ...

Page 199: ... surface visibility and other driving conditions Avoid obstacles that could damage the vehicle or make you lose control Avoid riding in the slipstream created by preceding vehicles in order to increase your speed WARNING Always drive with both hands on the handlebars and both feet on the footrests or on the rider s footboards in the correct driving posture Avoid standing up or stretching your limb...

Page 200: ...dent make sure that no damage has occurred to the control levers pipes wires braking system and vital parts If necessary have the vehicle inspected by an aprilia Official Dealer who should carefully check the frame handlebars suspensions safety parts and all the devices that you cannot check by yourself Always remember to report any malfunction to the technicians to help them in their work Never u...

Page 201: ...haracteristics Never race with other vehicles CLOTHING Before starting always wear a correctly fastened crash helmet Make sure that it is homologated in good shape of the right size and that the visor is clean Wear protective clothing preferably in light and or reflecting colours In this way you will make yourself more visible to the other drivers thus notably reducing the risk of being knocked do...

Page 202: ... and windscreens assembled on the vehicle can produce aerodynamic forces capable of compromising the stability of the vehicle while driving Make sure that the equipment is well fastened to the vehicle and not dangerous during driving Do not install electrical devices and do not modify those already existing to avoid electrical overloads because the vehicle could suddenly stop or there could be a d...

Page 203: ...ring because it could hit people or obstacles making you lose control of the vehicle Do not carry any bag if it is not tightly secured to the vehicle Do not carry bags which protrude too much from the luggage rack or which cover the lights horn or indicators Do not carry animals or children on the glove compartment or on the luggage rack Do not exceed the maximum load allowed for each side bag Whe...

Page 204: ...t compartment 6 Fuse carrier 7 Passenger grab rail 8 Passenger left footrest snapping closed open 9 Side stand 10 Rider left footrest with spring always open 11 Transmission oil drain plug 12 Shifting lever 13 Transmission oil filling cap 14 Starting lever 1 7 6 5 4 3 2 8 9 13 12 14 10 11 MX125_UK book Page 12 Wednesday October 15 2003 11 24 AM ...

Page 205: ...e 7 Ignition switch steering lock 8 Coolant radiator cap 9 Coolant right radiator 10 Horn 11 Rear brake control lever 12 Rider right footrest with spring always open 13 Rear brake pump 14 Drive chain 15 Passenger right footrest snapping closed open 16 Crash helmet hook 16 15 3 2 9 8 12 10 13 14 1 4 5 6 7 11 MX125_UK book Page 13 Wednesday October 15 2003 11 24 AM ...

Page 206: ... Dimmer switch 4 High beam signalling push button 5 Left rear view mirror 6 Clutch lever 7 Cold start lever 8 Instruments and indicators 9 Ignition switch steering lock 10 Front brake lever 11 Right rear view mirror 12 Throttle grip 4 3 1 2 5 6 7 8 9 10 11 12 MX125_UK book Page 14 Wednesday October 15 2003 11 24 AM ...

Page 207: ... beam warning light 2 Multifunction digital display 3 Green neutral indicator warning light 4 Green direction indicator warning light 5 Red 2 stroke oil reserve warning light 6 Blue high beam warning light 1 6 2 3 4 5 MX125_UK book Page 15 Wednesday October 15 2003 11 24 AM ...

Page 208: ...uring the normal operation of the engine this means that the 2 stroke oil reserve is being used in this case provide for topping up see pag 37 2 STROKE OIL TANK Neutral indicator warning light It comes on when the gear is in neutral Direction indicator warning light Blinks when the direction indicators are on High beam warning light Comes on when the headlight is in high beam position or when the ...

Page 209: ...otal distance covered 2 partial distance covered 3 and maintenance functions 4 can be selected Centre display total and partial race time 5 and trip meter 6 can be selected Right display average 7 max 8 and current 9 speeds and Km mi 10 functions can be selected Vehicle selection KM H MPH Mi or km selection SPD Current speed AS Average speed MS Max speed TT Trip meter RT Partial race time ART Tota...

Page 210: ...n to change the unit of measurement from km to mi KM H to MPH or vice versa Keep centre MODE push button pressed for about 1 5 seconds to confirm Then start wheel diameter WS setting CAUTION As soon as the MODE push button is pressed the actual wheel diameter value and the first flashing datum will appear on the left display MODE KM H MODE M H MODE 55 21 1 MX125_UK book Page 18 Wednesday October 1...

Page 211: ...utton again to change this value Pre set value 1850 Keep centre MODE push button pressed for about 1 5 seconds to confirm Then start time setting CAUTION As soon as the MODE push button is pressed time actual setting 24h or 12 h will appear on the centre display MODE 55 11 11 1 KM H MODE 55 11 11 1 KM H MODE 55 19 19 1 KM H MODE MX125_UK book Page 19 Wednesday October 15 2003 11 24 AM ...

Page 212: ...push button again to change the value Keep centre MODE push button pressed for about 1 5 seconds to confirm Then start preventative lubrication check CAUTION As soon as the MODE push button is pressed the lubrication symbo with the number of preventative services to be made will appear and start flashing on the left display MODE 12 00 12H MODE 12 00 24H MODE 17 50 24H MODE 1 00 00 1 MX125_UK book ...

Page 213: ...xt value Keep centre MODE push button pressed for about 1 5 seconds to confirm Then start preventative maintenance check CAUTION If the lubrication check function is not used set all values to zero CAUTION As soon as the MODE push button is pressed the maintenance symbol with the number of preventative services to be made will appear and start flashing on the left display CAUTION Checks to be mana...

Page 214: ...ress left push button to modify the value Press right push button to shift to next value Keep centre MODE push button pressed for about 1 5 seconds to confirm Then start total distance setting ODO CAUTION As soon as the MODE push button is pressed the ODO wording will appear on the left display CAUTION Checks to be made by the user Do not confuse with scheduled maintenance services MODE 4 00 00 1 ...

Page 215: ...ift to next value Keep centre MODE push button pressed for about 1 5 seconds to confirm Then start total race time setting ART CAUTION As soon as the MODE push button is pressed the ART wording will appear on the centre display MODE 00 00 1 300 ODO MODE 00 00 1 300 ODO MODE ART 00 00 00 MX125_UK book Page 23 Wednesday October 15 2003 11 24 AM ...

Page 216: ...the value Press right push button to shift to next value Keep centre MODE push button pressed for about 2 seconds to confirm Start up setting is now completed MODE ART 00 00 20 MODE ART 00 00 20 MODE 1 DST SPD KM H 11 53 48 0 00 00 0 RT 0 00 MX125_UK book Page 24 Wednesday October 15 2003 11 24 AM ...

Page 217: ...nd vehicle bike 2 STANDARD SETTING CAUTION Keep the two outer push buttons pressed for about 2 seconds to enable the STANDARD SETTING programme This menu will allow you to modify the wheel diameter the time setting the vehicle lubrication and maintenance interval the total distance covered ODO and the total race time ART The metric system setting KM H to MPH or vice versa can be modified only from...

Page 218: ... time RT will be displayed Press centre push button MODE to shift to screen B and press it again to shift again to screen C CAUTION Screens B and C will be displayed for 5 seconds only then screen A will appear again MODE 1 A DST RT SPD KM H 11 53 48 0 00 0 00 0 0 1 DST 0 MODE A RT SPD KM H 11 53 56 0 00 0 00 0 MODE 1 B DST TT AS KM H 11 53 49 0 00 0 00 00 0 1 MODE C ODO ART MS KM H 11 53 50 0 00 ...

Page 219: ... again to shift again to screen E showing the preventative lubrication check function CAUTION Screens D and E will be displayed for 5 seconds only If no other button is pressed screen A will be displayed again MODE 1 DST SPD KM H 11 49 08 7 96 53 30 A RT 30 42 1 MODE 1 SPD KM H 11 49 10 8 02 47 35 D RT 30 44 1 1 SPD KM H 11 49 12 8 04 47 35 E RT 30 46 1 MX125_UK book Page 27 Wednesday October 15 2...

Page 220: ...art setting the preventative lubrication check Press left push button to modify the value Press right push button to confirm this value and to shift to next value Keep centre MODE push button pressed for about 1 5 seconds to confirm preventative lubrication values and to shift to next operation Press left push button to modify the value Press right push button to confirm this value and to shift to...

Page 221: ... 1 DST TT AS KM H 11 49 16 0 07 8 05 54 34 CHRONOMETER The multifunction computer is equipped with a chronometer to be displayed on screen B together with trip meter TT Press left push button to enable chronometer Press centre push button MODE to display screen B Press left push button again to terminate the chronometer function MX125_UK book Page 29 Wednesday October 15 2003 11 24 AM ...

Page 222: ... the computer memory In particular Partial distance covered DST Trip meter TT Partial race time RT Maximum speed MS Average speed AS Keep the left and the centre MODE push buttons simultaneously pressed for about 2 seconds Screen A with the reset values will be displayed Press centre push button MODE to shift to screen B and reset the values Press centre push button MODE again to shift to screen C...

Page 223: ...e MODE push button pressed for about 3 seconds Press the right push button to increase the value Press the left push button to decrease the value Screen A with the changes made will be displayed after about 3 seconds BACKLIGHTING Press right push button to enable display backlighting The light will be automatically switched off after 4 seconds CHANGING THE BATTERY Remove headlight fairing Loosen t...

Page 224: ... operated by rotating the lever anticlockwise Pos A To disconnect the starter return the lever to its initial position 3 DIRECTION INDICATOR SWITCH To indicate the turn to the left move the switch to the left to indicate the turn to the right move the switch to the right To turn off the direction indicator press the switch 4 HORN PUSH BUTTON The horn is activated when the push button is pressed 5 ...

Page 225: ...etely leftwards Turn the key to position CAUTION Turn the key and steer the handlebar at the same time Press and rotate the key anticlockwise leftwards steer the handlebar slowly until the key reaches position Extract the key Position Function Key removal Steering lock The steer ing is locked It is neither possible to start the engine nor to switch on the lights It is possi ble to remove the key N...

Page 226: ... 1 7x8mm double fork spanner n 1 10x13 mm double fork spanner n 1 19 mm fork spanner n 1 21x24 mm double socket spanner n 1 cross cut headed screwdriver n 1 screwdriver handle n 1 3x70 mm cross headed screwdriver Max allowed weight 1 5 kg CRASH HELMET HOOK Thanks to the crash helmet hook you no longer have to carry the crash helmet with you every time you park the vehicle WARNING Do not ride with ...

Page 227: ...advisable to use the following special tools to be requested to an aprilia Official Dealer Tool Operations Page Square pin spanner 3 Rear shock ab sorber ring adjust ment 42 Special soc ket spanner 4 Clutch clearance adjustment 69 MX125_UK book Page 35 Wednesday October 15 2003 11 24 AM ...

Page 228: ...on of vapours do not swallow fuel or pour it from a receptacle into another by means of a tube DO NOT DISPOSE OF FUEL IN THE ENVIRONMENT KEEP AWAY FROM CHILDREN Use only unleaded petrol in conformity with the DIN 51607 standard min O N 95 N O R M and 85 N O M M FUEL TANK CAPACITY reserve included 11 l TANK RESERVE 1 3 l mechanical reserve To refuel proceed as follows Unscrew and remove the fuel ta...

Page 229: ...ut of oil in the 2 stroke oil tank or if the 2 stroke oil pipe has been removed contact an aprilia Official Dealer who will provide for bleeding the system This operation is indispensable since the running of the engine with air in the 2 stroke oil system may result in serious damage to the engine To introduce the 2 stroke oil in the tank proceed as follows Remove the right side cover see pag 58 R...

Page 230: ...ully wash the parts of your body that get in contact with the liquid Consult a doctor or an oculist if the liquid gets in contact with your eyes Do not dispose of the brake fluid in the environment KEEP AWAY FROM CHILDREN WARNING When using the brake fluid take care not to spill it on the plastic or painted parts since it damages them irreparably DISC BRAKES WARNING The brakes are the parts that m...

Page 231: ...ver if the screws 3 are loose or most important if the brake fluid tank cover has been removed Unscrew the two screws 3 Remove the cover 4 WARNING In order not to spill the brake fluid while topping up keep the fluid in the reservoir parallel to the reservoir rim Remove the gasket 5 Fill the tank with brake fluid see pag 88 LUBRICANT CHART until it covers the glass completely Put back the gasket 5...

Page 232: ...ake system line Unscrew and remove the plug 2 CAUTION In order not to spill the brake fluid while topping up keep the fluid in the tank parallel to the tank rim in horizontal position Remove the gasket 4 By means of a syringe top up the brake fluid reservoir 1 see pag 88 LUBRICANT CHART until reaching the MAX mark Take care to correctly position gasket 4 and refit plug 2 Secure rear brake system r...

Page 233: ...uster 2 by means of the lock nut 1 Unscrew the pump control rod 4 and bring it in contact with the pump piston Screw the rod in order to ensure a minimum clearance of 0 5 1 mm between the pump control rod 4 and the pump piston WARNING Ensure that there is some play between the master cylinder actuating rod 4 and piston or the brake will drag leading to early wear of friction elements Play between ...

Page 234: ...ler Insert the special spanner 5 and loosen the inner nut 6 Insert a cut headed screwdriver 7 in the special spanner 5 and tighten the adjusting screw 8 completely Loosen the adjusting screw 8 by giving it half a turn which corresponds to 3 4 mm of the lever 9 stroke Keep the adjusting screw 8 locked by means of the screwdriver 7 act on the special spanner 5 and tighten the inner nut 6 Tighten the...

Page 235: ...res since tyres in bad conditions can impair both the grip and the controllability of the vehicle Change the tyre when it is worn out or in case of puncture on the tread side if the puncture is larger than 5 mm After repairing a tyre have the wheels balanced Use only tyres in the size suggested by aprilia see pag 85 TECHNICAL DATA Make sure that the tyres always have their valve sealing caps on to...

Page 236: ...t parts of the engine it may catch fire and send out invisible flames In case maintenance operations are to be performed it is advisable to use latex gloves Have the coolant changed by an aprilia Official Dealer The coolant is made up of 50 water and 50 antifreeze This mixture is ideal for most running temperatures and ensures good protection against corrosion Ii is advisable to keep the same mixt...

Page 237: ...lant see pag 88 LUBRICANT CHART until covering the radiator plates completely WARNING Do not exceed this level otherwise the fluid will flow out of the tank when the engine is running WARNING The coolant is noxious do not swallow it if the coolant gets in contact with the skin or the eyes it can cause serious irritations Do not use your fingers or any other object to check if there is enough coola...

Page 238: ...iminating the exhaust fumes To have the catalytic converter function correctly and for long and to reduce possible problems regarding the soiling of the thermal unit and of the exhaust it is necessary to avoid covering long distances with the engine running at constantly low rpm It is sufficient to alternate these periods with periods in which the engine runs at relatively high rpm even if only fo...

Page 239: ...If necessary adjust and or lubricate it 71 2 stroke oil transmission oil Check and or top up if necessary 36 37 60 61 Wheel tyres Check the tyre surface the inflation pressure wear and tear and any damage 43 Brake levers Make sure that they work smoothly If necessary lubricate the articulations and adjust the stroke 39 40 Clutch The idle stroke at the end of the clutch lever must be about 10 mm th...

Page 240: ...et on the vehicle Then Rotate the fuel tap lever 1 to position ON Make sure that the dimmer switch 2 is in position Rotate the key 3 and move the ignition switch to position At this point the red 2 stroke oil reserve warning light comes on on the dashboard see and 15 INSTRUMENTS AND INDICATORS Lock the front wheel by pulling the front brake lever 4 Position the shifting lever 5 in neutral green wa...

Page 241: ...erature is low near or below 0 C it may be difficult to start the engine at the first attempt In this case Rotate the cold start lever 6 anticlockwise Pos A WARNING Do not press the start pedal when the engine is running Slightly rotate the throttle grip 8 and at the same time press the start pedal 7 with energy a few times releasing it immediately afterwards If the engine starts Release the throt...

Page 242: ...WARNING With the vehicle at rest try to get acquainted with the use of the rear view mirrors Start the engine see pag 48 STARTING Ride at reduced speed for the first miles in order to warm the engine up With released throttle grip 2 Pos A and engine idling pull the clutch lever 3 completely Engage the first gear by pressing the shifting lever 4 downwards Release the brake lever pulled on the start...

Page 243: ...t the gears one by one the simultaneous downshifting of more than one gear may make you exceed the maximum rpm red line Before and during the downshifting release the throttle grip and decelerate in order to avoid the red line To shift down proceed as follows Release the throttle grip 2 Pos A If necessary pull the brake levers moderately and decrease the speed of the vehicle Pull the clutch lever ...

Page 244: ...d If the brakes are operated continuously on downhill stretches the friction surfaces may overheat thus reducing the braking efficiency Exploit the engine compression and shift down by putting on both brakes intermittently Never drive downhill with the engine off WARNING Pay the utmost attention to any obstacle or variation of the ground Uneven roads rails manhole covers indications painted on the...

Page 245: ...g in of the REGULAR SERVICE INTERVALS CHART see pag 56 REGULAR SERVICE INTERVALS CHART in order to avoid hurting yourself or other people and or damaging the vehicle Between the first 800 and 1 500 km ride the vehicle more lively change speed and fully open throttles just for a few seconds so as to allow parts better coupling Do not open throttles more than 3 4 of their way After the first 1 500 k...

Page 246: ...teering see pag 33 STEERING LOCK and extract the key POSITIONING THE VEHICLE ON THE STAND Carefully read beside PARKING Grasp the left grip 4 and the passenger grab rail 5 Press the side stand with your right foot and extend it completely 6 Incline the vehicle until the stand rests on the ground CAUTION Make sure that the vehicle is stable SUGGESTIONS TO PREVENT THEFT NEVER leave the ignition key ...

Page 247: ...le and some of them are noxious or even toxic If not expressly indicated otherwise for the reassembly of the units repeat the disassembly operations in reverse order In case any maintenance operation should be required it is advisable to use latex gloves Routine maintenance operations can usually be carried out by the user but sometimes specific tools and specific technical skills may be required ...

Page 248: ... in after 1 month or 1000 Km 625 mi Every 12 months or 4000 Km 2500 mi Every 24 months or 8000 Km 5000 mi Battery terminals tightening c c Spark plug d d e Air cleaner c d Clutch clearance f f Light system c c Brake fluid c Coolant every 3 months c 2 stroke oil level Check before each ride c Transmission oil e c every 12000 Km 7500 mi É Headlamp beam setting operation c Start lever pin c Lubricate...

Page 249: ...Wheels balancing c Steering stem bearing and steering play c c Wheel bearings c Brake discs c c Mixer oil filter d Vehicle general operation c c Braking systems c c Cooling system c c Brake fluid every year e Coolant every 2 years e Muffler exhaust silencer c Fork oil and oil seal every 2 years e Piston and piston rings every 2 years c every 4 years e 2 stroke oil pump and air bleeding c f Fuel co...

Page 250: ...is stamped on the right side of the engine casing base Engine no FRAME NUMBER The frame number is stamped on the right side of the steering column Frame no REMOVING THE SIDE COVERS Carefully read pag 55 MAINTENANCE Position the vehicle on the stand CAUTION The description of the following operations refers to one side cover but it is valid for both Rotate the quick fastening screw 3 anticlockwise ...

Page 251: ... 3 complete with the grids 4 and 5 CLEANING WARNING In order not to deform the grids DO NOT force their sides Grasp the central part of both grids 4 and 5 pull and separate them Release the filtering element 3 from the grid 4 Clean the filtering element 3 with clean non inflammable solvents or solvents with high volatility point then let it dry thoroughly Apply a filter oil or a thick oil SAE 80W ...

Page 252: ...ow one fourth In the first case the excess oil would flow out of the oil pan in the second case the engine may get seriously damaged TOPPING UP If it were necessary to top up proceed as follows Unscrew and remove the filling cap 2 Pour a small quantity of oil see pag 88 LUBRICANT CHART and wait for about one minute to allow the oil to evenly flow inside the casing Make sure that oil level 1 is abo...

Page 253: ...the oil and let it drip into the container 1 for a few minutes Remove the metal residues from the drain plug 2 magnet Check and if necessary replace the sealing washer of the drain plug 2 Change the sealing washer of the drain plug 2 every 12000 km or every second engine oil change Screw and tighten the drain plug 2 Drain plug 2 driving torque 27 Nm 2 7 kgm Pour about 550 cm of transmission oil th...

Page 254: ...the weight of the vehicle CAUTION Weight of the vehicle ready for starting 126 kg Raise the front part of the vehicle and have a suitable support 1 the weight of which should be about 400 mm placed under the engine so that the front wheel can rotate freely and the vehicle cannot fall down WARNING The vehicle may fall down Provide for balancing the vehicle in order to prevent it from falling down P...

Page 255: ...heel pin 4 from the right side of the vehicle travelling direction Thrust the wheel pin and at the same time move the wheel in such a way as to align the pin axes and the wheel until introducing the wheel pin completely Screw and tighten the wheel pin 4 Wheel pin 4 driving torque 80 Nm 8 kgm WARNING Due to the weight and dimensions of the vehicle the following operation cannot be performed by one ...

Page 256: ...s for the rider other persons and the vehicle Check the conditions of the wheel rim and change it if it is damaged DISASSEMBLY Position the vehicle on the stand Loosen and remove the two screws 1 Remove the chain casing 2 Loosen the wheel nut 3 Wheel nut 3 driving torque 100 Nm 10 kgm WARNING Upon reassembly before tightening the wheel nut 3 check the chain tension see pag 66 DRIVE CHAIN Due to th...

Page 257: ...EASSEMBLY Withdraw the wheel from the rear fork from behind carefully withdrawing the disc from the brake caliper WARNING Never pull the rear brake lever after removing the wheel otherwise the caliper piston may go out of its seat thus causing the outflow of the brake fluid In this case consult your aprilia Official Dealer who will carry out the proper maintenance operation CAUTION Left 10 and rig...

Page 258: ...more frequently if you use the vehicle in difficult conditions or on dusty and or muddy roads CHECKING THE SLACK To check the slack proceed as follows Stop the engine Position the vehicle on the stand Position the shifting lever in neutral Make sure that the vertical oscillation in an intermediate point between pinion and crown in the lower part of the chain is about 30 35 mm Move the vehicle forw...

Page 259: ...Sprocket or teeth excessively worn or damaged WARNING If the chain rollers are damaged the pins are loose and or the O rings are damaged or lacking it is necessary to change the whole chain unit both sprockets and chain Check the wear of U shaped chain guide 6 and of the chain tightening roller 7 Finally check the wear of the rear fork protection shoe WARNING Lubricate the chain frequently especia...

Page 260: ...if the vehicle is used on dusty or wet roads or off road Further carry out the following checking operations With pulled front brake lever press the handlebar repeatedly thrusting the fork downwards The stroke must be gentle and there must be no trace of oil on the rods Check the fastening of all the components and the functionality of the front and rear suspension joints WARNING If you notice irr...

Page 261: ... with reduced load and full load However it is also possible to adjust the setting according to the intended use of the vehicle Slightly unscrew the locking ring nut 2 by means of the appropriate spanner 3 Act on the adjusting ring nut 1 shock absorber spring preload adjustment see figure Once the optimal attitude has been obtained tighten the locking ring nut 2 completely Adjusting ring nut 1 By ...

Page 262: ...e front brake caliper 1 from the rear upper part for the rear brake caliper 2 If the thickness of the friction material even of one pad only has reduced to about 1 mm replace both pads WARNING Have the pads changed by your aprilia Official Dealer ADJUSTING THE COLD START CONTROL Leggere attentamente Carefully read pag 55 MAINTENANCE The ideal slack of the cold start control should be about 2 3 mm ...

Page 263: ...wise you decrease the engine rpm Twist the throttle grip accelerating and decelerating a few times to make sure that it functions correctly and to check if the idling speed is constant CAUTION Do not act on the air adjusting screw to avoid variations of the carburation setting WARNING If necessary contact your aprilia Official Dealer ADJUSTING THE ACCELERATOR CONTROL Carefully read pag 55 MAINTENA...

Page 264: ...on wire and or a metal brush Energetically blow some air in order to prevent the removed residues from getting into the engine If the spark plug has crackings on the insulating material corroded electrodes or excessive deposits it must be changed Check the spark plug gap with a thickness gauge The gap must be 0 5 0 6 mm if necessary adjust it carefully bending the earth electrode Make sure that th...

Page 265: ... or the use make sure that the room is properly ventilated and avoid inhaling the gases released during the recharging KEEP AWAY FROM CHILDREN WARNING Never invert the connection of the battery cables Do not incline the vehicle too much in order to avoid dangerous leaks of the battery fluid Connect and disconnect the battery with the ignition switch in position Connect first the positive cable and...

Page 266: ...tery see p 57 INSTALLING THE BATTERY REMOVING THE BATTERY Carefully read p 73 BATTERY Make sure that the ignition switch is in position Remove the left side cover see pag 58 REMOVING THE SIDE COVERS Unscrew and remove the screw 3 from the negative terminal Move the negative cable 4 sidewards Unscrew and remove the screw 5 Remove the cover 6 Partially remove the battery from its compartment Unscrew...

Page 267: ... element plugs Check the electrolyte level vedi sopra CHECKING THE ELECTROLYTE LEVEL Connect the battery with a battery charger A recharge with an amperage equal to 1 10th of the battery capacity is recommended After the recharging operation check the electrolyte level again and if necessary top up with distilled water Replace the element plugs WARNING Reinstall the battery only 5 10 minutes after...

Page 268: ...s necessary to check the fuses For the checking proceed as follows Turn the ignition switch to position to avoid any accidental short circuit Remove the left side cover see pag 58 REMOVING THE SIDE COVERS Extract the fuses one by one and check if the filament 7 is broken Before replacing a fuse try to find out the cause of the trouble if possible Replace the damaged fuse with a new one having the ...

Page 269: ...weakened The side stand must rotate freely if necessary grease the joint see pag 88 LUBRICANT CHART CHECKING THE SWITCHES Carefully read pag 55 MAINTENANCE The vehicle is fitted with two switches Stoplight switch 1 on the rear brake control lever Stoplight switch 2 on the front brake control lever Checking Switches 1 and 2 withdraw the protection element Make sure that there are neither dirt nor m...

Page 270: ...ver By TURNING IT CLOCKWISE you set the beam upwards By TURNING IT ANTICLOCKWISE you set the beam downwards BULBS Carefully read pag 55 MAINTENANCE WARNING Before changing a bulb position the vehicle on the stand and move the ignition switch to position Change the bulb wearing clean gloves or using a clean and dry cloth Do not leave fingerprints on the bulb since these may cause its overheating an...

Page 271: ...dashboard PARKING LIGHT BULB CAUTION To extract the bulb socket do not pull its electric wires Grasp the bulb socket 6 pull and disconnect it from its seat Withdraw the parking light bulb 1 and replace it with one of the same type LOW HIGH BEAM BULB HALOG ENOUS CAUTION To extract the bulb electric connector do not pull its electric wires Grasp the bulb electric connector 7 pull it and disconnect i...

Page 272: ...g or damaging them Withdraw the front part of the fairing 2 complete with headlight downwards and disconnect it from the pin 3 provided on the dashboard WARNING LIGHT BULBS WARNING Extract the bulb sockets one by one in order not to position them incorrectly upon reassembly Extract the corresponding bulb socket Withdraw the bulb and replace it with a new one of the same type DASHBOARD LIGHTING BUL...

Page 273: ... socket Correctly install a new bulb of the same type CHANGING THE REAR LIGHT BULB WARNING Before changing a bulb check the fuses see pag 76 CHANGING THE FUSES and the efficiency of the stoplight switches see pag 77 CHECKING THE SWITCHES Carefully read pag 78 BULBS Unscrew and remove the two screws 4 WARNING Upon reassembly tighten the two screws 4 carefully and moderately in order not to damage t...

Page 274: ...xious for your health Before proceeding make sure that the room in which you are working is properly ventilated Do not inhale fuel vapours Do not smoke nor use free flames Do not dispose of fuel in the environment Position the vehicle on the stand Stop the engine and wait until it has cooled down Prepare a container with capacity exceeding the fuel quantity present in the tank and put it on the gr...

Page 275: ...CHECKING OPERATIONS To remove dirt and mud from the painted surfaces use a low pressure water jet carefully wet the dirty parts remove mud and filth with a soft car sponge impregnated with a lot of water and shampoo 2 4 parts of shampoo in water Then rinse with plenty of water and dry with chamois leather To clean the outer parts of the engine use a degreaser brushes and wipers CAUTION Polish with...

Page 276: ...Remove the battery see pag 74 REMOVING THE BATTERY Wash and dry the vehicle see pag 83 CLEANING Polish the painted surfaces with wax Inflate the tyres see pag 43 TYRES By means of a suitable support position the vehicle so that both tyres are raised from the ground Place the vehicle in an unheated not humid room away from sunlight with minimum temperature variations Cover the vehicle avoiding the ...

Page 277: ...1 0 3 0 Number of cylinders 1 Total displacement 124 82 cm Bore stroke 54 mm 54 5 mm Compression ratio 12 5 0 5 1 Starting with pedal Engine idling rpm 1200 100 rpm Clutch multidisc in oil bath with manual control on the left side of the hand lebar Cooling liquid cooled CAPACITY Fuel reserve included 11 l Fuel reserve 1 3 l mechanical reserve Transmission oil 600 cm Coolant 0 8 l 50 water 50 antif...

Page 278: ...10 213 R1 x R2 x R3 1 8 901 CARBURETTORS Number 1 Model DELL ORTO PHBH 28 FUEL SUPPLY Fuel unleaded petrol according to the DIN 51607 standard min O N 95 N O R M and 85 N O M M FRAME Type One beam with two cradles in high resistance steel tubes Steering inclination angle 28 Fore stroke 127 mm SUSPENSIONS Front Upside down Æ40 Stroke 260 mm Rear Gas filled monoshock Stroke 280 mm BRAKES Front Disc ...

Page 279: ... before T D C SPARK PLUG Standard NGK R BR8 ES Spark plug gap 0 5 0 6 mm ELECTRIC Battery 12 V 4 Ah SYSTEM Fuses general 20 A Fuses control unit 15 A Fuses service 7 5 A Generator 12 V 180 W BULBS Low high beam 12 V 35 35 W Front parking light 12 V 5 W Direction indicators 12 V 10 W Rear parking light number plate light stoplight 12 V 5 21 W Dashboard 12 V 2 W WARNING LIGHTS Neutral 12 V 1 2 W Dir...

Page 280: ...RK 20W 33 of the volume SAE 15W F A 5W 33 of the volume F A 20W 67 of the volume or FORK 5W 33 of the volume FORK 20W 67 of the volume Bearings and other lubrication points recommended AUTOGREASE MP or GREASE 30 As an alternative to the recommended product use high quality grease for rolling bearings working temperature range 30 C 140 C dripping point 150 C 230 C high protection against corrosion ...

Page 281: ...proper maintenance at the recommended intervals and using aprilia Original Parts only are other key factors To find contact information of the Authorised Dealer and or Service Centre nearest you please consult the Yellow Pages or the map provided at our web site www aprilia com When you demand aprilia Original Parts you are purchasing products that have been developed and tested as early as the ve...

Page 282: ...ntral Parc 255 Blv R Ballanger B P 77 93421 Villepinte Succursale en France Tel 0033 1 49634747 Fax 0033 1 49638750 Relations clienteles 0820 027915 A SPIRIT A S Saldova 38 180 00 Praha 8 Karlin A SPIRIT A S Sede operativa Bubenska 43 170 00 Praha 7 Tel 0042 02 96547142 Fax 0042 02 96547145 Email pistek aspirit cz AVTO TRIGLAV d o o Baragova 5 1113 Ljubljana Tel 00386 1 5883 421 Fax 00386 1 588346...

Page 283: ...ammervej 32 7900 Nikobing Mors Tel 0045 97 722233 Fax 0045 97 722143 33 Email thomas aprilia dk TUONTI NAKKILA OY P o B 18 29250 Nakkila Tel 00358 2 5352500 Fax 00358 2 5372793 Email satu saarinen aprilia fi RO GROUP INT sede operativa Str Depozitelor 41 43 Jud Arges Pitesti Tel 0040 248211004 Fax 0040 248211004 Email marian ion rogroup ro Z A O ITALMOTO sede operativa Ul Preobragenskaya 5 7 10707...

Page 284: ... Singapore Tel 0065 6299 6251 Fax 0065 6297 5684 Email jeorjb yahoo com AH LAM MOTORCYCLE CO LTD 29 Hak Po Street Mongkok Kowloon Hong Kong Tel 00852 23859229 Fax 00852 23857920 Email garyyip ahlam com hk PERFECT MOTORS COMPANY LIMITED No 281 Jungshing North Street Sanchung City 241 Taipei Tel 00886 2 85111156 Fax 00886 2 85111148 Email taiwan eisyu msa hinet net AL RADWAN INTERNATIONAL GROUP Bloc...

Page 285: ... G T Road P O Dujana 203207 Dadri Ghaziabad UP Tel 0091 98100 19315 Fax 0091 98100 19300 MOTO TECNICA S A Avenia Petapa 38 78 Local B Zona12 Guatemala Tel 0050 2 3606815 Fax 0050 2 3327847 DUARTE BASTOS CASTENDO LDA Rua Dr António José de Almeida n 238 Benguela Tel 00244 7 232669 Fax 00244 7 235106 Email marco castendo netc pt MX125_UK book Page 93 Wednesday October 15 2003 11 24 AM ...

Page 286: ...enance MX 125 94 WIRING DIAGRAM MX 125 16 19 18 14 20 21 27 28 23 15 13 12 11 10 9 28 28 28 8 7 6 28 4 5 29 28 28 32 31 22 28 27 31 26 25 28 24 28 34 33 2 3 1 MX125_UK book Page 94 Wednesday October 15 2003 11 24 AM ...

Page 287: ...ow beams warning light 18 Dashboard lighting bulb 19 High beam warning light 20 Direction indicator warning light 21 Oil level warning light 22 Neutral switch 23 Horn 24 Front right direction indicator 25 Low high beam bulb 26 Front parking light bulb 27 Front left direction indicator 28 Multiple connectors 29 Spark plug 30 Headlight 31 CDI 32 Pick up 33 Electronic control unit rave 34 Solenoid va...

Page 288: ...omers for the purchase of this vehicle Do not dispose of oil fuel polluting substances and components in the envi ronment Do not keep the engine running if it isn t necessary Avoid disturbing noises Respect nature MX125_UK book Page 96 Wednesday October 15 2003 11 24 AM ...

Reviews: