58
use and maintenance
Pegaso 650 I.E.
)$%.4)&)#!4)/. $!4!
It is a good rule to write down the frame
and engine numbers in the space provided
in this manual.
The frame number can be used for the pur-
chase of spare parts.
NOTE
Do not alter the identification
numbers if you do not want to incur severe
penal and administrative sanctions. In par-
ticular, the alteration of the frame number
results in the immediate invalidity of the
guarantee.
FRAME NUMBER
The frame number (1) is stamped on the
right side of the steering column.
Frame no.
ENGINE NUMBER
The engine number (2) is stamped on the
rear part of the engine, near the pinion.
Engine no.
*/).43 7)4( #,)#+ #,!-03 !.$
7)4( 3#2%7 #,!-03
a
CAUTION
Remove ONLY the clamps indicated in
the maintenance procedures.
This text is not to be intended as an au-
thorization to arbitrarily remove the
clamps present on the vehicle.
a
WARNING
Before removing a clamp, make sure
that the removal does not involve any
fluid leakage; if so, provide for prevent-
ing such leakages and protect the com-
ponents positioned near the joint.
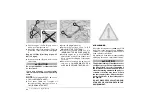
CLICK CLAMPS
For the removal it is sufficient to use simple
pliers, while for the installation it is neces-
sary to use a special tool (see below).
Before removing a clamp, prepare the ma-
terial necessary for the correct reassembly.
NOTE
Have the appropriate special tool
m
to hand:
– clamp installation pliers, see p. 23 (SPE-
a
CAUTION
Upon installation, replace the click
clamp that has been removed with a
new one having the same dimensions,
to be requested to an
APRILIA
Official
Dealer.
Do not attempt to reinstall the removed
click clamp, since it is unusable.
Do not replace the removed click clamp
with a screw clamp or with other types
of clamp.
a
CAUTION
Proceed with care, in order not to dam-
age the joint components.
◆
Work with the pliers on the head of the
click clamp, forcing until you release it.
SCREW CLAMPS
For the removal and installation it is suffi-
cient to use a simple screwdriver.
a
CAUTION
Check the conditions of the clamp and
if necessary replace it with a new one of
the same type and dimensions, to be re-
quested to an
APRILIA
Official Dealer.
When fastening the clamp, make sure
that the joint is sufficiently stable.
Summary of Contents for Pegaso 650 I.E.
Page 1: ...use maintenance book PEGASO I E 650 aprilia part 8104312 ...
Page 5: ...safe drive ...
Page 105: ...105 4 3 2 5 30 2 0 243 9 use and maintenance Pegaso 650 I E ...
Page 106: ...106 use and maintenance Pegaso 650 I E MPORTERS ...
Page 107: ......
Page 108: ...108 use and maintenance Pegaso 650 I E 7 2 2 0EGASO ...
Page 110: ...110 4 3 2 5 30 2 0 243 9 use and maintenance Pegaso 650 I E ...
Page 111: ...111 4 3 2 5 30 2 0 243 9 use and maintenance Pegaso 650 I E ...


