7
- 57
CHASSIS
Pegaso 650 I.E.
7.4.3 ASSEMBLING THE TYRE
◆
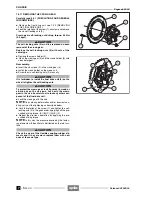
Eliminate any trace of dirt or rust from the valve seat.
◆
Apply the special lubricant for tyres, or soapy water, to
the beads of the tyre.
a
CAUTION
Never apply grease, oil or petrol to the beads of the
tyre for any reason whatsoever.
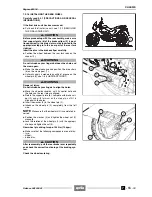
If a disassembled tyre is to be reassembled, make sure
that the arrow stamped on it is pointed in the wheel rota-
tion direction and make the chalk mark made on the tyre
upon disassembly coincide with the mark on the rim.
◆
Proceed to the assembly of the tyre using special
equipment and following specific procedures.
NOTE
Before inflating the tyre, make sure that the
mark on the tyre still coincides with the mark on the rim.
◆
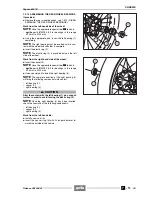
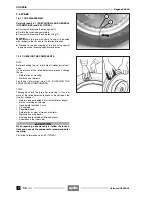
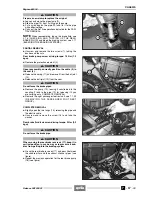
Make the tyre bounce several times and at the same
time rotate it (A). This operation pushes the beads to-
wards the seats on the rim, thus facilitating the inflation
of the tyre.
a
WARNING
The tyre it may explode, causing serious injuries.
Never sit on the tyre while inflating it.
◆
Slightly inflate the tyre; do not over inflate.
NOTE
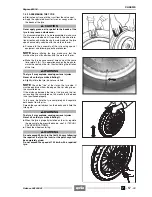
Check the “line” of the rim on the tyre side. It
must be equidistant from the edge of the rim along its en-
tire circumference.
If the distance between the line of the tyre and the rim
varies along the circumference, this means that the bead
is not positioned properly.
In this case, deflate the tyre completely and separate
both beads from the rim.
Spread the special lubricant on the beads and inflate the
tyre again.
a
WARNING
The tyre it may explode, causing serious injuries.
Never sit on the tyre while inflating it.
◆
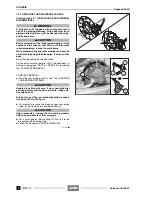
When the tyre is properly installed on the rim, regulate
the pressure to the prescribed value, see 1.5 (TECHNI-
CAL SPECIFICATIONS).
◆
Check the wheel centering.
a
WARNING
Do not exceed 50 km/h in the first 24 hours following
the repair of the tyre; the insert or the patch might not
be completely glued.
Do not exceed the speed of 130 km/h with a repaired
tyre.
Release 00/2002-02
- 00
Summary of Contents for Pegaso 650 I.E.
Page 11: ...1 1 Pegaso 650 I E GENERAL INFORMATION 1 Release 00 2002 02 00 ...
Page 24: ...GENERAL INFORMATION 1 14 Pegaso 650 I E 1 7 2 GENERIC TOOLS Release 00 2002 02 00 ...
Page 39: ...2 1 Pegaso 650 I E 1 SERVICE AND SETTING UP 2 Release 00 2002 02 00 ...
Page 45: ...SERVICE AND SETTING UP 2 7 Pegaso 650 I E LUBRICATION CHART Release 00 2002 02 00 ...
Page 95: ...3 1 Pegaso 650 I E 1 3 ENGINE 3 Release 00 2002 02 00 ...
Page 99: ...ENGINE 3 5 Pegaso 650 I E Release 00 2002 02 00 ...
Page 113: ...4 1 Pegaso 650 I E 1 2 3 FUEL SUPPLY SYSTEM 4 Release 00 2002 02 00 ...
Page 139: ...5 1 Pegaso 650 I E 1 2 3 4 COOLING SYSTEM 5 Release 00 2002 02 00 ...
Page 149: ...6 1 Pegaso 650 I E 1 2 3 4 5 ELECTRIC SYSTEM 6 Release 00 2002 02 00 ...
Page 152: ...6 4 ELECTRIC SYSTEM Pegaso 650 I E 42 0 43 9 54 00 Release 00 2002 02 ...
Page 190: ...ELECTRIC SYSTEM 6 42 Pegaso 650 I E 7 2 2 Release 00 2002 02 00 ...
Page 193: ...7 1 Pegaso 650 I E 1 2 3 4 5 6 CHASSIS 7 Release 00 2002 02 00 ...
Page 287: ...1 2 3 4 5 6 7 8 1 Pegaso 650 I E 1 2 3 4 5 6 7 REPAIR INFORMATION 8 Release 00 2002 02 00 ...
Page 297: ...REPAIR INFORMATION 8 11 Pegaso 650 I E 8 2 3 FUEL SYSTEM PIPES Release 00 2002 02 00 ...
Page 298: ...REPAIR INFORMATION 8 12 Pegaso 650 I E 8 2 4 ENGINE OIL PIPES Release 00 2002 02 00 ...
Page 304: ...REPAIR INFORMATION 8 18 Pegaso 650 I E Release 00 2002 02 00 ...
Page 305: ...Pegaso 650 I E REPAIR INFORMATION 8 19 Release 00 2002 02 00 ...
Page 306: ...REPAIR INFORMATION 8 20 Pegaso 650 I E Release 00 2002 02 00 ...
Page 307: ...REPAIR INFORMATION 8 21 Pegaso 650 I E Release 00 2002 02 00 ...
Page 311: ... 1 Pegaso 650 I E ANALYTICAL INDEX 00 Release 00 2002 02 ...
Page 317: ...ANALYTICAL INDEX 7 Pegaso 650 I E 9 2IF 0AGE 2IF 0AGE 00 Release 00 2002 02 ...

