7
- 93
3$57(&,&/2
&+$66,63$576
6863(16,2175$6(5$
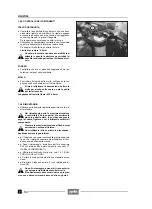
7.10.1 DESMONTAJE
Lea con cuidado 1.4 (PRECAUCIONES E INFORMA-
CIONES GENERALES) y 2.27 (SUSPENSIÓN TRASE-
RA).
X
Extraiga el basculante junto con la rueda, el grupo sus-
pensión y el grupo freno , véase 7.9.1 (DESMONTA-
JE).
X
Destornille y quite el tornillo (1) y guarde la arandela.
Durante el apriete del tornillo (1) no supere el
par indicado porque se fija directamente en el
amortiguador.
Un eventual daño a la rosca supone la inmediata sus-
titución del amortiguador completo.
Par de apriete tornillo (1): 50 Nm (5 kgm)
X
+
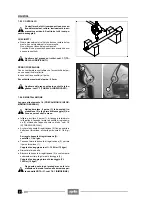
Afloje y quite la tuerca (2).
X
+
Extraiga el tornillo (3) y guarde la arandela.
El tornillo (3) en el lado izquierdo del vehículo
es más largo del tornillo en el lado derecho.
Par de apriete tuerca/tornillo (2-3): 80 Nm (8 kgm)
X
Afloje y quite la tuerca (4) y guarde la arandela.
X
Quite el tornillo (5) y guarde la arandela.
Par de apriete tuerca/tornillo (4-5): 80 Nm (8 kgm)
X
+
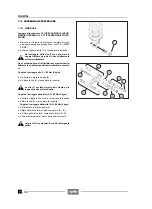
Desmonte la biela simple (6).
X
Extraiga según el orden todos los componentes inte-
riores (A - B).
X
+
Extraiga según el orden todos los componentes inte-
riores (C - D).
X
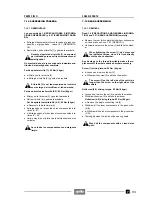
Limpie muy bien el interior de los alojamientos de los
cojinetes.
Lave todos los componentes con detergente
limpio.
5($56863(16,21
7.10.1 REMOVAL
Read 1.4 (PRECAUTIONS AND GENERAL INFORMA-
TION) and 2.27 (REAR SUSPENSION) carefully.
X
Remove the rear fork complete with wheel, suspension
unit and brake unit, see 7.9.1 (REMOVAL).
X
Unscrew and remove the screw (1) and take the wash-
er.
When tightening the screw (1), do not exceed
the indicated torque, since it is fixed directly
onto the shock absorber.
Any damage to the thread inevitably makes the re-
placement of the whole shock absorber necessary.
Screw (1) driving torque: 50 Nm (5 kgm).
X
+
Loosen and remove the nut (2).
X
+
Withdraw the screw (3) and take the washer.
The screw (3) on the left side of the vehicle is
longer than the screw on the right side of the
vehicle.
Nut/screw (2-3) driving torque: 80 Nm (8 kgm).
X
Loosen and remove the nut (4) and take the washer.
X
Withdraw the screw (5) and take the washer.
Nut/screw (4-5) driving torque: 80 Nm (8 kgm).
X
+
Remove the single connecting rod (6).
X
Withdraw all the inner components in the given order
(A-B).
X
+
Withdraw all the inner components in the given order
(C-D).
X
Thoroughly clean the inside of the bearing seats.
Wash all the components with a clean deter-
gent.
Summary of Contents for Pegaso 650
Page 1: ......
Page 3: ...0 4 NOTE NOTES ANMERKUNGEN ...
Page 4: ...1 1 1 2 3 4 5 6 7 8 INFORMAZIONI GENERALI INFORMACIONES GENERALES GENERAL INFORMATION ...
Page 42: ......
Page 69: ...3 1 1 2 3 4 5 6 7 8 MOTORE MOTOR ENGINE ...
Page 90: ...3 22 MOTORE NOTE NOTAS NOTES ...
Page 91: ...4 1 1 2 3 4 5 SISTEMA DI ALIMENTAZIONE SISTEMA DE ALIMENTACIÓN FUEL SYSTEM ...
Page 116: ...4 26 SISTEMA DI ALIMENTAZIONE NOTE NOTAS NOTES ...
Page 117: ...5 1 1 2 3 4 5 6 7 8 IMPIANTO DI RAFFREDDAMENTO SISTEMA DE REFRIGERACIÓN COOLING SYSTEM ...
Page 130: ...5 14 IMPIANTO DI RAFFREDDAMENTO SISTEMA DE REFRIGERACIÓN COOLING SYSTEM NOTE NOTAS NOTES ...
Page 131: ...6 1 6 1 2 3 4 5 6 7 8 IMPIANTO ELETTRICO INSTALACIÓN ELÉCTRICA ELECTRICAL SYSTEM ...
Page 176: ...IMPIANTO ELETTRICO INSTALACIÓN ELÉCTRICA ELECTRICAL SYSTEM 6 46 NOTE NOTAS NOTES ...
Page 177: ...7 1 1 2 3 4 5 6 7 8 CICLISTICA PARTE CICLO CHASSIS PARTS ...
Page 226: ... 67 3 57 2 66 6 3 576 7 50 5827 3267 5 25 58 75 6 5 5 5 ...
Page 242: ... 67 3 57 2 66 6 3 576 7 66 5 12 17 5 25 5 12 17 52 5217 5 ...
Page 246: ... 67 3 57 2 66 6 3 576 7 70 5 12 3267 5 25 5 12 75 6 52 5 5 5 ...
Page 272: ... 67 3 57 2 66 6 3 576 7 96 NOTE NOTAS NOTES ...
Page 311: ...INFORMAZIONI PER LE RIPARAZIONI INFORMACIONES PARA LAS REPARACIONES REPAIRS 8 39 ...


