2
- 25
OPERACIONES DE MANTENIMIENTO PERIÓDICO Y DE
PUESTA A PUNTO
PERIODIC SERVICE AND SETTING UP OPERATIONS
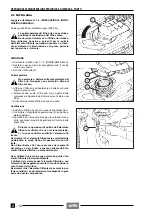
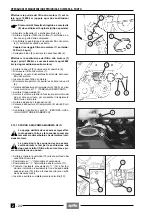
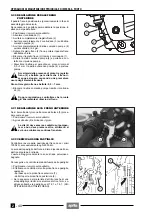
Limpie el filtro aceite motor sobre el bastidor (1) cada
12000 km (o cada dos veces que se sustituye el acei-
te motor).
Prepare una abrazadera de manguera tipo des-
tornillador (2) para sustituirla a la original (de
tipo especial).
◆
Afloje la abrazadera (3) y desempalme el tubo (4).
◆
Destornille y saque el filtro aceite motor (1) sobre el
bastidor y límpielo con un chorro de aire comprimido.
◆
Controle la junta del filtro aceite motor (1) sobre el bas-
tidor, enrósquelo y apriételo.
Par de apriete filtro aceite motor (1) sobre el basti-
dor:
35 Nm (3,5 kgm).
◆
Empalme el tubo (4) y apriete la nueva abrazadera (2).
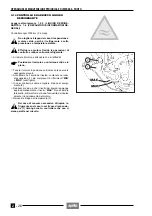
Sustituya el filtro aceite motor (7) tras los primeros
1000 km y luego cada 6000 km (o cada vez que se
sustituye el aceite motor).
◆
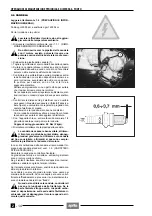
Destornille los dos tornillos (5) y quite la tapa (6).
◆
Saque el filtro aceite motor (7).
◆
Aplique una ligera capa de aceite sobre la junta tórica
del nuevo filtro aceite motor.
◆
Introduzca el nuevo filtro aceite motor.
◆
Vuelva a instalar la tapa (6), atornille y apriete los dos
tornillos (5).
◆
Vierta por la abertura de llenado (9) unos 1600 cm
C
de
aceite motor, véase 1.7 (TABLA DE LOS LUBRI-
CANTES).
◆
Enrosque el tapón -varilla (8).
◆
Ponga en marcha el motor y déjelo funcionar al ralentí
por un minuto más o menos para que el circuito aceite
motor se llene.
◆
Desenrosque y extraiga el tapón-varilla (8).
◆
Vierta por la abertura de llenado (9) otros 600 cm
C
de
aceite.
◆
Controle el nivel del aceite, véase 2.12 (CONTROL
DEL NIVEL DEL ACEITE DEL MOTOR Y RELLENO).
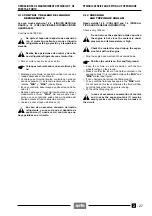
2.13.1 PURGA DEL AIRE DE LA BOMBA DE
ALIMENTACIÓN DEL ACEITE
La purga del aire debe efectuarse siempre
cuando el aceite ha sido descargado comple-
tamente, tanto del depósito como del motor
(revisión motor).
Hay que realizar las siguientes operaciones
durante el cambio de aceite apenas se ha qui-
tado el filtro de aceite sobre el motor y antes
de montar otras vez uno nuevo.
◆
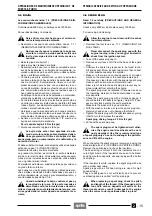
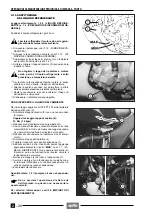
Desenrosque y quite la valvulita (10), que está coloca-
da en el fondo del alojamiento del filtro del aceite mo-
tor.
◆
Coloque el interruptor de arranque en la posición “
n
”.
◆
Coloque el interruptor de parada motor (11) en la posi-
ción “
m
”.
◆
Apriete el pulsador de arranque “
r
” (12) y haga fun-
cionar el motor de arranque, hasta que desde el asien-
to de la valvulita (10) comience a salir aceite (son sufi-
cientes algunos segundos).
◆
Introduzca y enrosque completamente la valvulita
(10).
c
a
a
Clean the engine oil filter positioned on the frame (1)
every 12000 km (or every second engine oil change).
Prepare a pipe clamp (2) to replace the origi-
nal one (special type).
◆
Loosen the clamp (3) and disconnect the pipe (4).
◆
Unscrew and remove the engine oil filter positioned on
the frame (1) and clean it with a compressed air jet.
◆
Check the seal of the engine oil filter positioned on the
frame (1), screw and tighten it.
Driving torque of the engine oil filter (1) positioned
on the frame: 35 Nm (3.5 kgm).
◆
Connect the pipe (4) and tighten the new clamp (2).
Change the engine oil filter (7) after the first 1000 km
and successively every 6000 km (or every time you
change the oil).
◆
Unscrew the two screws (5) and remove the cover (6).
◆
Remove the engine oil filter (7).
◆
Spread an oil film on the sealing ring of the new engine
oil filter.
◆
Fit the new engine oil filter.
◆
Put back the cover (6), screw and tighten the two
screws (5).
◆
Pour about 1600 cm
C
of engine oil through the filling
opening (9), see 1.7 (LUBRICANT CHART).
◆
Tighten the plug/dipstick (8).
◆
Start the engine and let it idle for about one minute, in
order to ensure the filling up of the engine oil circuit.
◆
Unscrew and extract the plug/dipstick (8).
◆
Pour other 600 cm
C
of oil through the filling opening
(9).
◆
Check the oil level, see 2.12 (CHECKING THE EN-
GINE OIL LEVEL AND TOPPING UP).
2.13.1 AIR BLEEDING FROM OIL DELIVERY PUMP
The bleeding of air must always be carried out
when the oil has been completely discharged
from both tank and engine (engine overhaul).
The following operations are to be performed
during the phases of changing oil after remov-
ing the oil filter on the engine and before at-
taching the new one.
◆
Unscrew and remove the small valve (10) located on
the bottom of the engine oil filter housing.
◆
Position the ignition switch on “
n
”.
◆
Position the engine stop switch on “
m
” (11).
◆
Press the starter button “
r
” (12) and run the starter
until oil begins to escape from the seat of the small
valve (10) (a few seconds are sufficient).
◆
Insert and completely screw the valve (10).
c
a
a
Summary of Contents for Pegaso 650
Page 1: ......
Page 3: ...0 4 NOTE NOTES ANMERKUNGEN ...
Page 4: ...1 1 1 2 3 4 5 6 7 8 INFORMAZIONI GENERALI INFORMACIONES GENERALES GENERAL INFORMATION ...
Page 42: ......
Page 69: ...3 1 1 2 3 4 5 6 7 8 MOTORE MOTOR ENGINE ...
Page 90: ...3 22 MOTORE NOTE NOTAS NOTES ...
Page 91: ...4 1 1 2 3 4 5 SISTEMA DI ALIMENTAZIONE SISTEMA DE ALIMENTACIÓN FUEL SYSTEM ...
Page 116: ...4 26 SISTEMA DI ALIMENTAZIONE NOTE NOTAS NOTES ...
Page 117: ...5 1 1 2 3 4 5 6 7 8 IMPIANTO DI RAFFREDDAMENTO SISTEMA DE REFRIGERACIÓN COOLING SYSTEM ...
Page 130: ...5 14 IMPIANTO DI RAFFREDDAMENTO SISTEMA DE REFRIGERACIÓN COOLING SYSTEM NOTE NOTAS NOTES ...
Page 131: ...6 1 6 1 2 3 4 5 6 7 8 IMPIANTO ELETTRICO INSTALACIÓN ELÉCTRICA ELECTRICAL SYSTEM ...
Page 176: ...IMPIANTO ELETTRICO INSTALACIÓN ELÉCTRICA ELECTRICAL SYSTEM 6 46 NOTE NOTAS NOTES ...
Page 177: ...7 1 1 2 3 4 5 6 7 8 CICLISTICA PARTE CICLO CHASSIS PARTS ...
Page 226: ... 67 3 57 2 66 6 3 576 7 50 5827 3267 5 25 58 75 6 5 5 5 ...
Page 242: ... 67 3 57 2 66 6 3 576 7 66 5 12 17 5 25 5 12 17 52 5217 5 ...
Page 246: ... 67 3 57 2 66 6 3 576 7 70 5 12 3267 5 25 5 12 75 6 52 5 5 5 ...
Page 272: ... 67 3 57 2 66 6 3 576 7 96 NOTE NOTAS NOTES ...
Page 311: ...INFORMAZIONI PER LE RIPARAZIONI INFORMACIONES PARA LAS REPARACIONES REPAIRS 8 39 ...


