1
2018/01/05 REV1.1
Quick Installation Guide
ECU-3Z Energy Communication Unit Quick
Installation Guide
Version: W2
This guide is for reference only and assumes you have access to, and have read the detailed
instructions in the ECU-3Z Installation/Users Manual (available at APsystems.com).
Step 1: Power-on ECU
Plug the AC power cord into the AC input on the ECU, and then plug the other end into a
dedicated wall outlet.
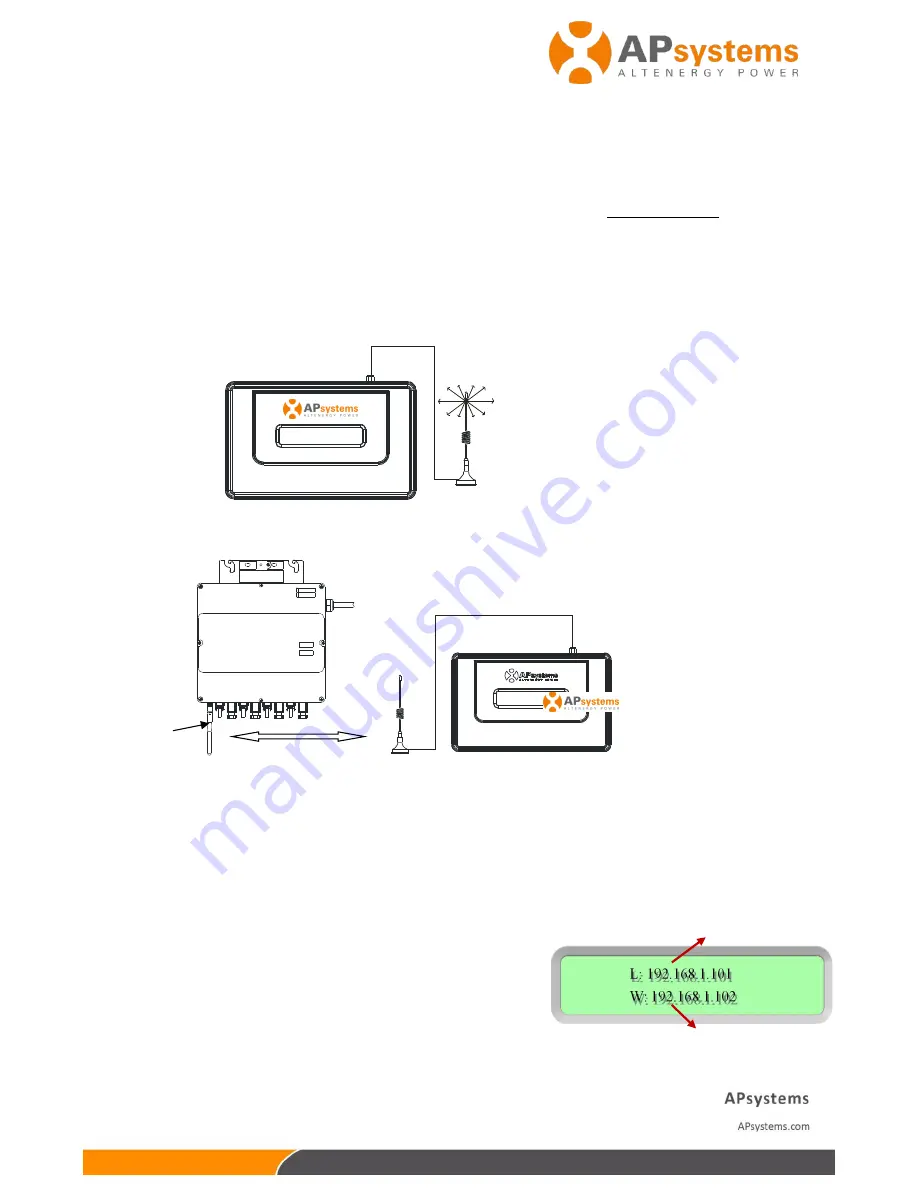
Step 2: Adjust the radiation angle
The radiation angle of ECU antenna is indicated as below:
Please make a appropiate angle for the ECU, which is parallel the antenna of the
Microinverter.
Step 3: Connect ECU to Internet
Option 1: LAN connection – use the LAN Cable to connect ECU to a Broadband Router.
Option 2: WiFi connection.
Keep pressing the button
“
Menu
”
until the screen shows "Turn on LWA". Then the LWA
function of ECU is opened.
Turn on the Wi-Fi function on PC. Connect to the ECU’s Wi-Fi named with
ECU-WIFI_xxxx(the
“
xxxx
”
refers to the last 4 numbers of the ECU ID), and connect. The
first connection has no password.
Open an internet browser and enter the IP address
172.30.1.1 into the URL search field. Click
“Administration” - “WLAN”, and turn on the WLAN
function, then connect to the router
via WiFi. For details, please refer to ECU-3Z user manual.
The ECU will automatically obtain the LAN IP address, such as: 192.168.1.101, and connect to
the internet.
If the LAN IP address shows “192.168.131.228”, it means the ECU failed to get IP
address. Make sure the connection between ECU and Router is working well, then reboot ECU
and it will obtain IP address.
Antenna of
Microinverter
LAN IP address
Wireless IP address


