


FRONT
PANEL
CONTROLS
1.
1.
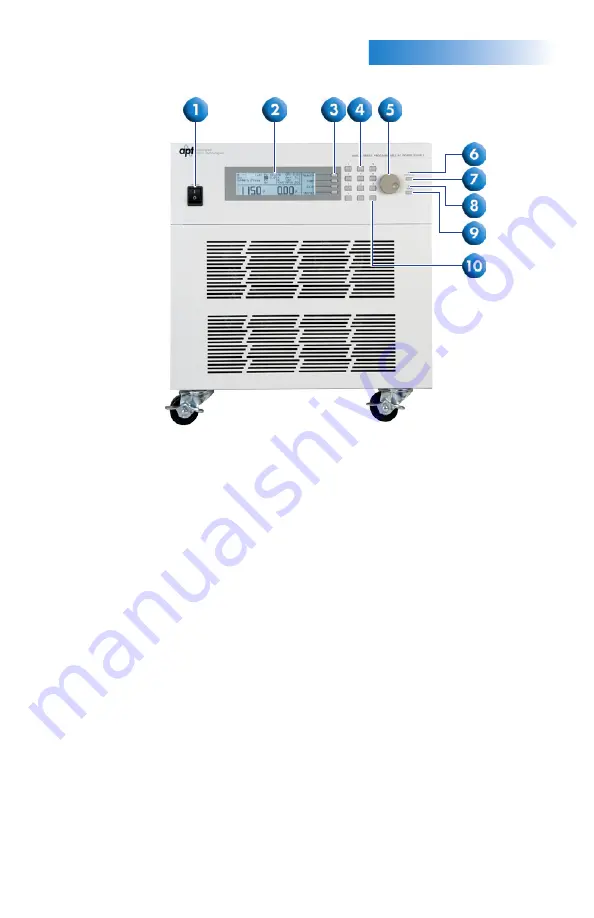
POWER SWITCH:
Rocker style power switch with international ON ( | ) and
OFF (0) markings.
2.
GRAPHIC LCD:
240 x 64 monographic LCD.
3.
SOFT KEYS:
Multi-functional selection keys used to select parameters, select
screens, and edit parameters.
4.
NUMERIC KEYPAD:
Keys used to enter numerical data.
5.
ROTARY KNOB:
Used to adjust the voltage/frequency output in MANUAL
Mode or DC Mode.
6.
TEST/RESET LED:
When lit, this LED indicates output is active, or when
blinking indicates the instrument is in a failure condition.
7.
TEST/RESET KEY:
Used to turn ON/OFF output voltage, or used to reset the
instrument in the event of a failure condition.
8.
LOCK LED:
When lit, this LED indicates the instrument’s front panel is locked.
9.
LOCK KEY:
Used to lock out the front panel.
10.
DELETE KEY:
Used to delete text characters and numerical data.
(430XAC/460XAC Front Panel)


