Installation and user manual aquagrATIx for HD6990, 04/2011
Description
Description
Description
Description
Thank you for purchasing a graphics card water block
manufactured by aqua computer. The aquagrATIx for
HD6990 has been specifically designed for graphics
cards according to reference design of the chip man-
ufacturer. The aquagrATIx for HD6990 effectively
cools the RAM, voltage regulators and GPU of your
graphics card. The base part of the water block is
manufactured from pure copper for outstanding per-
formance and durability.
Installation
Installation
Installation
Installation
Step 1:
Remove the originally installed air cooling unit from
the graphics card. The procedure necessary to per-
form this might vary slightly depending on the graph-
ics card. Use extreme caution not to damage any of
the highly sensitive components of the graphics card!
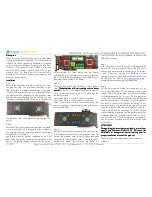
Remove the screws holding the air cooling unit (see
red marks in the figure) and lift the air cooling unit off
the graphics card while disconnecting the fan con-
nector.
Step 2:
Remove all thermally conductive pads from the graph-
ics card and clean all surfaces with direct contact to
the cooling unit from remaining thermal compounds
using benzine if necessary.
Apply a thin layer of thermal compound to the GPU
and the RAM modules (indicated by red marks in the
figure). The thermal compound must not be electric-
ally conductive! Cut fitting pieces from the thermal
pad supplied with the water block and place them on
top of the voltage regulators and the bridge chip (in-
dicated by green marks in the figure).
Step 3:
Attach the aquagrATIx for HD6990 to the graphics
card. The backplates of the air cooling unit are being
The backplates of the air cooling unit are being
The backplates of the air cooling unit are being
The backplates of the air cooling unit are being
reused!
reused!
reused!
reused! To do so, at first carefully and evenly screw in
the four screws adjacent to the GPU, afterwards the
remaining screws:
Four screws M3x4 mm, green marks in the figure.
Four screws M3x6 mm, blue marks in the figure.
Seven screws M3x8 mm with countersunk head, red
marks in the figure, three of them fixated with hex nuts
on top of the PCB.
Step 4:
Carefully check that the water block has level contact
to all relevant components of the graphics card. Do
not put the graphics card to work if the cooler does
not perfectly fit the graphics card! In this case, disas-
semble and repeat the mounting procedure. All
screws must not be overly tightened to prevent the
PCBs from twisting!
Step 5:
Insert the graphics card to your PC and integrate the
water block into your cooling system. Be sure not to
connect any water blocks in parallel but only consec-
utively. A detailed instruction on building a water
cooling system and plug&cool connectors as well can
be found on our website
www.aqua-computer.de
–
please check the section support/download.
Step 6:
Put the water cooling system into operation, but do
not connect any other PC components to the mains
supply! Check the water block as well as the fittings
for leakages and do not put your PC into operation
unless you can definitively eliminate the possibility of
coolant leaking from the system! If any component
has been in contact with coolant, do not put it into
operation before it is completely dry again! For oper-
ating the graphics card, the water block must be cor-
rectly mounted and be connected to a water cooling
system featuring adequate cooling performance! For
corrosion inhibition, “Double Protect Ultra” or a mix-
ture of water and ACfluid according to the prepara-
tion instructions provided with ACfluid must be used
as coolant!
ATTENTION:
ATTENTION:
ATTENTION:
ATTENTION:
Disregarding the instructions may lead to severe dam
Disregarding the instructions may lead to severe dam
Disregarding the instructions may lead to severe dam
Disregarding the instructions may lead to severe dam----
ages! Aqua Computer GmbH & Co. KG cannot be
ages! Aqua Computer GmbH & Co. KG cannot be
ages! Aqua Computer GmbH & Co. KG cannot be
ages! Aqua Computer GmbH & Co. KG cannot be
held liable for damages or injuries resulting from im
held liable for damages or injuries resulting from im
held liable for damages or injuries resulting from im
held liable for damages or injuries resulting from im----
proper installation or use of the product!
proper installation or use of the product!
proper installation or use of the product!
proper installation or use of the product!
Thank you again for choosing an aqua computer
product.
© 2011
Aqua Computer GmbH & Co. KG – Gelliehäuser Str. 1 – D-37130 Gleichen
computer
aqua


