10
2.4.
Diffuser
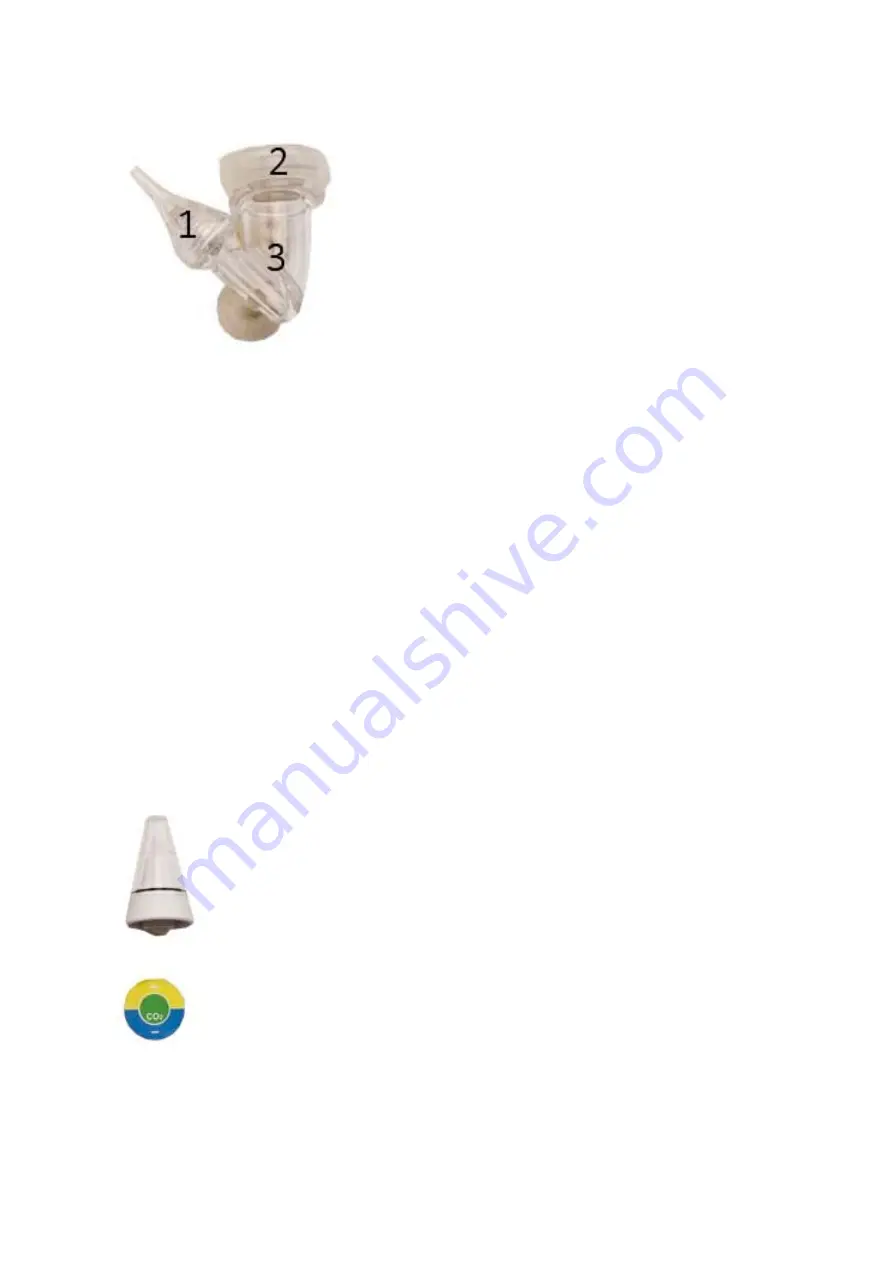
Fig. 3: reactor compact
1.
Tube connection with non-return valve
2.
Union nut incl. ceramic plate
3.
Bubble counter
Before the reactor compact can be set up, the pressure regulator has to be mounted on the CO
2
bottle. The CO
2
diffuser should be placed in the aquarium in a visible place as close to the ground
as possible. Beforehand, it has to be filled up with a little water up to the outlet. To do so, unscrew
the union nut incl. ceramic plate (Fig. 3, No. 2). Now, you can start the setting.
1.
Open the valve of the CO
2
pressure bottle.
2.
Open the fine control valve of the CO
2
pressure regulator slowly. Check the flow of the CO
2
bubbles on the bubble counter of the diffuser.
3.
The initial flow should be approx. 15 bubbles/minute.
4.
The CO
2
gas flows through the ceramic plate of the diffuser into the aquarium water. The lower
the diffuser is mounted on a pane in the aquarium by using the suction cup, the better the
dissolution rate is.
5.
With the included permanent test, the carbon dioxide content can be determined.
Attention:
the unit operates with a delay of several hours, therefore, increase the number of bubbles
slowly at intervals of several days.
Check the pH value regularly and adjust the amount of bubbles as required.
2.5.
Permanent test
Fig. 4: CO
2
-Indicator
Summary of Contents for CO2 Box
Page 32: ...32 1 CO2 Box CO2 Box 2 0 5 2 2 2 6 2 2 2 1 1 2 1 2 1 1b...
Page 33: ...33 2 2 2 2 1 2 2 2 3 4 2 60 70 5 reactor compact 2 2 2 2 3 2...
Page 34: ...34 2 2 4 3 reactor compact 1 2 3 reactor compact 2 2 3 2 1 2 2 2 2 3 15 4 5 2 2 5 4 2...
Page 35: ...35 Aqua Medic CO2 1 4 6 dKH 4 Aqua Medic aqua KH 2 CO2 2 1 2 10 35...
Page 36: ...36 3 2 4 2 Aqua Medic 2 2 2 5 2 21 8 1 14 2 0 5 2 250 20 60...


