background image

9

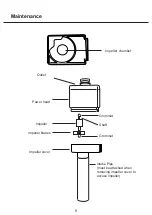
Outlet

Impeller chamber

Power head

Impeller

Impeller blades

Impeller cover

Grommet

Grommet

Shaft

Intake Pipe 

(must be attached when 

removing impeller cover to 

access impeller)

Maintenance

Summary of Contents for AquaVue 380

Page 1: ...Inspiring Excellence in Fish Care AquaVue 380 480 580 www aquaone com au Instruction version 25 06 2015 1 1 ...

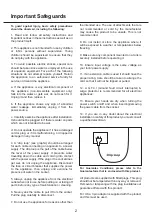
Page 2: ...wet do not unplug the appliance Disconnect the fuse or circuit breaker that supplies the power to the appliance then unplug and examine for presence of water in the socket 5 Always unplug the appliance from the electrical outlet when not in use before putting on or taking off parts before any type of maintenance or cleaning 6 Never yank the cable to pull it from the socket Pull the plug carefully ...

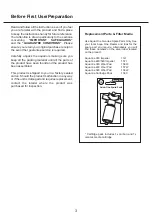
Page 3: ...d and the product has been assembled This product is shipped to you in a factory sealed carton Should the product malfunction in any way or if the unit is damaged and requires replacement contact the retailer where the product was purchased for inspection Replacement Parts Filter Media Use Aqua One Genuine Spare Parts Only See your local Aqua One Dealer and look for the spare part you require Alte...

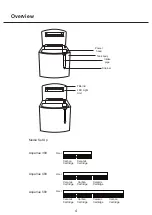
Page 4: ...lter lid Intake pipe Strainer Media Set Up Wool Carbon Ceramic Cartridge Cartridge Wool Ceramic Carbon Ceramic Cartridge Cartridge Cartridge Wool Ceramic Carbon Ceramic Carbon Cartridge Cartridge Cartridge Cartridge AquaVue 380 AquaVue 480 AquaVue 580 ...

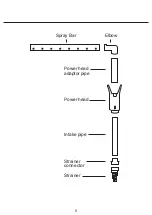
Page 5: ...5 Power head adaptor pipe Power head Elbow Spray Bar Intake pipe Strainer Strainer connector ...

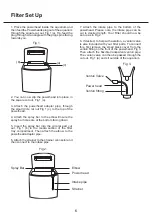
Page 6: ... section of the filter tray compartment Then attach the elbow to the powerhead adaptor pipe 6 Attach the strainer to the strainer connector and then connect to the intake pipe 7 Attach the intake pipe to the bottom of the powerhead Please note the intake pipe can be cut to desired length Your Filter should now be set up as in Fig 2 8 If desired to help with aeration a venturi valve is also include...

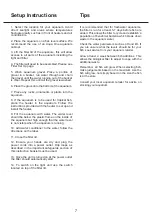
Page 7: ...er level is not visible when the aquarium is running 10 Add water conditioner to the water follow the directions on the label 11 Close the filter lid 12 Ensure your hands are dry and plug the power cords into a power outlet Drip loops as described in the important safeguards section of this instruction booklet must be used 13 Once the unit is turned on at the power outlet the filter should automat...

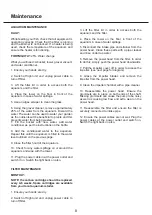
Page 8: ...r around the aquarium and wipe with the towel 11 Plug the power cable in at the power outlet and switch it on Switch the light back on also FILTER MAINTENANCE MONTHLY NOTE the carbon cartridge should be replaced every 4 6 weeks Spare cartridges are available from your local aquarium retailer 1 Ensure your hands are dry 2 Switch off light unit and unplug power cable to turn off filter 3 Lift the fi...

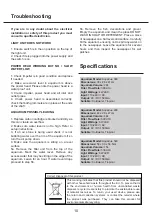
Page 9: ...9 Outlet Impeller chamber Power head Impeller Impeller blades Impeller cover Grommet Grommet Shaft Intake Pipe must be attached when removing impeller cover to access impeller Maintenance ...

Page 10: ...5b Aquarium Model AquaVue 380 Dimensions 38 x 26 x 41cm Aquarium Volume 28L Filter Flow Rate 300L Hr Light Wattage 4W LED Input 110 240V AC Output 9V DC 1500mA Suitable Coldwater Tropical Aquarium Model AquaVue 480 Dimensions 48 x 29 x 47cm Aquarium Volume 48L Filter Flow Rate 500L Hr Light Wattage 6W LED Input 110 240V AC Output 9V DC 1500mA Suitable Coldwater Tropical Aquarium Model AquaVue 580 ...

Page 11: ...serves the right to terminate Extended Guarantee for such goods and will provide written notice to the purchaser 3 0 Exclusions and Limitations Where permitted by local law the following exclusions and limitations apply in regard to Guarantee 3 1 Glass breakage for whatever reason caused after Aquarium purchase 3 2 Goods claims where fault is due to but not limited by a misuse b neglect c abuse d ...

Page 12: ...12 Inspiring Excellence in Fish Care ...

Reviews: