8
Set Up Instructions
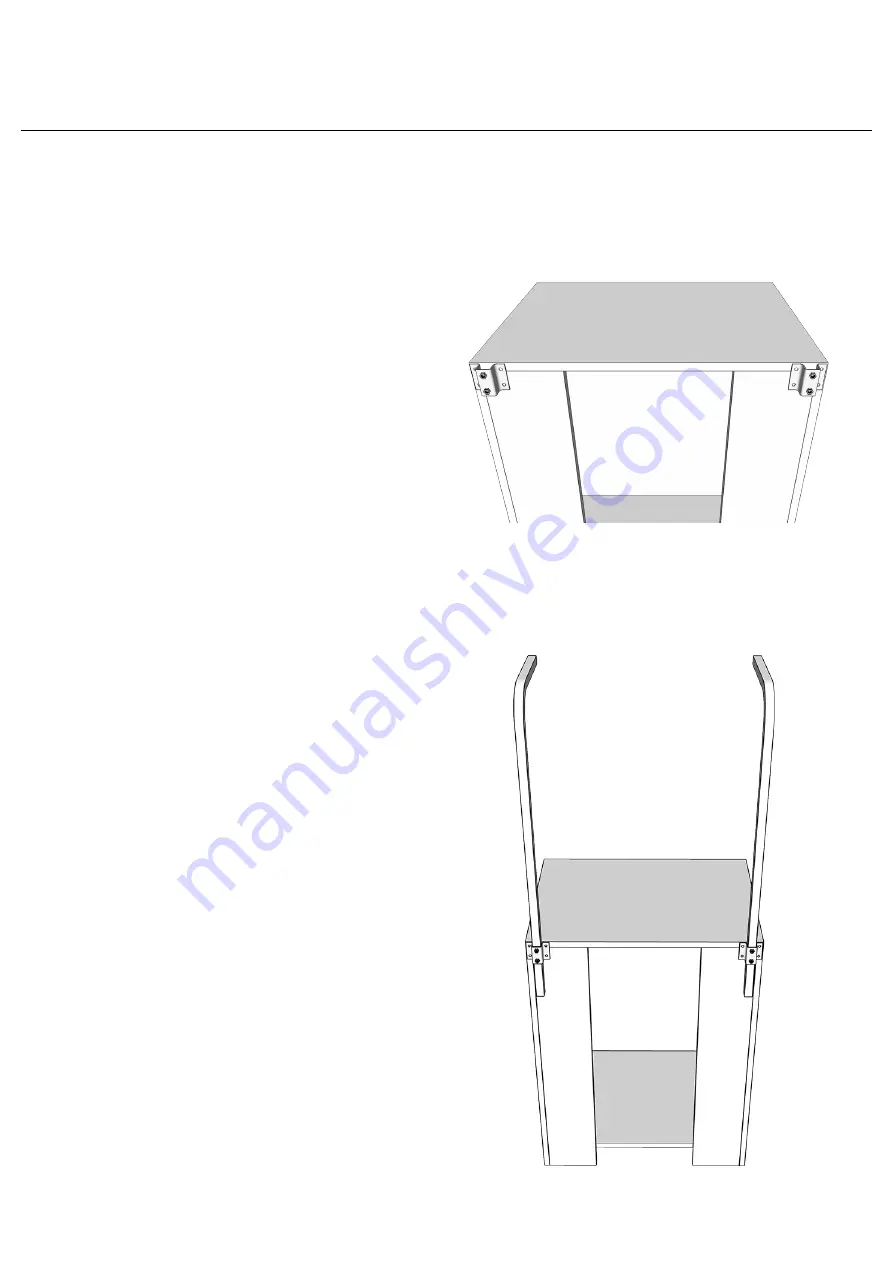
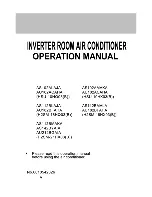
LIGHT INSTALLATION
1. Loosely attach the supplied brackets to the
rear of the aquarium cabinet. Do not tighten
the screws until after the light frame is secured
in place.
2. Insert the support arms into the brackets
and secure using the supplied bolts. The
height can be adjusted depending on which
holes are used in the support arms.
11. Unpack the supplied filter sock and place
it in the location shown on page 6.
12. Ensure the sump is on the far left hand
side of the cabinet so that the drain pipe sits
directly over the sump inlet. Attach the bottom
section of the drain (3) by connecting the
barrel union.
13. Attach the flexible outlet (4) to the return
pipe. The connection should pass through a
hole in the overflow grill. Ensure that you use
the Small Black O-ring (10) on the inside of
the overflow.
14. Ensure the hole in the top of the drain pipe
remains free, this will minimise noise caused
as water exits the aquarium.
15. Follow the instructions provided with the
return pump to install into the sump. Place
the pump in the position noted on page 4
and use the elbow intake as described in the
instructions.
16. Attach the two lengths of flexible hose
using the Return Barrel Union (11). Use the
assembly to connect the pump to the return
pipe (6). Use hose clamps (7).
17. Fill the aquarium with water such that
the water overflows into the sump and fills
the last section (where the return pump sits)
to no more than 3cm above the maximum
operating water level mark. When running,
the water level should always remain above
the minimum operating water level mark.
18. Unpack and install the protein skimmer as
shown in the diagram on page 6 and following
the instructions supplied with the skimmer.
The intake strainer should be removed from
the G216 skimmer before installation.
19. Unpack and install the heater in the sump
in the section immediately after the protein
skimmer. Ensure the heater is fully submerged
at all times.


