background image

13

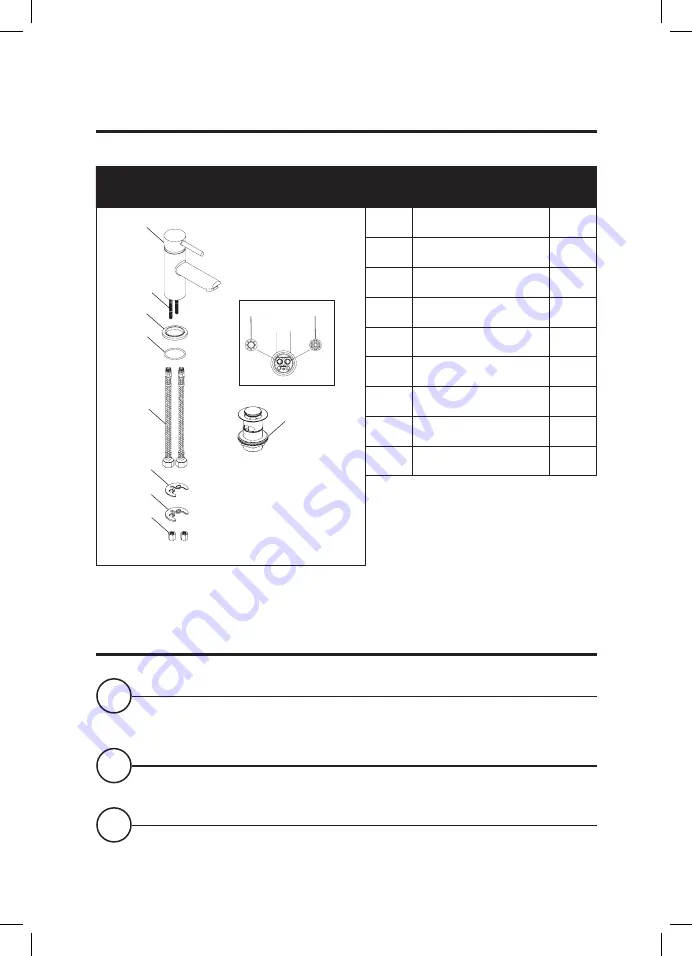
LARGE PILLAR TAP COMPONENTS

312HP

NO.

DESCRIPTION

QTY

H

1

3

5

4

2

C

Fig. 1

9

6

7
8

1

*Large Pillar Tap

1

2

Fixing Bolt

2

3

Cover Plate

1

4

Sealing Washer

1

5

1/2" Flexible Hoses

2

6

Fixing Washer

1

7

Fixing Plate

1

8

Fixing Nut

2

9

Click Clack Waste

1

 CLICK CLACK WASTE INSTALLATION

1   

Ensure the sealing ring is in position on the waste.

2   

Pass it through the basin.

3   

Tighten with the base nut.

*Aqualisa Uptown model shown for illustrative purposes.

Summary of Contents for CENTRAL Series

Page 1: ...TAPS INSTALLATION AND USER GUIDE ...

Page 2: ...12 General Maintenance 14 General Cleaning 15 Troubleshooting 16 SAFETY INFORMATION This product must be installed by a competent person in accordance with all relevant current Water Supply and Building Regulations This product is suitable for domestic use only GUARANTEE Aqualisa products are supplied complete with a 1 year guarantee that can be upgraded by registering this product with Aqualisa F...

Page 3: ...d balanced high pressure and combination boiler systems This product is designed to control static pressure up to 5 bar Where pressures are likely to exceed 5 bar a pressure reducing valve must be fitted into the incoming mains supply A setting of 3 bar is recommended It should be noted that daytime pressures approaching 3 bar can rise above the stated maximum overnight For optimum performance a m...

Page 4: ...t CLEANING Whilst modern plating techniques are used in the manufacture of these fittings the plating will wear if not cleaned properly The safest way to clean your product is to wipe with a soft damp cloth Stains can be removed using washing up liquid Substances that are not suitable for plastics and electroplated surfaces must not be used DO NOT USE ABRASIVE CLEANERS ...

Page 5: ...5 RANGES AQUALISA CENTRAL AQUALISA UPTOWN AQUALISA DOWNTOWN ...

Page 6: ...re familiar with the necessary plumbing regulations required to install the product correctly and safely 1 Remove fixing washers 4 and fixing nuts 5 from the mixer leaving the base rings 2 and deck washers 3 fitted to the mixer tap tails 2 Locate the tails of the mixer tap into the holes of the bath 3 Underneath the bath put the fixing washers 4 onto the mixer tails and secure them using the fixin...

Page 7: ... 1a Aqualisa Central Handset 1 2 Base Ring 2 1b Aqualisa Downtown Handset 1 3 Deck Washer 2 1c Aqualisa Uptown Handset 1 4 Fixing Washer 2 2 1 25m Hose 1 5 Fixing Nut 2 1 3 2 4 5 2 1b 1c 1a Aqualisa Uptown model shown for illustrative purposes Handset and hose are only supplied with Bath Shower Mixer models The handset supplied is dependant on the model purchased ...

Page 8: ...model a Offer the handset holder onto the backplate at an angle feeding the locking release tab into the holder first b Push the holder onto the backplate until it clicks and locks into position Aqualisa Uptown model a Loosen the grub screws located within the handset holder using the allen key provided Offer up the handset holder to the backplate ensuring the handset holder sits flush to the fini...

Page 9: ...ews 2 4 Handset Holder 1 AQUALISA UPTOWN MODEL NO DESCRIPTION QTY 1 Cover Plate 1 2 Wall Plugs 2 3 Backplate 1 4 Allen Key 1 5 Wall Screws 2 6 Handset Holder 1 7 Grub Screws 2 AQUALISA DOWNTOWN MODEL NO DESCRIPTION QTY 1 Wall Plugs 2 2 Backplate 1 3 Wall Screws 2 4 Handset Holder 1 4 3 2 1 1 3 2 1 3 6 2 5 4 7 1 3 2 3 2 1 4 ...

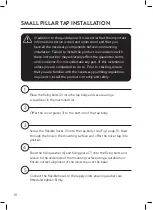
Page 10: ... necessary plumbing regulations required to install the product correctly and safely 1 Place the fixing bolts 2 into the tap body and secure using a screwdriver in the machined slot 2 Offer the cover plate 3 to the bottom of the tap body 3 Screw the flexible hoses 5 into the tap body see Fig 1 page 11 feed through the hole in the mounting surface and offer the mixer tap into position 4 Feed the fi...

Page 11: ...3 Cover Plate 1 4 Sealing Washer 1 5 1 2 Flexible Hose 2 6 Fixing Washer 1 7 Fixing Plate 1 8 Fixing Nut 2 9 Click Clack Waste 1 CLICK CLACK WASTE INSTALLATION 1 Ensure the sealing ring is in position on the waste 2 Pass it through the basin 3 Tighten with the base nut Aqualisa Uptown model shown for illustrative purposes ...

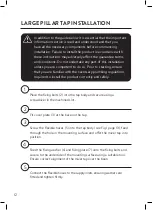
Page 12: ...ith the necessary plumbing regulations required to install the product correctly and safely 1 Place the fixing bolts 2 into the tap body and secure using a screwdriver in the machined slot 2 Fit cover plate 3 at the base on the tap 3 Screw the flexible hoses 5 into the tap body see Fig 1 page 13 feed through the hole in the mounting surface and offer the mixer tap into position 4 Feed the fixing w...

Page 13: ... Cover Plate 1 4 Sealing Washer 1 5 1 2 Flexible Hoses 2 6 Fixing Washer 1 7 Fixing Plate 1 8 Fixing Nut 2 9 Click Clack Waste 1 CLICK CLACK WASTE INSTALLATION 1 Ensure the sealing ring is in position on the waste 2 Pass it through the basin 3 Tighten with the base nut Aqualisa Uptown model shown for illustrative purposes ...

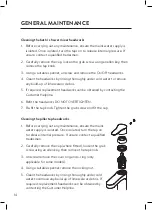
Page 14: ...ntacting the Customer Helpline 6 Refit the headworks DO NOT OVERTIGHTEN 7 Re fit the tap knob Tighten the grub screw and fit the cap Cleaning the pillar tap headworks 1 Before carrying out any maintenance ensure the mains water supply is isolated Once isolated turn the tap on to release internal pressure If unsure contact a qualified tradesman 2 Carefully remove the cap where fitted loosen the gru...

Page 15: ...loth Stains can be removed using washing up liquid DO NOT USE Scouring pads abrasive cloths or cleaners and cleaning agents that contain acids or bleach Limescale Rub the nozzles of the shower head to break down scale build up Should chemical descaling of the head become necessary remove the shower head fully and immerse in a mild proprietary descaler IT IS IMPERATIVE THAT DESCALING IS CARRIED OUT...

Page 16: ... function Make sure the maintained inlet pressures are nominally balanced and sufficient Refer to Pressures section Page 3 Airlock or partial blockage of the pipework gravity supply only Flush through pipework to ensure removal of debris and any airlocks Outlet water temperature too hot cold Mixed water supplies cold water supply overpowering the hot Check that hot and cold water supplies are from...

Page 17: ...17 NOTES ...

Page 18: ...18 NOTES ...

Page 19: ...19 NOTES ...

Page 20: ...lisa co uk Guarantee www aqualisa co uk guarantee Republic of Ireland Sales enquiries 01 864 3363 Service enquiries 01 844 3212 Part No 705116 Issue 1 Aug 20 Please note that calls may be recorded for training and quality purposes The company reserves the right to alter change or modify the product specifications without prior warning Trademark of Aqualisa Products Limited ...

Reviews: