Trim Tab Fitting Instructions
All Aqualuma lights have been tested before shipping.
It is recommended that you use a qualifi ed boat builder to work out placement and fi tting
of your new underwater lights.
You will require the following to install your new Aqualuma lights: -
6 mm/1/4’ drill, 5 or 6 cable/zip ties and a Fuse or Circuit Breaker
Step 1
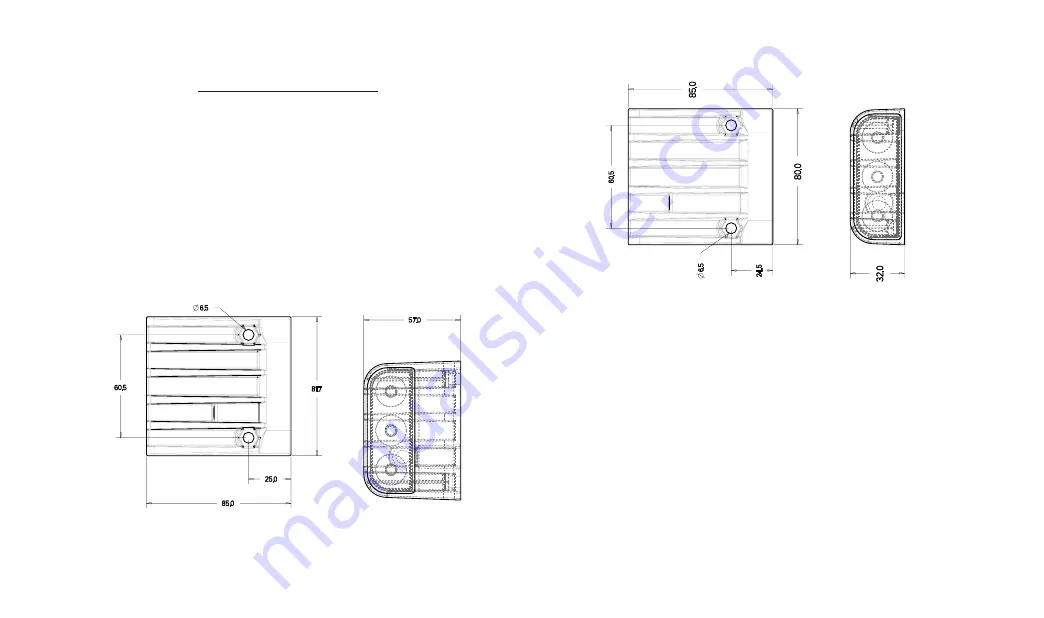
With boat on hardstand or trailer work out where to fi t light unit to Trim tab or angle
bracket and mark hole centres as set out below.
Standard Trim Tab Light
Step 2
Drill the 2 holes required to mount the unit to the Trim Tab or Bracket.
Step 3
Using the 2 nylock nuts and bolts supplied attach the unit to the Trim Tab or Bracket and
tighten until just tight ( do not over tighten ) the nut and bolt need only to be tight
enough to stop the unit from moving on the mount.
Step 4
Mark out and drill a 6mm/1/4’ hole well above the waterline for the wire and feed wire
through. Cable tie wire where needed then apply sealant around hole and clean.
Step 5
Connect the wires to a joiner box if using more than one light then run a positive and
negative feed from a fused switch to the joiner box.
Short Trim Tab Light


